ESP32 Barcode Scanner Case – Under-Cabinet Mount


Print Profile(1)
Description
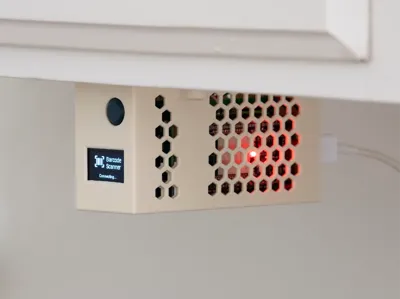
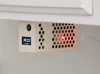
A compact under-cabinet enclosure for a DIY barcode scanner that adds groceries to your shopping list. Mount it under a kitchen cupboard, point a product at the scanner window below, and press the button — the item appears on your Mealie shopping list.
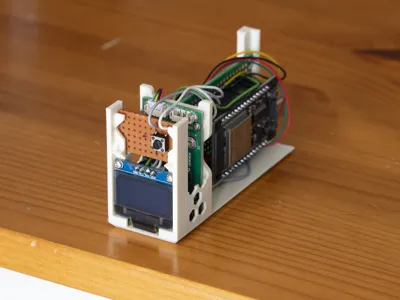
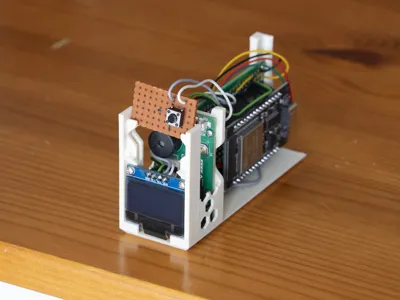
What's Inside
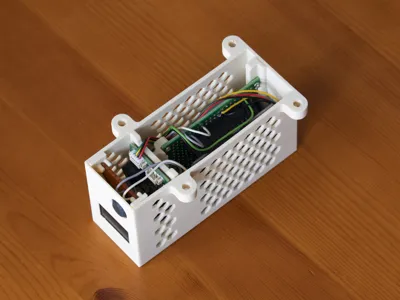
- ESP32 DevKit on a 40 × 60 mm perfboard
- GM67 barcode scanner module — faces straight down through the bottom opening
- SSD1306 0.96″ OLED display — visible through a front cutout, shows scan results
- Tactile push button — 10 mm, front face, easy thumb press
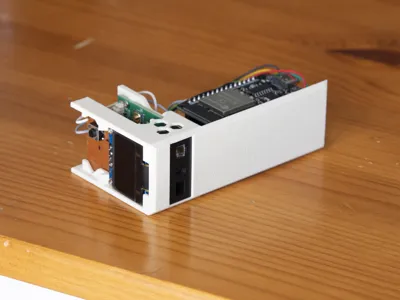
The Case
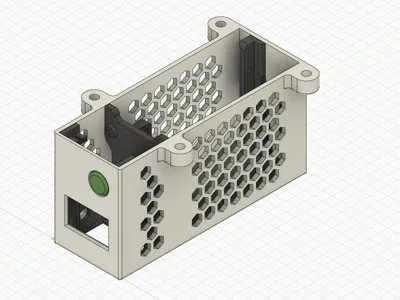
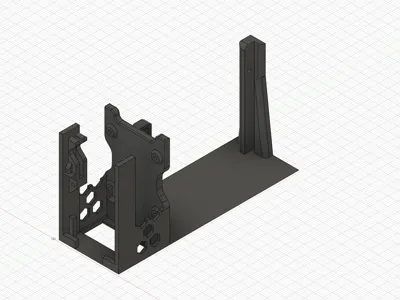
Three printed parts — an outer shell, an internal chassis (inset), and a small button cap.
Part | Supports | Print orientation |
| Outer case | Yes (display cutout + USB opening) | Upside-down |
| Inset (chassis) | None | As-is |
| Button cap | None | As-is |
The inset holds all electronics and slides into the outer case via matching 45° bevels for a clean, seamless fit. Four mounting ears with countersunk screw holes attach the case to the underside of a cupboard or shelf.
Dimensions: 100 × 36 × 52 mm (100 × 56 mm with mounting ears)
Print Settings
- Material: PLA or PETG (PETG recommended for kitchen use)
- Layer height: 0.2 mm
- Infill: 15–20%
- Standard slicer defaults, no special settings
Hardware
Fasteners:
- 8× M1.7 × 5 mm screws (electronics mounting)
- 4× 3.5 × 18 mm countersunk wood screws (cupboard mounting)
Tools:
- PH0 + PH2 screwdrivers
- Perfboard saw or Dremel + file (to cut the button carrier board to 27.5 × 17 mm)
- Safety goggles
Assembly
A specific assembly order is required due to the compact design — some parts lock against each other. Full step-by-step instructions →
Quick summary:
- Slide scanner into inset, screw in
- Seat ESP32 on perfboard, slide into inset slots, screw in, connect scanner cable
- Slide display into front slot, screw in
- Lower inset into outer case
- Tilt forward, drop in button cap
- Slide button carrier board into slots (friction fit)
- Plug in USB, mount to cupboard
Part of a Larger Project
This case is part of mealie-barcode-middleware — a self-hosted barcode scanning system for Mealie grocery management. The project includes:
- ESP32 firmware (ESPHome) — handles scanning, display, and communication
- Middleware (FastAPI + web dashboard) — barcode lookup, fuzzy matching, shopping list management
- Full documentation — hardware build guide, wiring diagram, firmware setup, and more
Everything runs locally on your home network. No cloud, no subscription.
Links:
Comment & Rating (0)