
Press-Fit Magnet Hole Negative Part (No Glue!)
Print Profile(1)
Description
Please read full description; must be comfortable with Bambu Studio re-scaling/re-sizing, and adding a negative part.
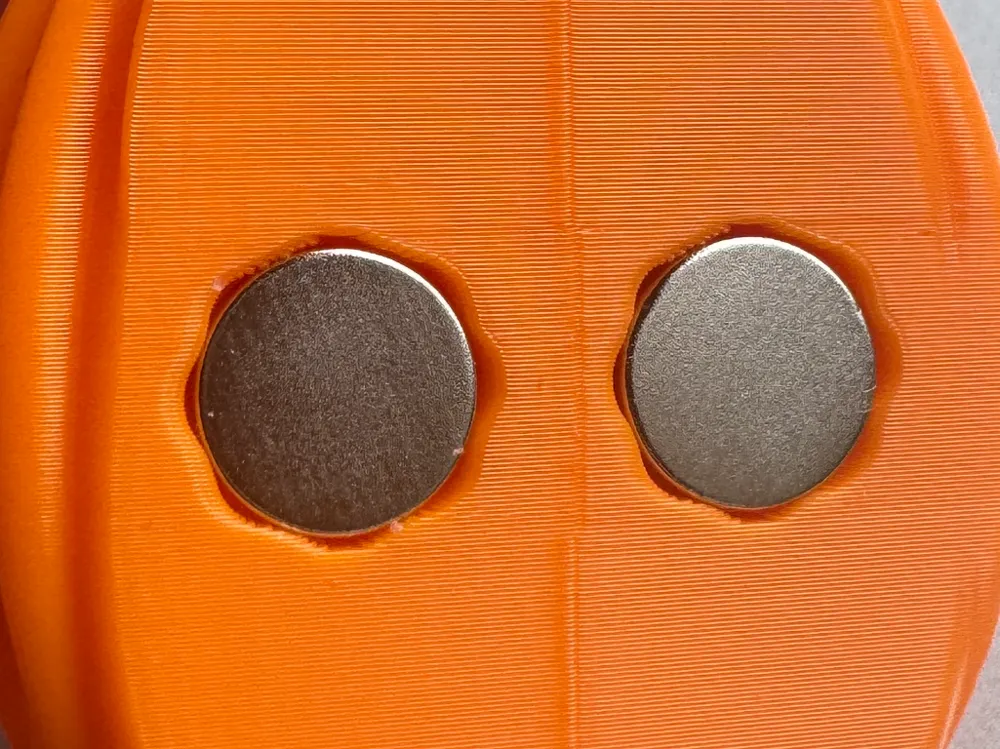
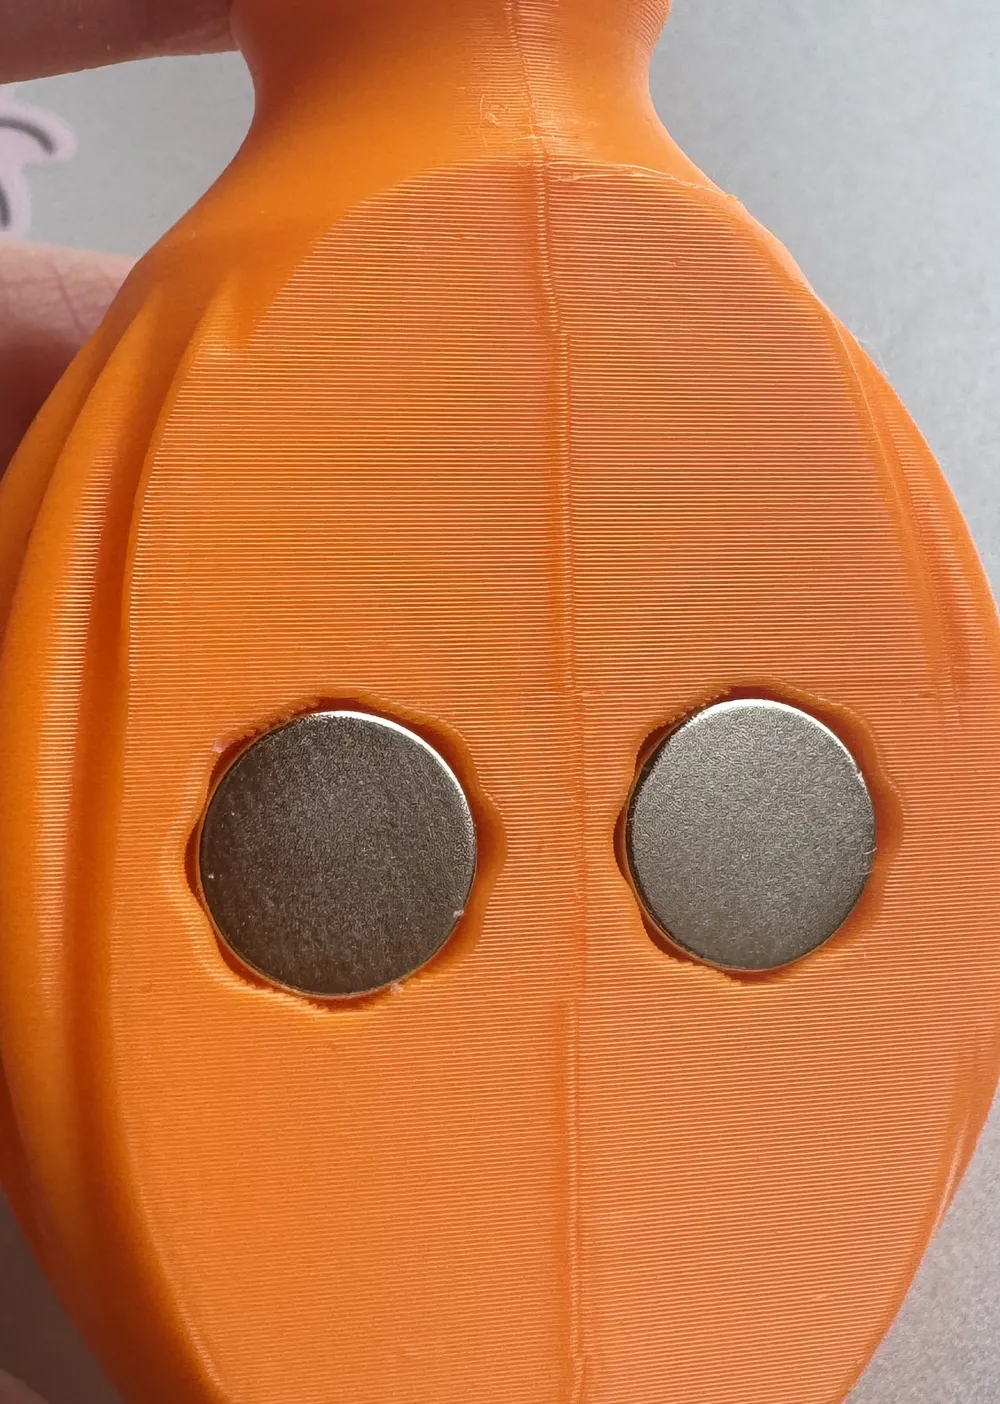
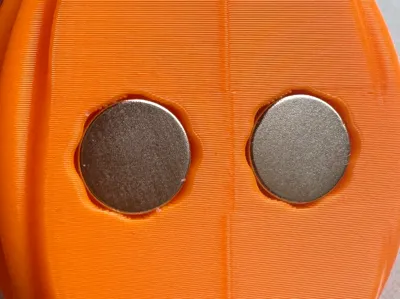
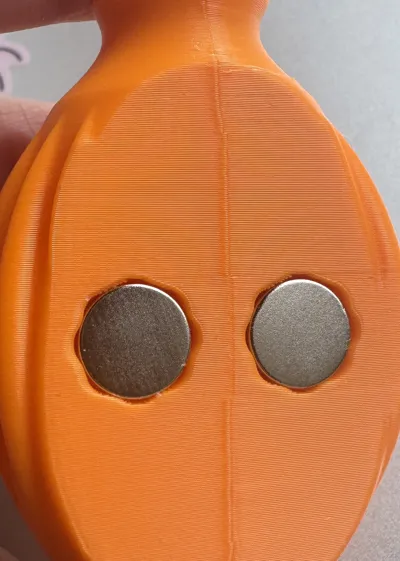
The magnet hole is designed with “crush ribs” (wavy outside edge of magnet hole) to grab onto the magnet for a snug fit.
In my experience the magnet hole width needs to be about .2mm larger than the magnet for PLA and about .3 larger than the magnet for PETG.
- Example: for 10x2mm magnets, the best size magnet hole for my printer settings was 10.20x2.05mm.
Important: Print a test print. Different printers, filament, print settings (# of walls) will affect the snugness of the press-fit.
- Use a caliper to measure your magnets.
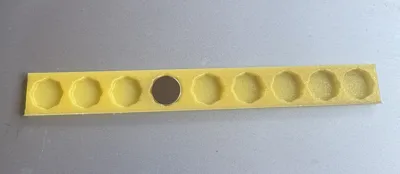
- Choose a test print depending on the orientation you plan to print your magnet holes for your model.
- Flat Orientation
- Standing/Vertical orientation - no supports needed (notice the point of the hole edge is oriented upward to allow a smooth overhang.)
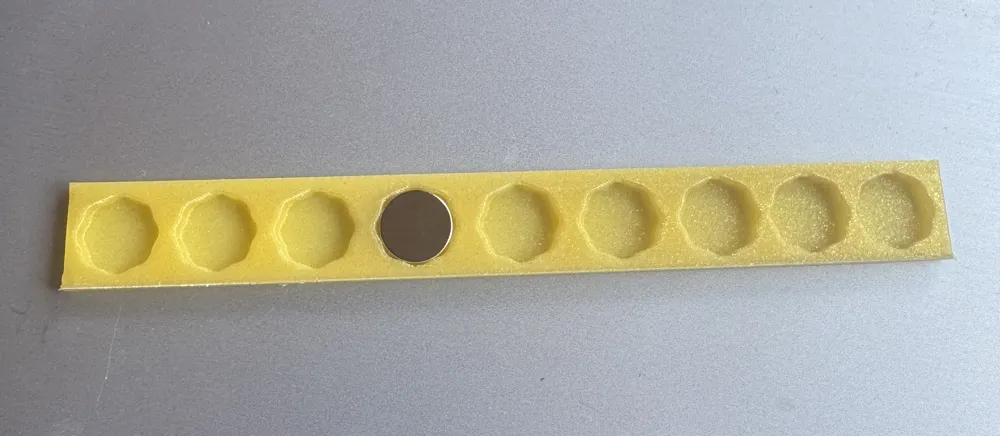
- There is a large, medium and small version for each orientation.
- small is best for testing up to 10mm magnets
- medium is best for testing 10mm-18mm magnets
- large is best for testing 18-20mm magnets.
- Rescale the 9 magnet hole sizes in the test print so you can dial in the best snug fit. Uncheck the uniform scale check box when resizing.
- It may take a few tests prints. Continue adjusting the hole sizes with each test print until you have a snug fit.
- Use the same filament and print settings you plan to use for the model you are planning to insert the magnets into.
Once you have dialed in the best size, open the MagnetOctagonNegativePart file and resize it. Then you can add this part to your model.
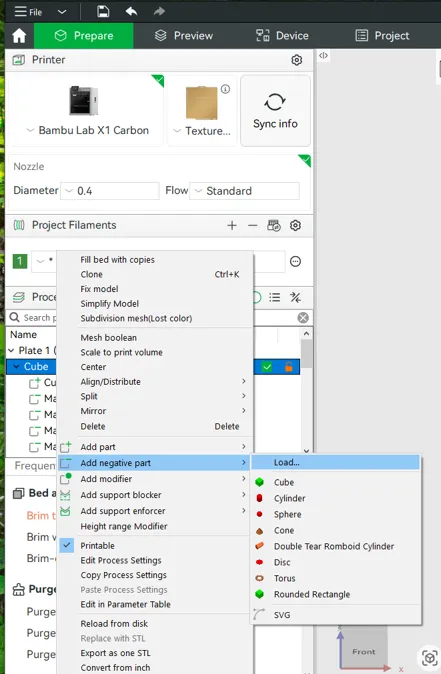
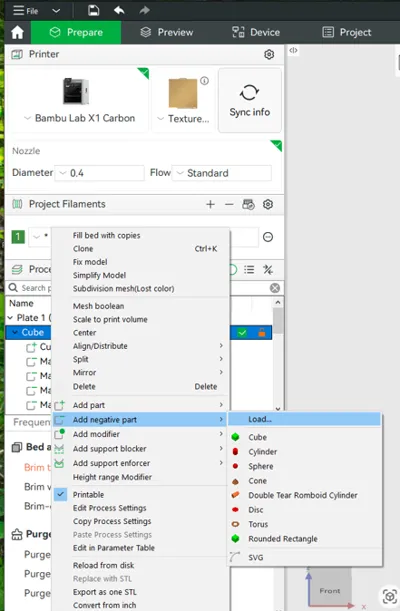
Open your model file, In Object Settings > Add Negative Part > Load.. > Choose MagnetOctagonNegativePart file.
You may need to move, rotate the part to get it where you need to in your model. Copy and paste if more holes needed.
Please share photos of how you used this magnet hole in your models! Thank you!
License



Comment & Rating (16)