Precision Tripod for Delta Spectrum Digital Scope


Print Profile(1)
Description
Hello everyone !
I use this spotting scope for 25 m target shooting, and I consider it a perfect accessory.
Unfortunately, the tripod included in the set is very imprecise and easy to knock out of position.
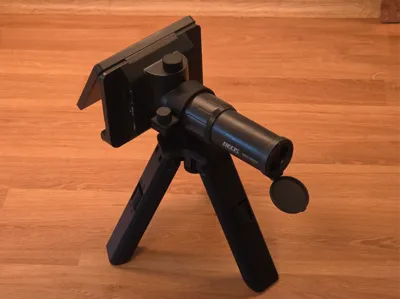
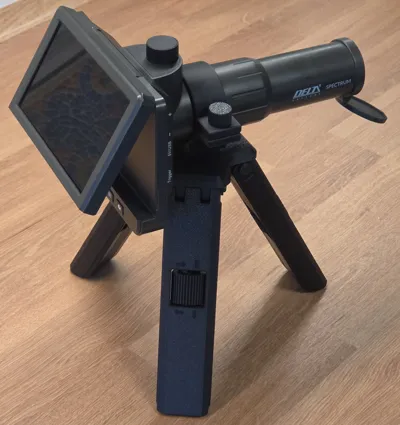
This project was created as a practical replacement for the original tripod supplied with the Delta Spectrum digital spotting scope.
There are also other clones of this Digital scope on the market, tripod should also work for them
The original tripod was difficult to adjust precisely and was easy to knock out of position by accident. Fine alignment often became frustrating, especially during target shooting sessions where stable and accurate positioning is important.
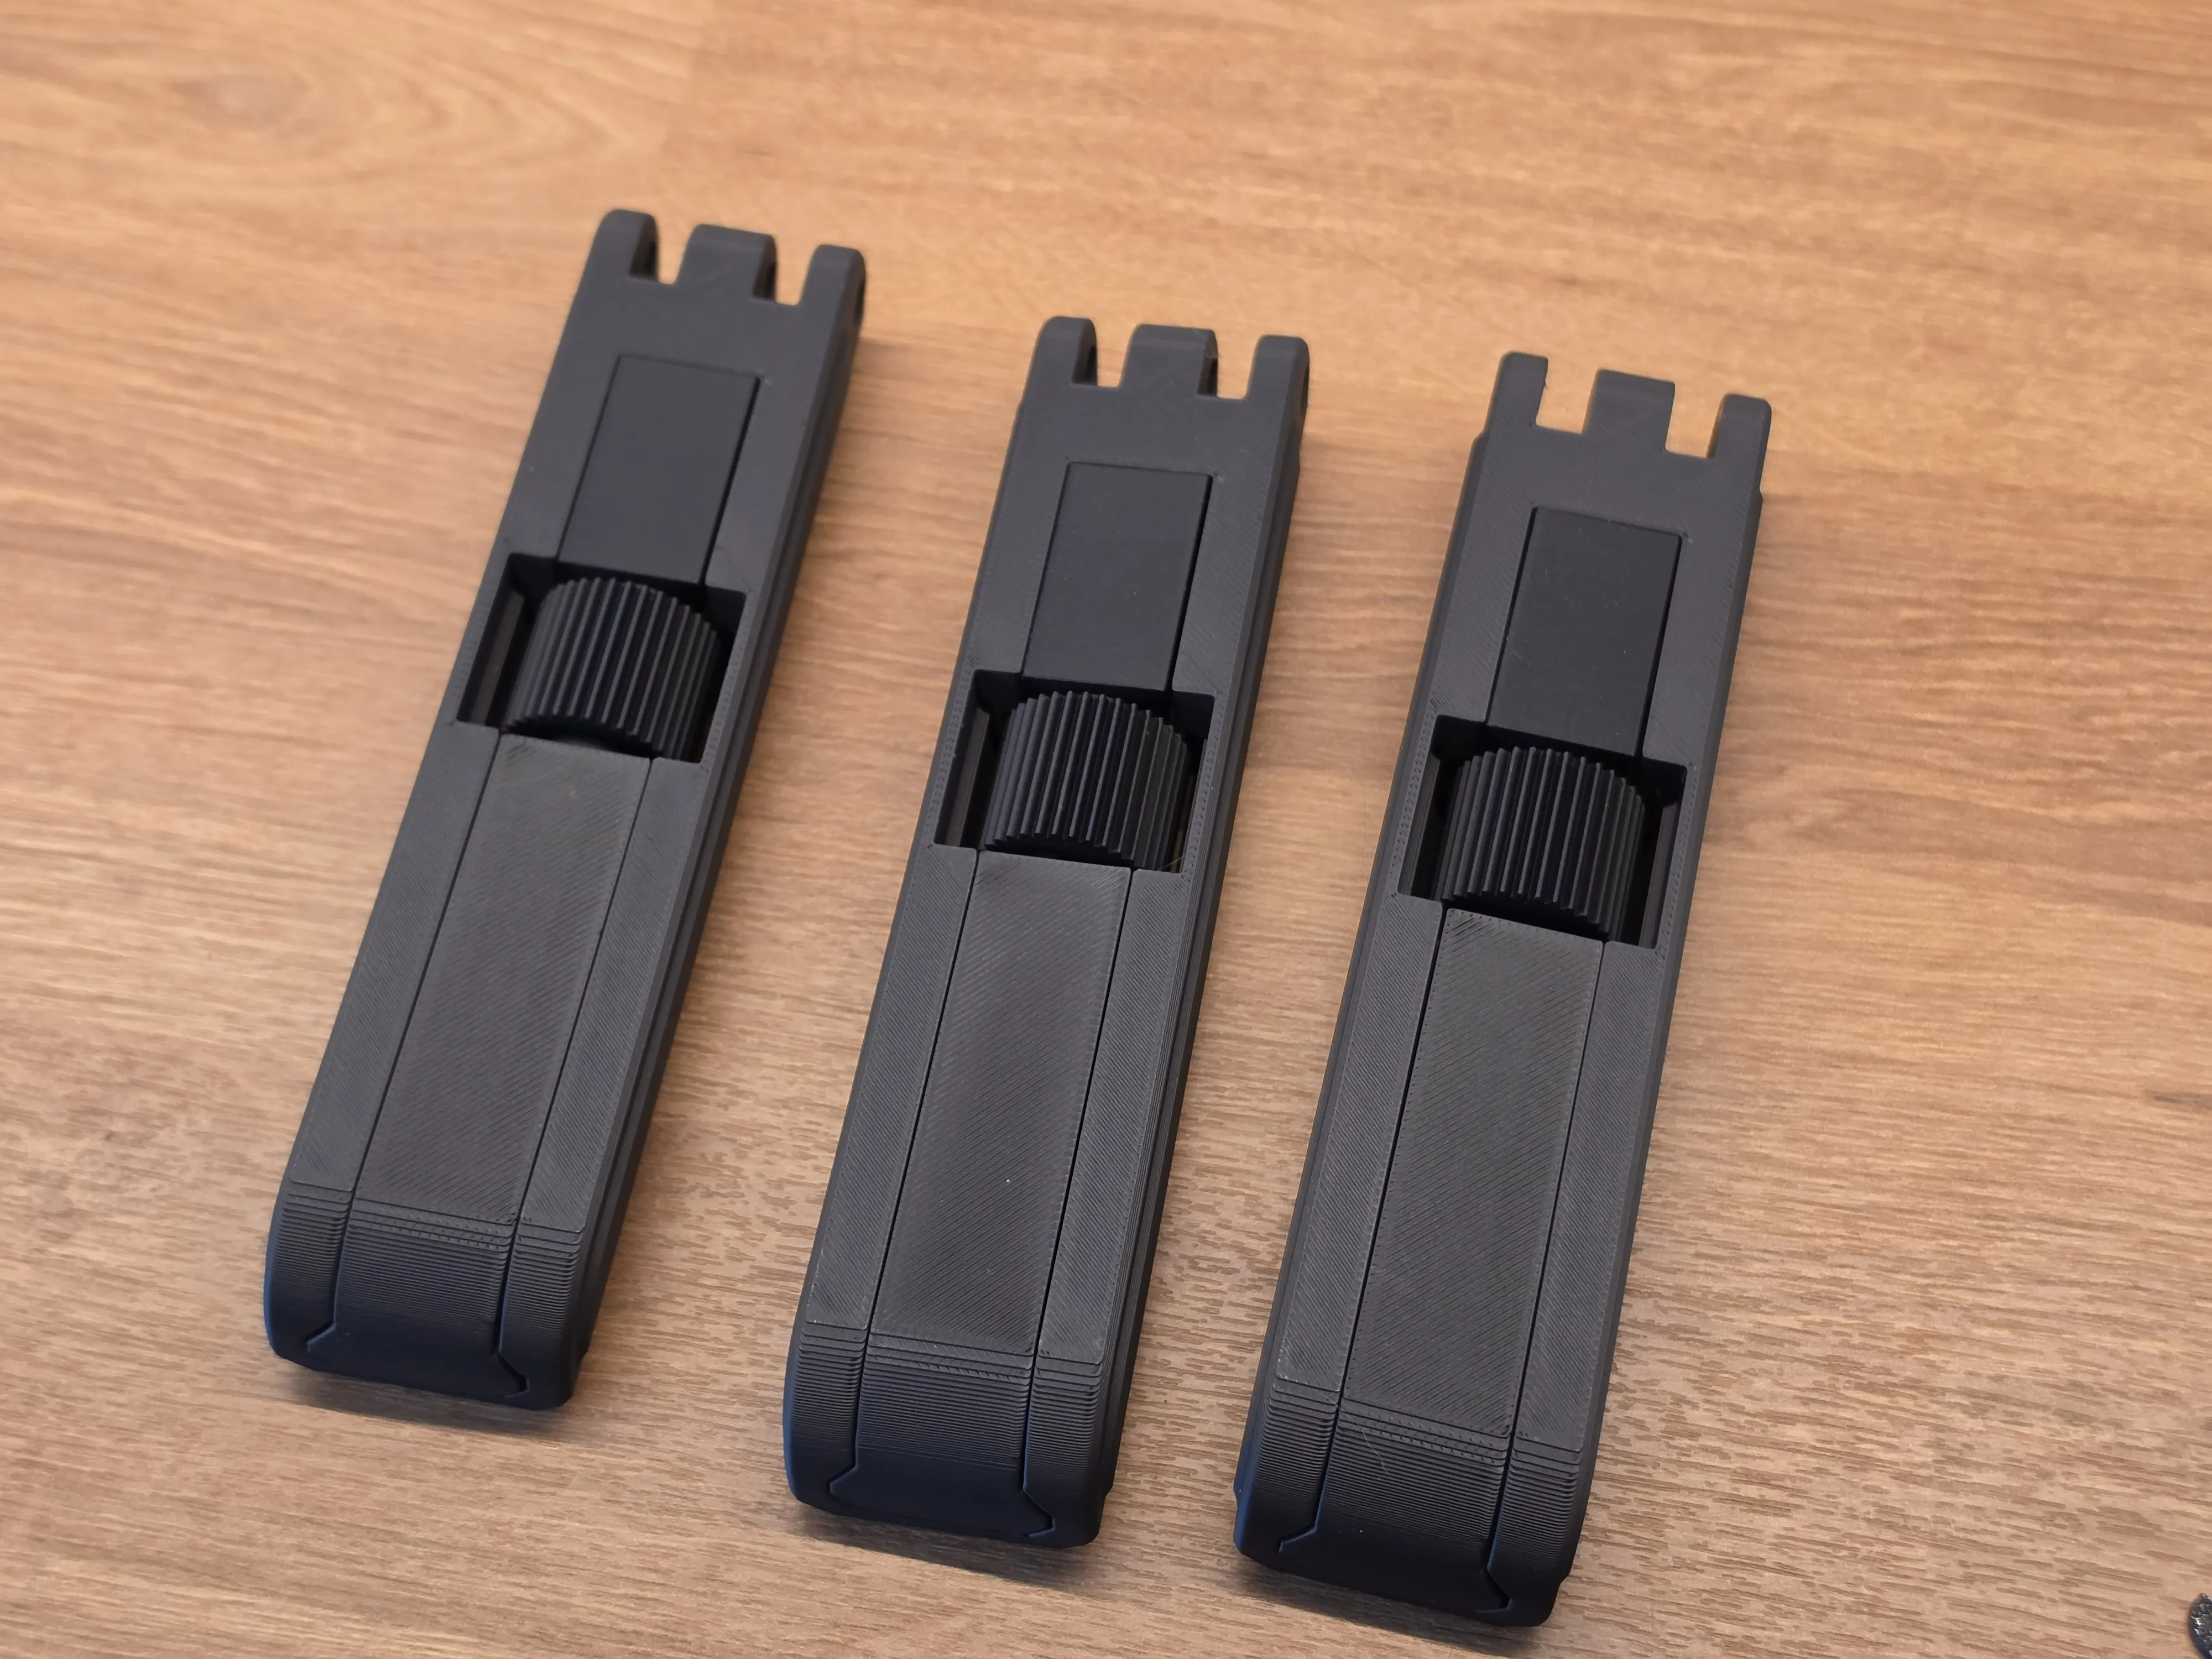
This custom tripod solves that problem by using three independently adjustable legs. Each leg can be extended or shortened by turning its adjustment knob, allowing precise height and angle control. This makes it much easier to aim the spotting scope exactly at the target and keep it stable during use.
The spotting scope is attached using a clamp ring mounted around the scope tube, instead of using the standard bottom mounting screw. This makes attaching and removing the scope fast and convenient. To detach the scope, simply loosen the clamp screw and lift the scope out of the mount.
The design is especially useful for 25 m target shooting, where the scope is used to view bullet holes in paper targets. For this purpose, it works very well and provides a much more comfortable adjustment experience than the original tripod.
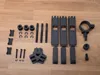
Assembly:
Step 1 — Prepare the PartsLay out all printed parts and hardware. Make sure the threaded parts move freely and that all holes are clear. |
 |
Step 2 — Assemble the Adjustment ScrewTake the main adjustment screw and slide the adjustment knob onto it. Secure the knob using two cotter pins or retaining clips. |   |
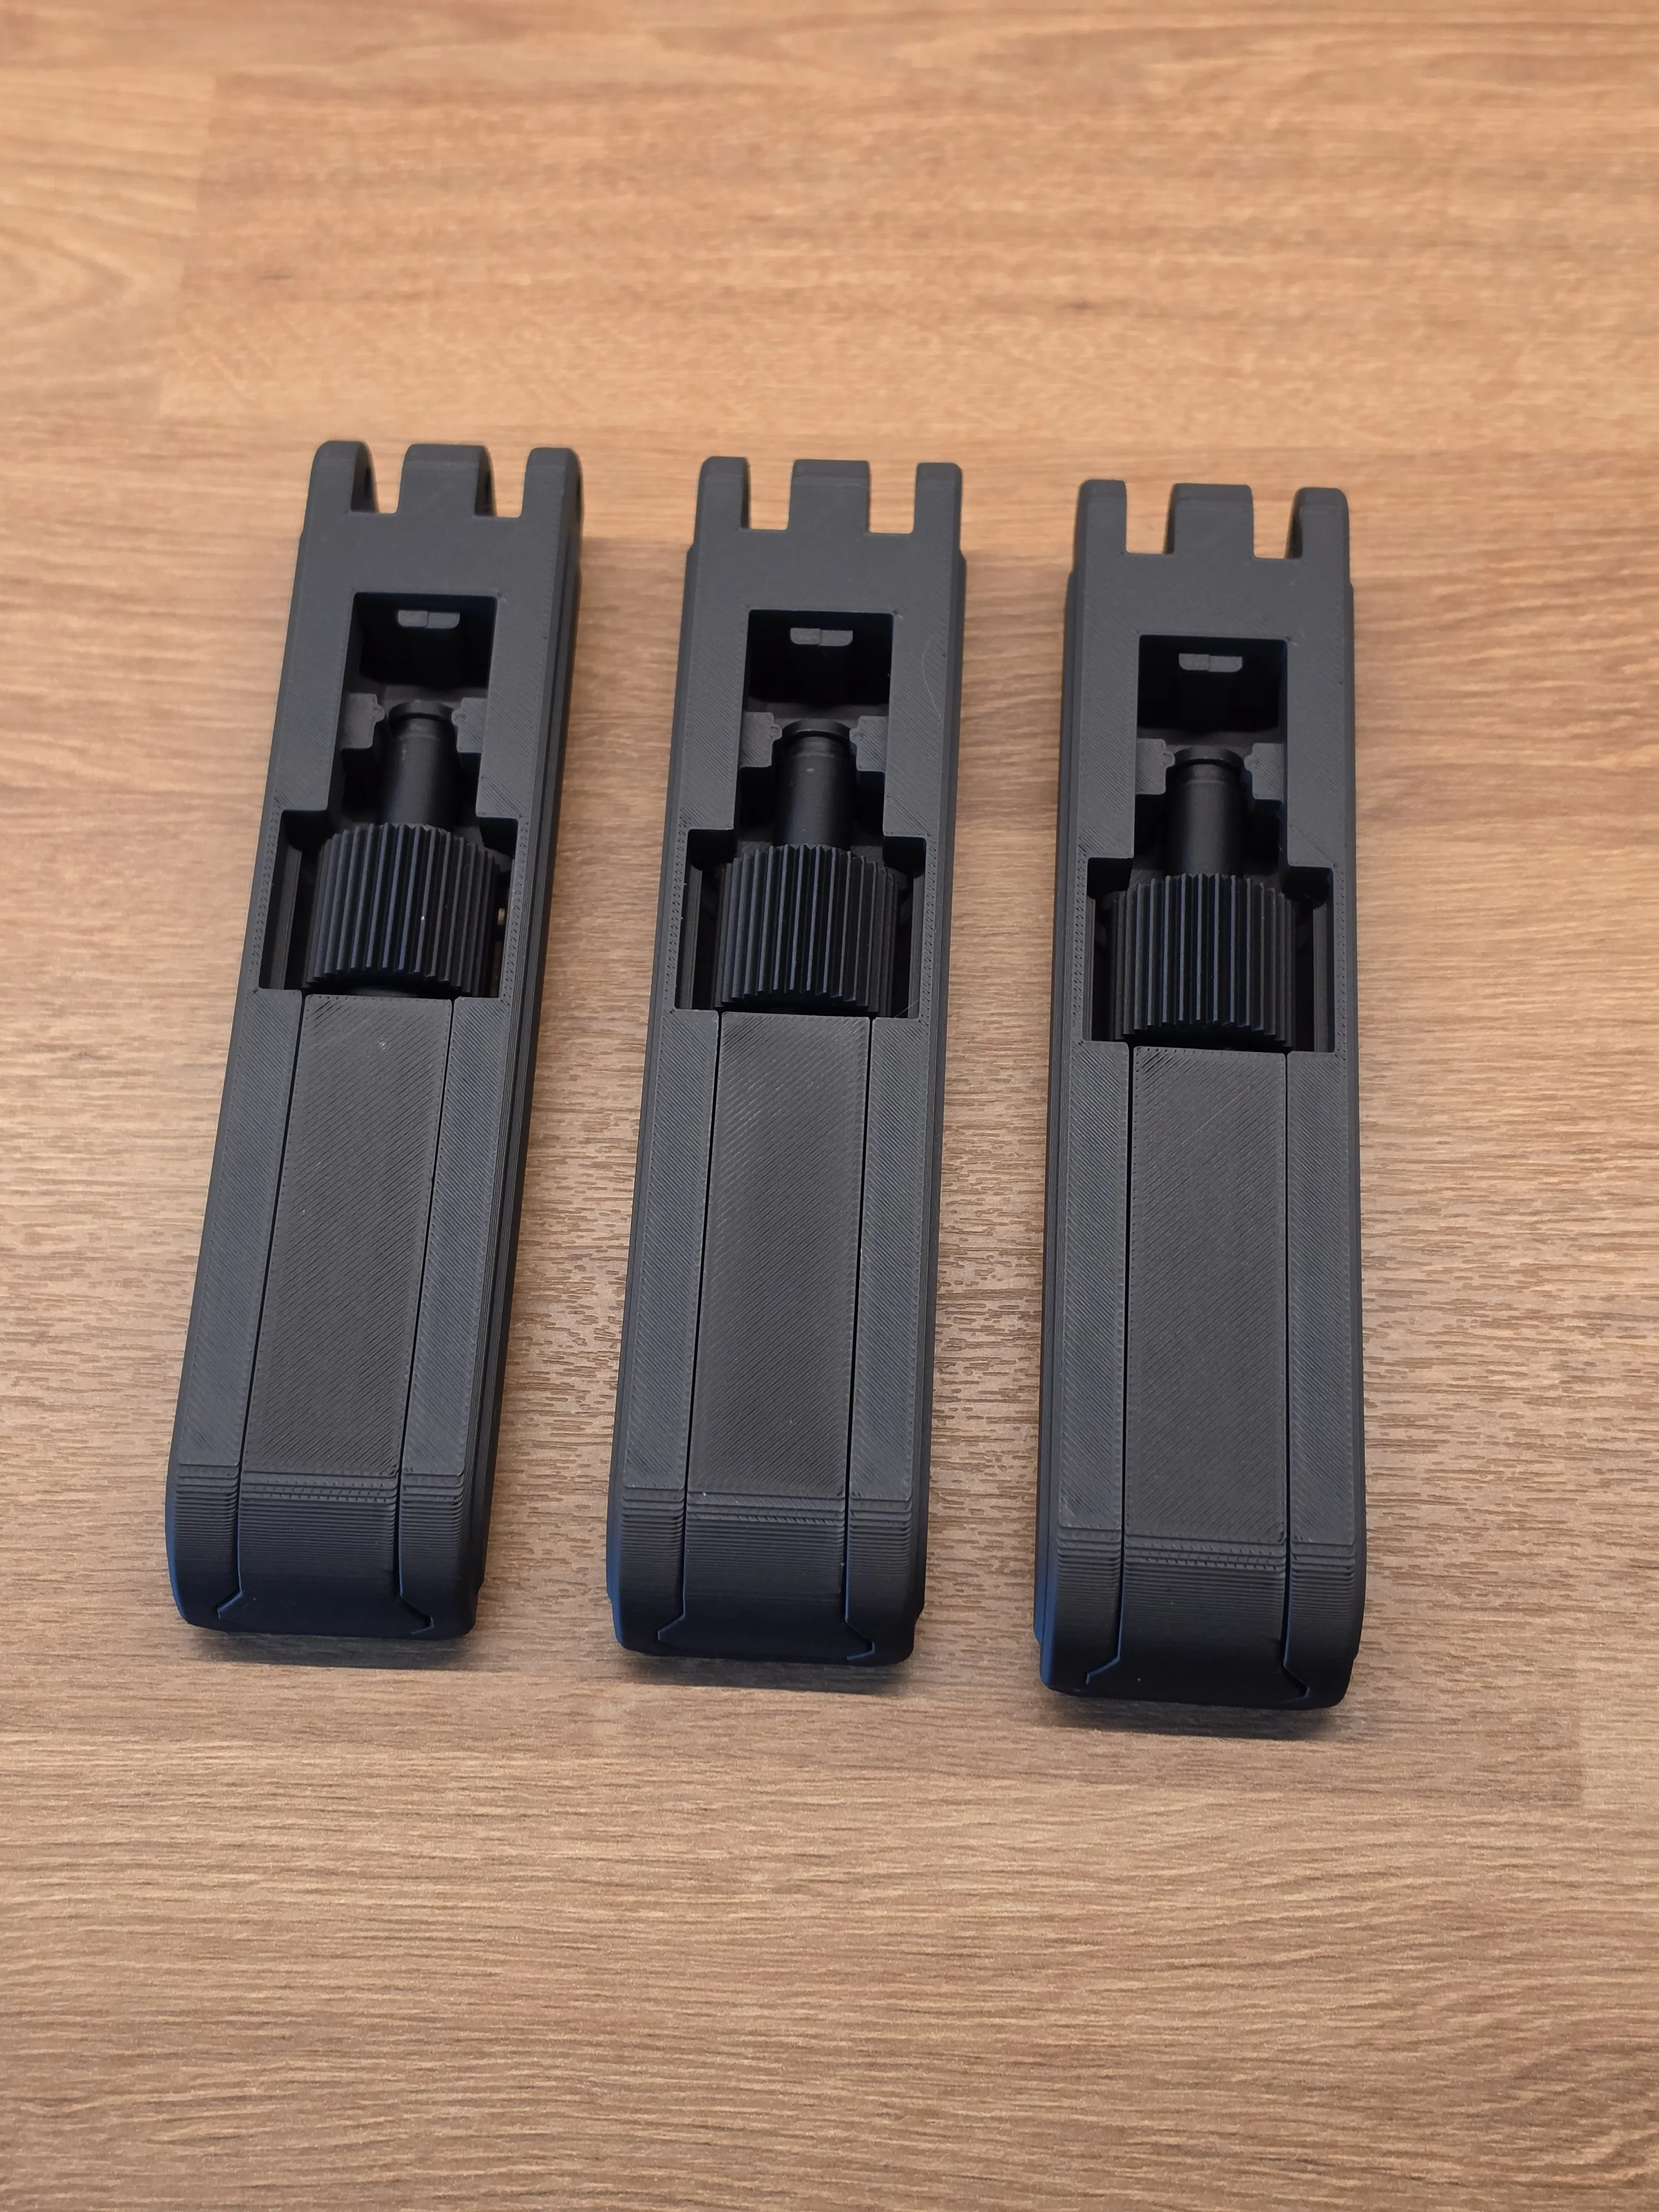
Step 3 — Insert the Screw Into the Leg BodyInsert the assembled adjustment screw into the main leg body. Then slide the threaded leg extension onto the screw thread. Turn the adjustment knob to retract the extension into the leg body. This confirms that the adjustment mechanism works correctly. Repeat this process for all three legs. |
|
Step 4 — Install the CoversInstall the covers on the legs. |
  |
Step 5 — Attach the Legs to the BaseMount the three legs to the triangular base. Insert the mounting pins through the hinges and secure them with cotter pins or retaining clips. Make sure each leg can pivot freely |  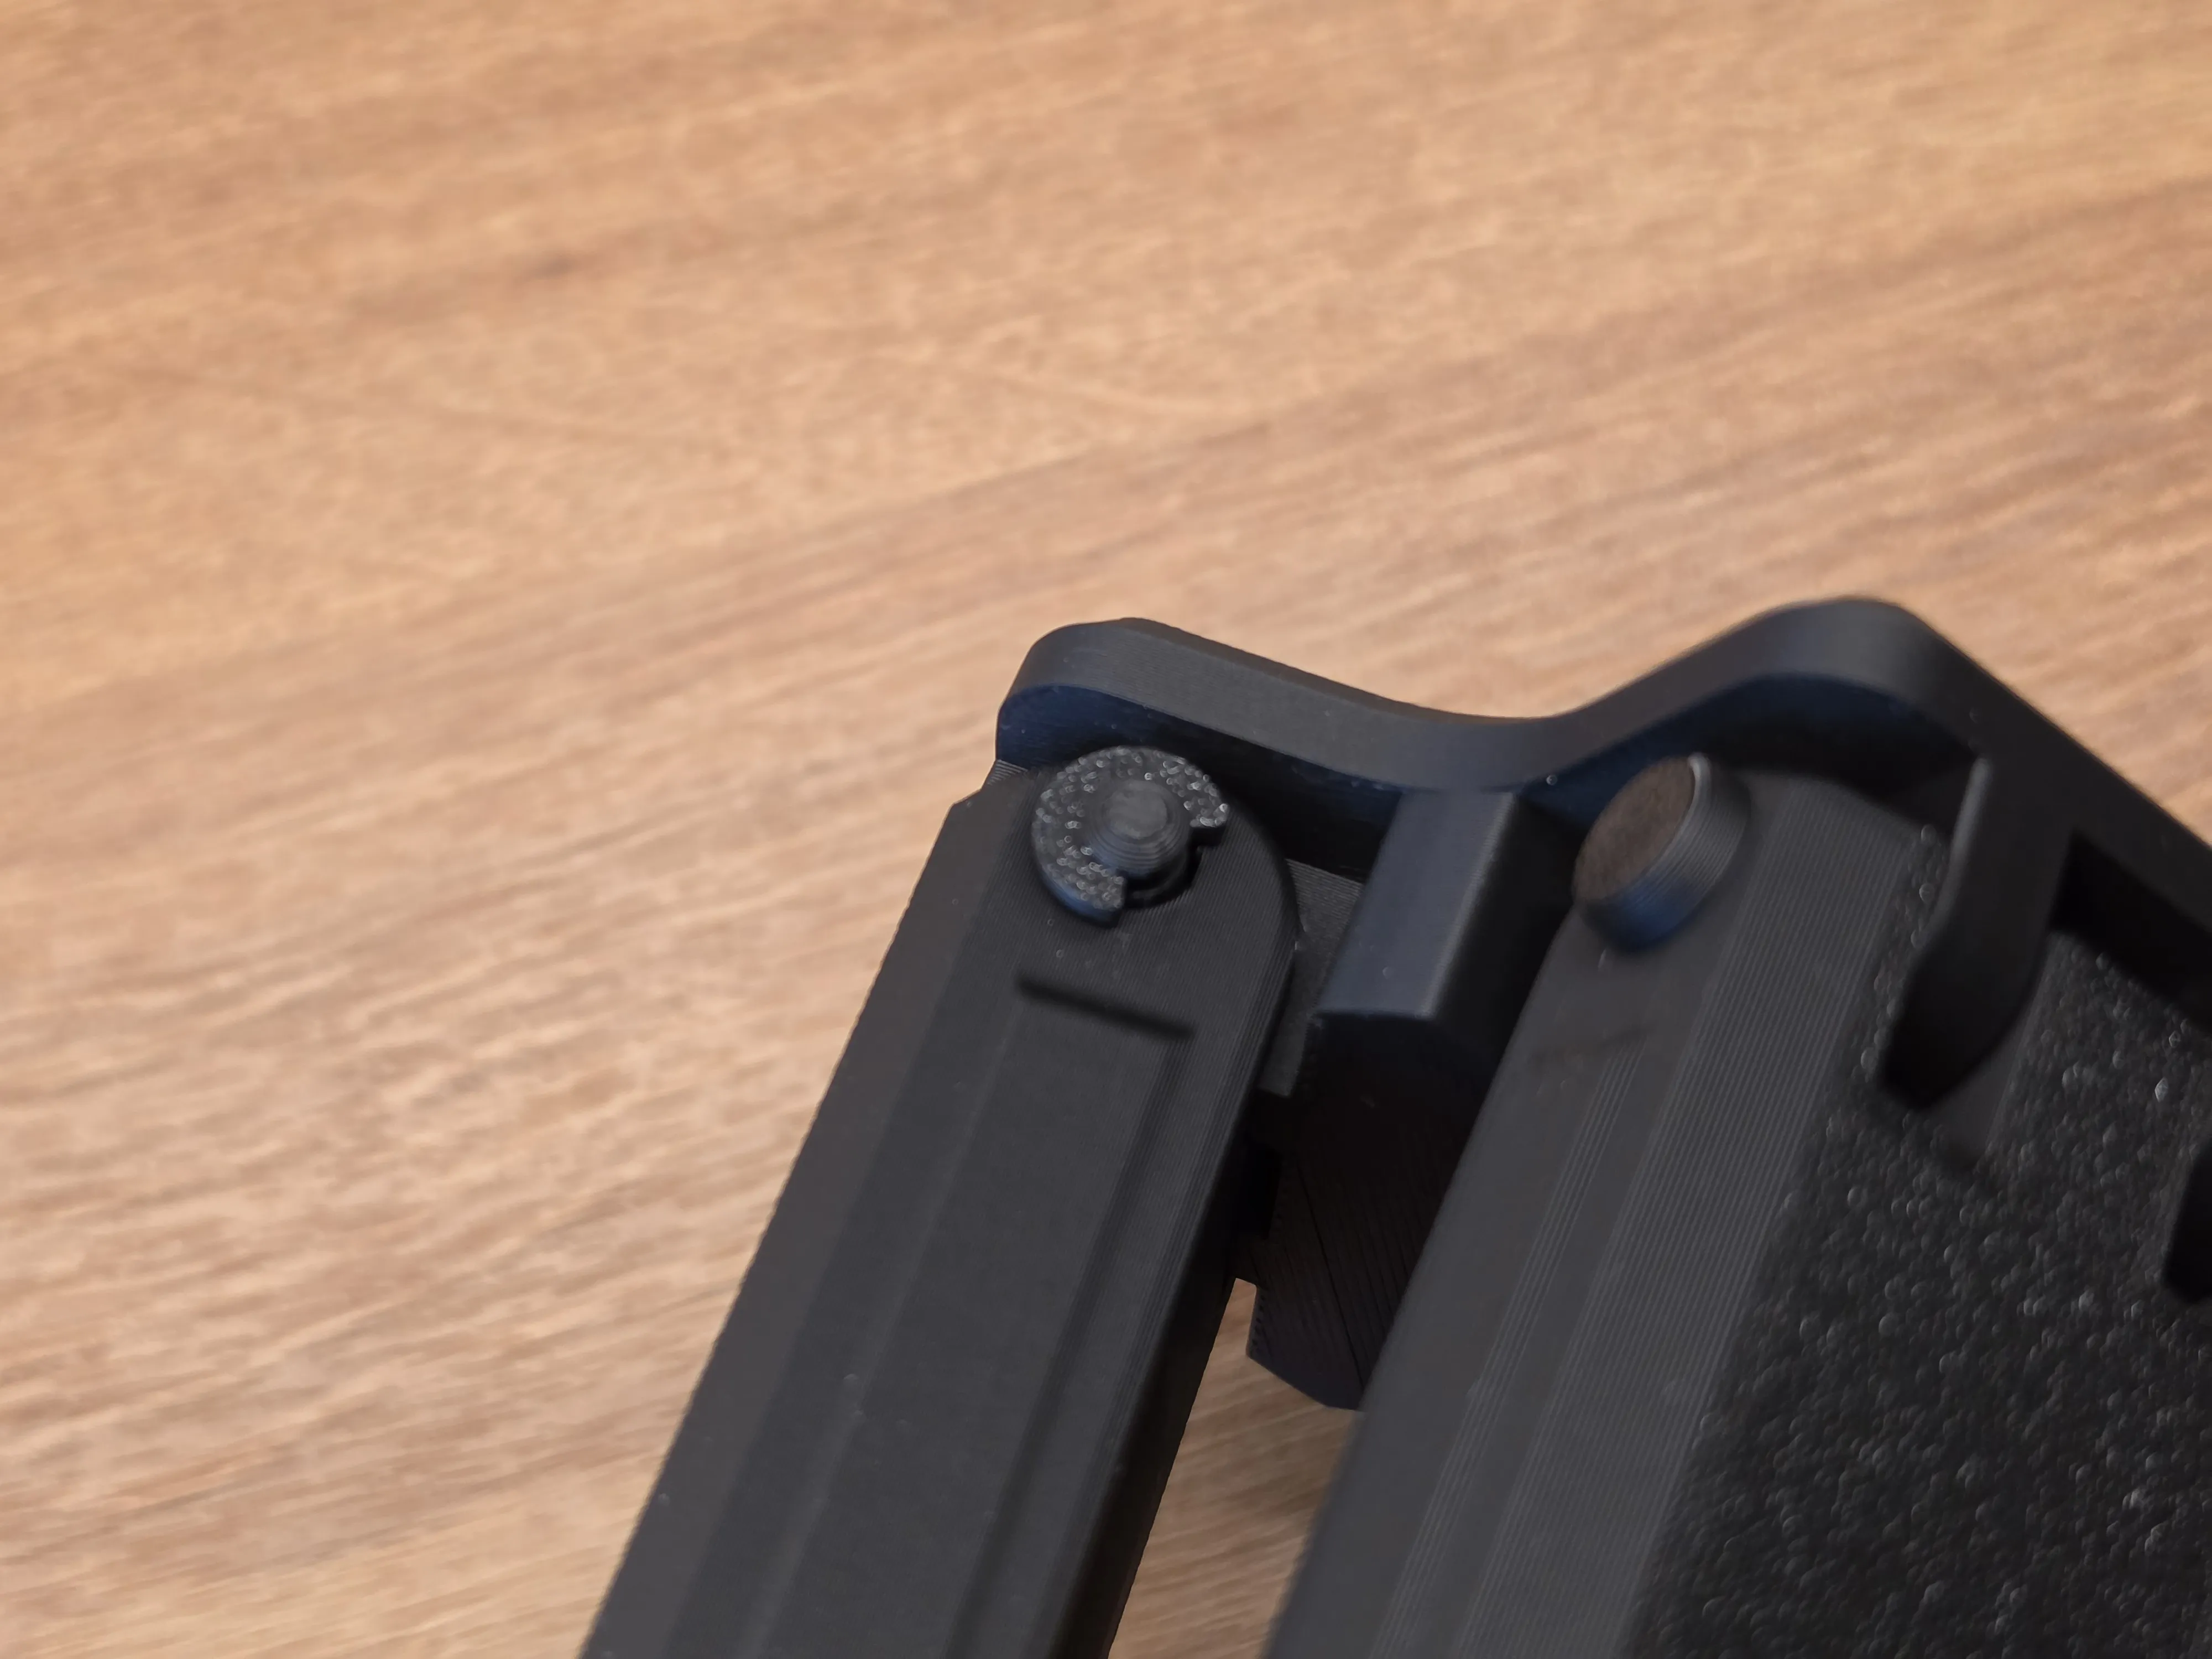
|
Step 6 — Install the Scope ClampSlide the scope mounting clamp into the top of the tripod base. Secure it from below using the bottom screw. Then install the clamp tightening screw into the clamp ring. This screw is used to tighten the ring around the scope tube. | 
|
If you want to support my work:
Boost Me (for free)
If you like my work and want to see more, please consider boosting me. It would be greatly appreciated!
If you want to sell my models:
Membership
If you want to sell my projects, check out my commercial license !
Thank you so much for all your support!
License
You shall not share, sub-license, sell, rent, host, transfer, or distribute in any way the digital or 3D printed versions of this object, nor any other derivative work of this object in its digital or physical format (including - but not limited to - remixes of this object, and hosting on other digital platforms). The objects may not be used without permission in any way whatsoever in which you charge money, or collect fees.
Comment & Rating (0)