Search models, users, collections, and posts
Little Schiit Double Rack
IP Report


Print Profile(1)
0.2mm layer, 2 walls, 15% infill
Designer
11.8 h
3 plates
Open in Bambu Studio
Boost
1
4
0
0
1
0
Released
Bill of Materials
Maker's Supply Kits and Parts
Select all


Bambu Filaments
Select all

Description
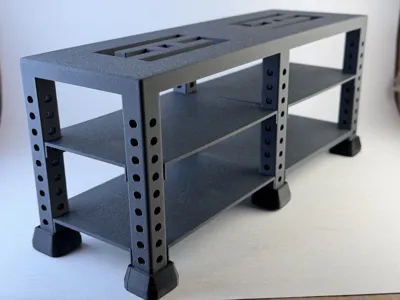
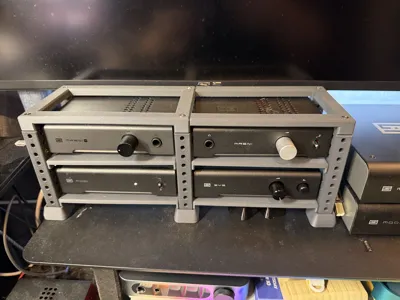
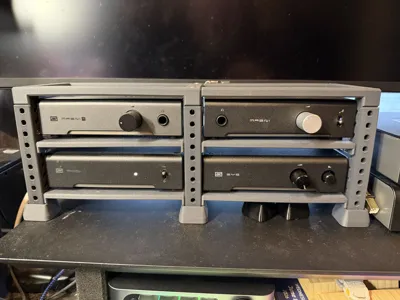
Have too much Schiit on your desk? Want a handy, dandy rack to hold them all?
This is a double-wide, double-tall rack for small form factor Schiit gear; Magni, Modi, Loki Mini, Sys, Rekkr, Piety, Mani, etc. Print one rack, four shelves, and six feet, insert heat inserts in the appropriate holes, and screw it all together and VOILA! You've organized your Schiit.
Built from the ground up in Fusion 360, but heavily inspired by Bassman117's Modular Mini Rack (https://www.thingiverse.com/thing:7042164).
You'll need:
- 1 x rack assembly, printed in a hard filament (I personally really like PLA-CF)
- 4 x shelves, printed in a moderately heat-resistent hard filament (I personally really like PLA-CF)
- 6 x feet, printed in 95A TPU (or use a hard filament or just omit them; they're mostly there to reduce sliding on smooth surfaces)
- At least 22 x Voron heat inserts (, printed in a hard filament (I personally really like PLA-CF)) [ https://amzn.to/4fGtpgm ]
- At least 22 x M3 screws (any size from 3 mm to 12 mm will work; I personally used 8-12 mm screws for the shelves and 5 or 6 mm for the feet)
- Soldering iron
Assembly:
- Use the soldering iron to sink the heat inserts into the appropriate holes (all six pillars, and then whatever height in the legs you want. I personally only used four screws per shelf, on the sides of the legs in the wide orientation. For better security, you can put two screws on each shelf on each leg, though you'll want to use shorter screws so as not to hit each other if you do.
- Screw the shelves into place, starting with the top shelves, then the bottom shelves.
- Attach the feet [if you are using them].
License
This user content is licensed under a
Creative Commons Attribution-Noncommercial-Share Alike
Comment & Rating (0)