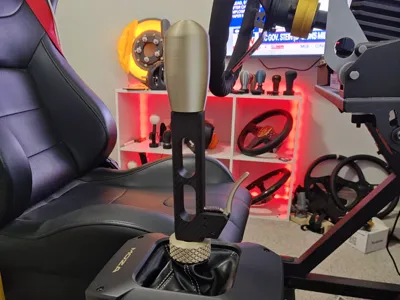
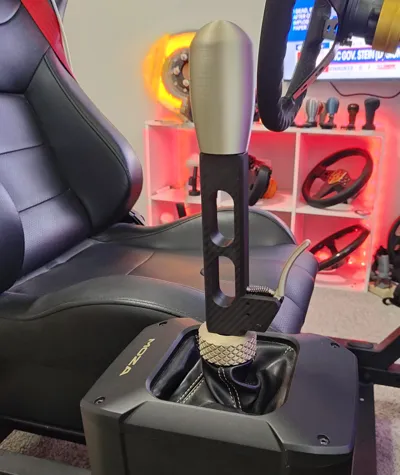
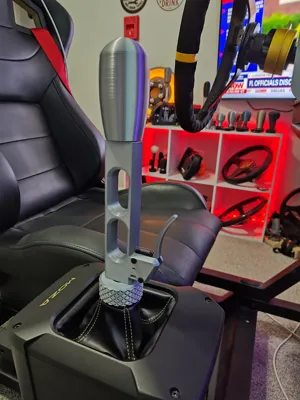
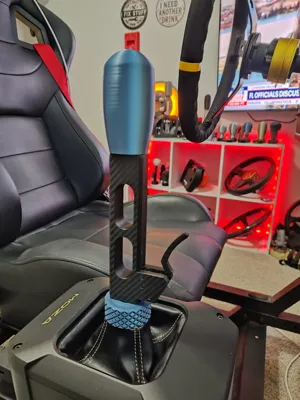
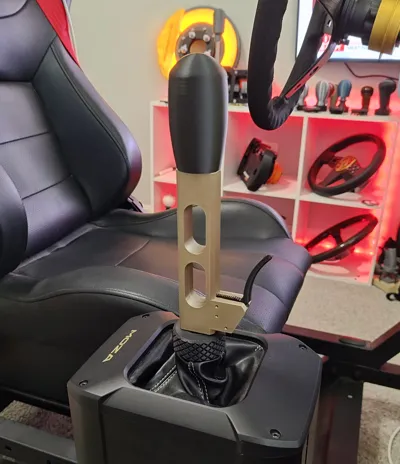
Moza AB9 Modern Sequential lever with switch


Print Profile(1)


Description
Boost Me (for free)
Since you can't buy me a beer, help me get a spool or two!
Moza AB9 Modern Sequential shift lever - with Neutral switch (or use it for whatever you want)
I like to match shift knobs to the cars I use in Assetto Corsa.
I use the switch for neutral gear when using sequential shifting as I don't like having to knock down 6 gears drop down to neutral if I crash (a lot). hehe
There is a lever version without the switch.
I recommend not modifying the settings unless increasing walls for more strength but I don't that is needed.
I tried to maximize strength to weight ratio using walls/infill while maintaining low weight to keep the AB9 motor reaction as efficient as possible.
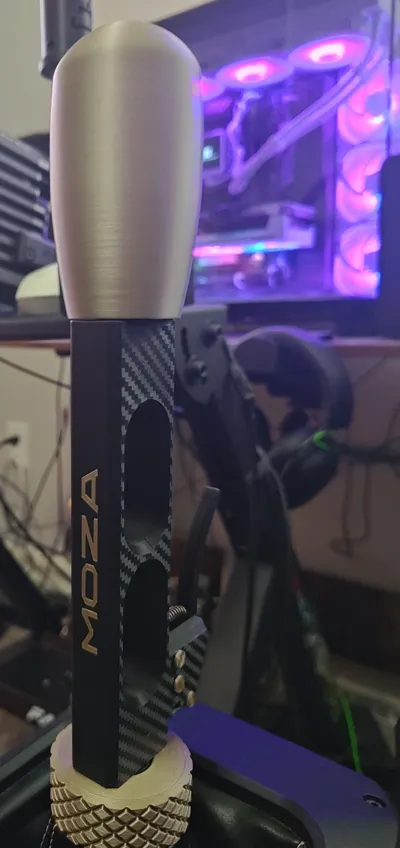
- The main shifter lever set to 4 walls, 10% gyroid infill, I used PLA plus. You can increase the walls and infill depending on the strength of the filament you use or if you shift like the hulk. hehe. I printed one in silk silver and had to increase the walls to 6 since silk pla is so brittle and it now holds up well.
- Screw coupling set to has 6 walls, 100% infill and 0.250 XY hole compensation (This setting is important for the thread to be correct).
- Short shaft is set to 6 walls, 100% infill and 0.250 XY Hole Compensation.
- Knobs set to 4 walls, 10% gyroid infill.
The supports in the switch housing are a pain to remove but with patience it gets done.
The printed pins are supposed to be a snug fit but not extremely tight. It might be tight or loose depending on the expansion of the filament you are using.
You can resize them increasing or decreasing by 0.05 until they fot right.
You may want print extra pins as they can snap as you test fit.
There are two style switch levers. The one that sweeps backwards a little is to make contact with the lever so it does not bend too much and snap. That is in case you use a brittle filament like silk pla or just like the look of that lever.
BOM - Purchased parts:
1- 20mm x 6.5mm x 10.2 micro limit switch (pull off the metal lever if it has one).
2- 0.5mm x 25mm x 4.5mm. (wire diameter x spring length x spring diameter). Or a spring from a pen (but you may need to stretch it out…)
Got mine from Aliexpress (20pcs/Lot 0.5mm Stainless Steel Micro Small Compression Spring OD 3/3.5/4/4.5/5/6/7/8/9/10/11/12mm Length 5mm to 50mm - AliExpress)
3- Switch controller - I have mine wired to a zero delay arcade encoder that I have as a button box. You can also use an Arduino (cheaper but will require you to program it). Or you can wire it to plug directly into your Fanatec wheelbase if you have one.
4- M8x20mm conical screw
Assembly
1 - Insert the micro switch (with wires already soldered) from the top of the housing with the little red button pointing to the front of the shifter / pins towards the rear of the lever and red button at the top pf the switch housing. You will need to bend the switch pins downward slightly to make it fit.

2 - From the three printed long Pins; Insert two micro switch pins to hold the switch in place (you may need to scale the pins (increase or decrease by 0.1mm) depending on the filament you are using. You will need to use a screwdriver or something to push the switch into place.

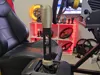
3 - Place the two short spring retainer pins. One pin on the finger lever and one on the shift lever like in the picture above in step 2.
4 - Place the spring on the finger lever then on the shift lever.

5 - Use the square hole in the switch housing for a zip tie to secure the wire into place. (When unscrewing/changing shifters over many times it can loosen the solder of the wires on the micro switch so the tie wrap avoids that stress.)
6 - Insert the knob/lever connector into the top of the lever then attach the knob and glue into place if needed.

7 - Screw in the M8x20mm screw in the knob short shaft. It screws in tightly. You can increase the XY hole compensation to 0.250 to make it easier. You can place the shaft in the knob and use the knob to hold for better grip while you screw the bolt in.


8- Insert the short knob shaft with screw in the screw coupling.

9 - Place the lever on the shaft, use glue if needed.

10 - Screw the shifter on to your AB9. I made it so the lever base sits as close to the screw coupling as possible to add contact area for more strength. As you screw the coupling down, keep the lever aligned/facing forward and feel for when the 4 pins on the AB9 align with the holes in the short shaft.
11 - Then connect the switch wire to whatever board you are using and configure the setup in game.
Ready to race.
Then start shifting and drifting
Stay Sidewayz…
License
You may create derivative works based on this object, provided that all such derivative works are published exclusively on the MakerWorld platform and include proper attribution to the original creator. You may not share, upload, host, distribute, or publish this object—or any derivative work of this object—on any other digital platform, marketplace, or distribution channel. Commercial use of this object and any derivative works is strictly prohibited. This includes, but is not limited to, selling, renting, sublicensing, or using the object in any context in which you receive monetary compensation or other financial benefits.
Comment & Rating (0)