Cadac Carri Chef 2 Height Adjustment V2


Print Profile(0)
Description
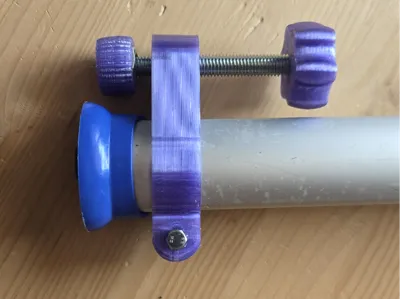
This version can remain on the grill, offers a more secure stand, requires less material, and is overall more stable and easier to handle
Comments welcome
Required additional parts:
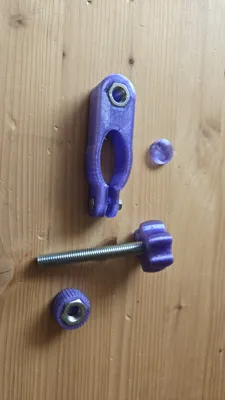
- 1x M10x80 hex head screw
- 2x M10 nut
- 1x M5x20 screw
- 1x M5 nut
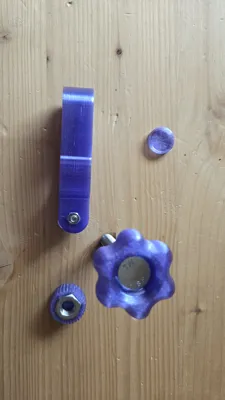
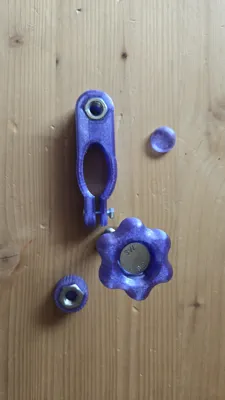
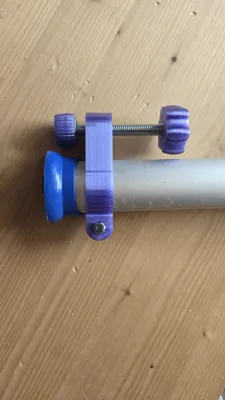
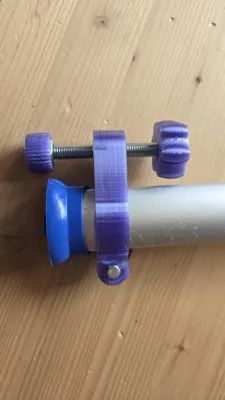
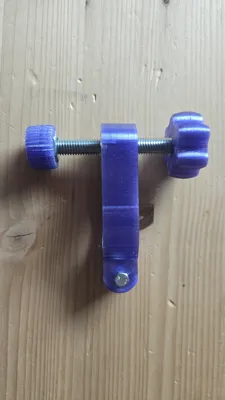
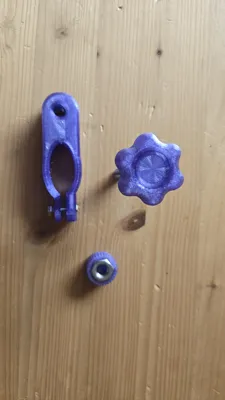
Required printed parts
- 1x Cadac foot clamp M5M10
- 1x Cadac short handle
- 1x obj_9_Kappe Stern M10 SW17.STL
- 1x Cadac foot cap
Thanks to practical3D for the template collection of star grips
Printed in PETG with
- 0.2mm layer height
- 5 perimeters
- 25% gyroid infill
- for the clamp, organic supports are advisable; depending on printer settings, it can also be printed without them
Screw heads and nuts should fit snugly but might need to be secured with a bit of superglue
Push the M5 screw through and use it to pull the M5 nut into its seat
Insert the M10 nut (secure with superglue if necessary), then screw the M10x80 screw through the nut and all the way through to create a thread in the plastic Then unscrew it and screw it back in from the other side so the nut is at the bottom This way, the grill's weight is not solely on the nut, and the M10x80 screw has a stable guide
Assembly
- Screw handle
- apply some superglue to the screw seat if necessary
- insert M10x80 screw
- counter with an M10 nut and use it to pull the screw head firmly into its seat
- put the cap on, add superglue beforehand if necessary
- remove the lock nut again
- Foot
- apply some superglue to the nut seat if necessary
- insert M10 nut
- Clamp
- apply some superglue to the larger nut seat if necessary
- insert M10 nut
- screw through from below (nut side) with the pre-assembled M10x80 screw including the screw handle, thereby cutting a thread into the plastic (provides additional lateral hold)
- remove the screw and screw it back in from the other side
- screw on the pre-assembled foot, secure with superglue if necessary
- apply some superglue to the smaller nut seat if necessary
- insert M5 nut (might be a bit tight, but that's fine)
- insert the M5x20 screw from the other side and use it to pull the M5 nut into its seat
- remove the M5x20 screw
Attachment
- slide on the pre-assembled clamp (M10 nut facing down)
- secure with M5x20 clamping screw
It is advisable to attach the height adjustment to at least 2 legs so the grill can always be leveled With 3, it can also be leveled in any direction
Comment & Rating (0)