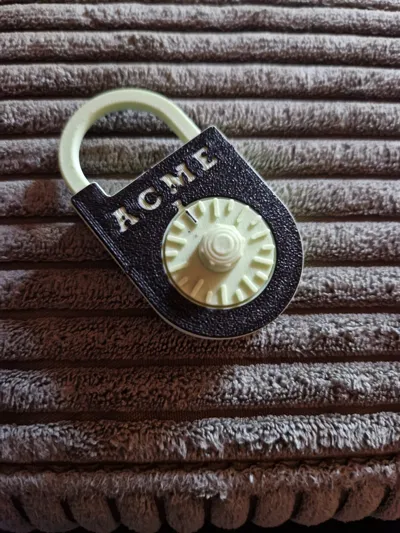
3-Digit Combination Lock by LoboCNC


Print Profile(1)

Description
This is a modified version of a combination lock, which originated from LoboCNC, but I have changed it so that it is no longer a kit card, but rather several individual named parts for easy reprinting.
Boost Me (for free)
Please boost me because it was not easy to separate all the parts well. And please also leave a boost for LoboCNC. And especially for me, so that more versions from me can be released as quickly as possible. For example, with 4 or 5 digits instead of 3, which ensures more security.
-----------------------------------------------------------
no glue version! I've revised a few things so that everything is press-fit or snapped together, making it a great project to assemble with kids.
This (mostly flat) kit card is a bit tricky to make, but it will produce a working 3-digit combination lock, just like the one you used to have on your high school locker. Well, sort of like that. It requires a flawlessly tuned printer (some parts are very small), a steady hand, tweezers, and maybe a magnifying glass. It prints without supports and snaps together without glue, fasteners, or other hardware.
I learned how a combination lock works from this video and designed this based on it. It consists of three dials that have release slots that all need to be aligned to open the lock. There are small pins on each dial that push against each other to align the slots, and you can adjust the position of the pins during assembly to create unique combinations.
About the dial: I didn't have enough space to include numbers, so like one of those annoying clock faces without numbers, you'll have to somehow guess which number is which. There are 10 long marks on the dial (0, 10, 20, 30… etc.) and short marks as subdivisions in between. And finally, one of the long marks is colored to indicate the 'zero' position of the dial. Each combination number consists of 2 digits (e.g.: 67 - 32 - 18), but this lock is so forgiving that +/-3 on any number should be sufficient.
Print
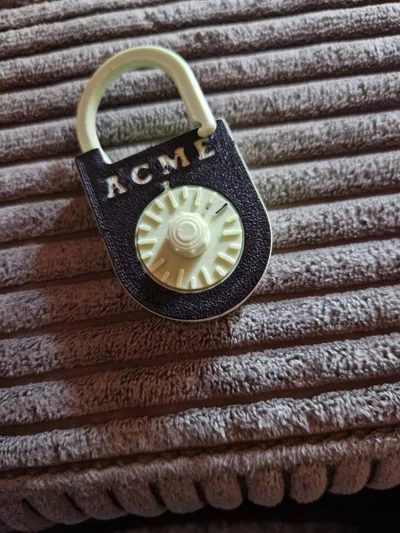
Print in PLA with exactly 0.2mm layers. Use a 0.4mm (or smaller) nozzle. Your bed leveling needs to be near perfect, and you'll need to eliminate any elephant's foot. You will also want a well-tuned print feed to avoid over-extrusion at the corners. Otherwise, the kit card prints easily as posted without supports. For added contrast, you can print the first 2 layers in one color and then switch to a contrasting color, as shown in the second photo above.
Assembly
Before you begin, read through the entire instructions and test all the parts that fit together. Make sure the three dials turn relatively easily on the pin, and that the latch can pivot easily on the small pins on the inside of the covers.
Here is the arrangement of all the parts:

Note that the small parts in the upper right corner are tricky to handle. When removing them from the frame, cut them off at the frame and leave the tabs in place as small handles for maneuvering.

1. The center pin is slightly thicker at one end to create a friction fit. You can determine which end is thicker by trying to insert both ends into the hole in the back cover. Start by inserting the thin end through the back of the cover and into the center of the lock. Press the pin flush with the back cover by pressing the end of the pin against a hard, flat surface.


2. Insert one of the short nubs (I've given you two to use, plus a spare) into one of the long slots (randomly) on the back of the dial. It doesn't matter which one – you'll set your combination later. Press the top of the short nub against a hard, flat surface to fully seat it. On the front of the dial, color in the top of one of the long marks with a marker or nail polish to indicate the 'zero' position. Again, it doesn't matter which one, as we'll figure out the combination later.


3. Insert the second short nub into one of the slots at the top of the back disk and snap it firmly into place. Then insert the long nub into one of the slots in the middle disk and snap it firmly into place.

4. Stack onto the pin on the back: the back disk, the middle disk, and then the dial. Place the latch over the small pivot pin on the back cover. When you turn the dial, the pin on the back of the dial should push against the pin on the front of the middle disk and turn it, and finally, the protruding pin on the back of the middle disk will push against the pin on the back disk and turn it as well. Note that none of the pins should rub against the surface of the adjacent disk. If they do, file the tops down a bit.

5. Now you'll determine what combination you've given yourself. Start by turning the dial clockwise for at least 3 rotations.
- Continue turning the dial until the release slots on the back disk are aligned with the pawl on the latch. Loosely place the front cover over the dial and note the dial position that aligns with the mark on the cover. This is the first digit of your combination.
- Remove the cover. Turn the dial back one full rotation counter-clockwise, then continue turning until the middle disk's release slots also align with the pawl on the latch. Place the cover back on and note the second digit of the combination. (Note: When turning counter-clockwise, the back disk should not move. If it does, check if pins are rubbing against the surface.)
- Remove the cover. Turn the dial clockwise one last time until the release slots on the bottom of the dial also align with the pawl. Note your third digit.


6. Place the shackle in the assembly as shown. Now place the front cover on top and press it firmly. It should hold quite well with just the press fit. Test your combination to make sure the lock works. If not, you'll need to use a knife blade to carefully pry off the cover and see what's not working.
7. Operating the combination:
- Turn the dial at least 3 times clockwise and stop at the first digit of your combination.
- Turn counter-clockwise back one full rotation past the first digit, then stop at the second digit of your combination.
- Turn clockwise and stop at the first appearance of your third digit. (This will be less than 1 rotation.)
- Pull up on the shackle. If you have turned the dial after opening the padlock, you can close it again with a small click. Turn the dial well after closing to ensure the combination has been cleared.
8. The cover's press fit should be quite snug, but if you want your padlock to be truly secure (well, as secure as a tiny plastic padlock can be), add a few drops of super glue around the seam where the front connects to the back.
And finally, a video from Dr. Operator with the working padlock:
Comment & Rating (1)