Vibration Compensation for A1 and A2L


Print Profile(1)
Description
Vibration Compensation for A1 and A2L
Bambu Lab has shown with the A2L how effectively adaptive vibration compensation can improve print quality. The underlying principle is as simple as it is proven and is also used in high-quality tools. A dead-blow hammer, for example, has a chamber filled with steel shot or sand. Upon impact, the filler material moves with a time delay, absorbing part of the recoil energy and thus reducing unwanted vibrations. The result is a more controlled movement without disruptive bouncing or spring-back.
Since the crossbeam of the A2L has the same dimensions, it makes sense to use this damper concept there as well. Especially at high printing speeds, the vibration behavior can be further optimized by this.
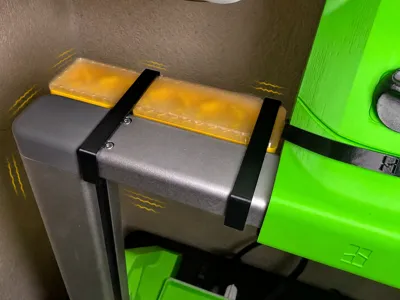
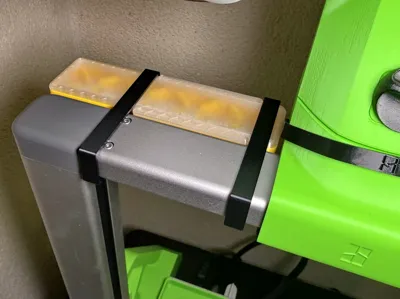
For this reason, I have developed a vibration damper for the A1 and A2L. It absorbs kinetic energy in both the X and Y axes, thereby contributing to a smoother operation of the printer. Especially when the AMS lite or filament spools are mounted on top of the device, disturbing movements are significantly reduced. This ensures a cleaner and more consistent print image, especially during fast printing processes.
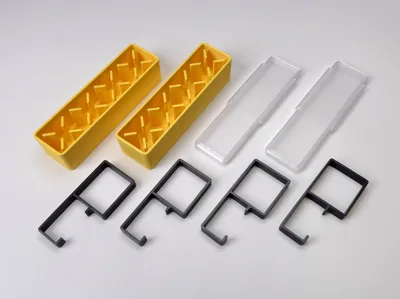
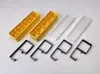
The vibration compensators consist of a container with integrated baffles. These limit the free movement of the filler material, increase internal friction, and thereby improve energy absorption.
The dampers are most effective with small, fast movements.
Material
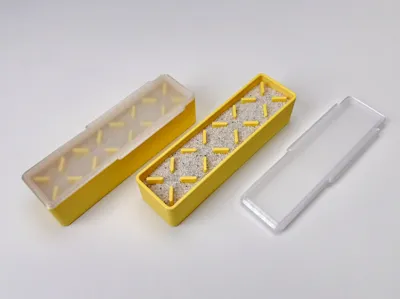
No adhesive or screws are needed for assembly. For filling, I recommend fine-grained sand, as it provides a particularly good damping effect.
Printing
PETG is particularly well suited for printing, as the retaining clips are slipped over the upper beam and PLA is generally too brittle for this.
Assembly
Fill the containers with sand up to the top edge of the baffles. A little air should remain at the top so that the filler material can move freely.
Close the containers with the lids and then attach the side clips with the opening facing downwards. The shape of the lid automatically dictates the correct position.
Attach the vibration dampers to the left and right of the printer's upper crossbeam.
The dampers are also compatible when the AMS lite is mounted on top.
Function Test
After printing, you can directly test the effect of the dampers. Fill one chamber with sand as described, close both chambers with the lids, and secure them with the clips. Then shake the empty absorber first, and then the filled one by hand. The difference in damping effect will be clearly noticeable.
Important
Do not forget to perform a new printer calibration after assembly!

License
You shall not share, sub-license, sell, rent, host, transfer, or distribute in any way the digital or 3D printed versions of this object, nor any other derivative work of this object in its digital or physical format (including - but not limited to - remixes of this object, and hosting on other digital platforms). The objects may not be used without permission in any way whatsoever in which you charge money, or collect fees.
Comment & Rating (6)