EZGO TXT Bluetooth Dash Speaker System


Print Profile(1)


Description
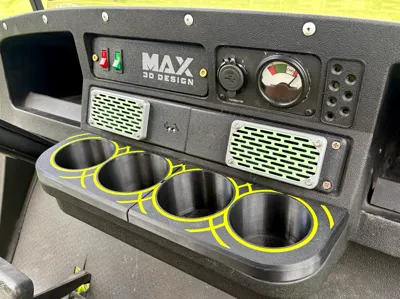
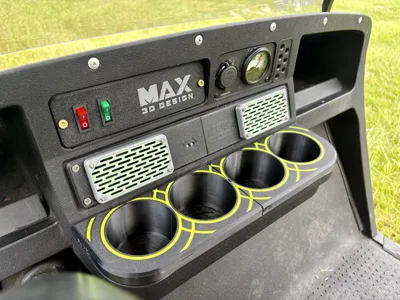
Turn an unused dash opening into a clean, integrated Bluetooth audio system.
This project was designed around an E-Z-GO TXT golf cart after relocating the factory battery gauge and USB charger, leaving two unused openings in the dashboard. Rather than installing a traditional head unit, I designed a compact Bluetooth speaker system that fills the opening while providing surprisingly good sound from inexpensive off-the-shelf components.
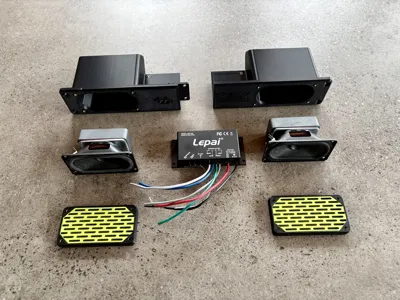
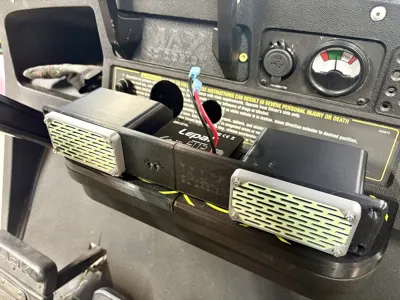
The system uses dual full-range speakers housed in sealed enclosures with a hidden Bluetooth amplifier mounted behind the dash. The result is a simple, low-profile audio upgrade that looks right at home in the cart.
Want more accessories? Check out more Golf Cart Models here:
https://makerworld.com/en/collections/28284523-golf-cart-accessories
IMPORTANT
Print the included cutting template first to verify fitment before printing the complete assembly. (PLATE 5)
This design was developed around an E-Z-GO TXT dashboard. Fitment may vary depending on year, accessories, and aftermarket modifications.
Features
- Designed for E-Z-GO TXT golf carts
- Bluetooth audio streaming
- Dual sealed speaker enclosures
- Hidden amplifier installation
- Customizable two-color speaker grilles
- Printable cutting template included
- Compact design utilizing unused dash space
- Modular assembly for easier printing and installation
Hardware Required
Electronics
- (1) Lepai LPW-250 Bluetooth Amplifier: https://amzn.to/3Sa06ZD
- (2) Dayton Audio CE4895-8 Full Range Speakers: https://www.parts-express.com/Dayton-Audio-CE4895-8-2x3.75-Racetrack-Full-Range-22W-8-ohm-285-187?quantity=1
- Appropriate 12V power source for your application (I used this converter: https://amzn.to/43RPTE0)
Hardware
- M3 brass heat-set inserts: https://amzn.to/4xdpYE6
- M3 screws: https://amzn.to/4uWoYmh
- Speaker terminals/spade connectors
- Wiring
- Silicone or hot glue for wire pass-through sealing
Note: Affiliate Disclosure: As an Amazon Associate I earn from qualifying purchases.
Assembly
- Print all components.
- Install brass heat-set inserts.
- Install the enclosure retaining/joining clip.
- Insert the printed LED light pipes.
- Mount the amplifier into the center section. The amplifier also secures the enclosure halves together.
- Route speaker wires through the enclosure openings.
- Seal wire pass-throughs with silicone or hot glue.
- Install speaker terminals/spade connectors.
- Place TPU gasket between speaker frame and enclosure.
- Connect speaker wiring.
- Install speakers.
- Install grille inserts and speaker covers.
- Print and verify fitment using the included cutting template.
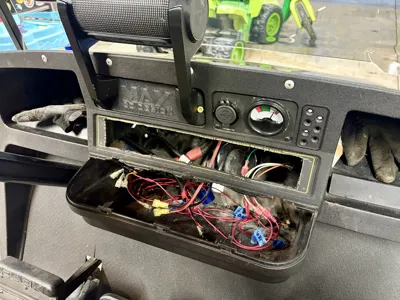
- Cut dashboard opening as required.
- Install assembly and complete wiring for your specific application.
Notes
The included LED light pipes allow amplifier status LEDs to be viewed from the front panel.
Electrical compatibility and wiring are the responsibility of the installer. Verify wiring requirements and component compatibility before installation.
Print Settings
Recommended Materials:
- PETG
- ASA
- ABS
Membership
Want to sell physical prints of my designs? This membership covers commercial use and will continue to grow as I add more models. Thanks!
Boost Me (for free)
If you like this model, a boost helps support future designs and free uploads. Thanks for the support!
License
You may create derivative works based on this object, provided that all such derivative works are published exclusively on the MakerWorld platform and include proper attribution to the original creator. You may not share, upload, host, distribute, or publish this object—or any derivative work of this object—on any other digital platform, marketplace, or distribution channel. Commercial use of this object and any derivative works is strictly prohibited. This includes, but is not limited to, selling, renting, sublicensing, or using the object in any context in which you receive monetary compensation or other financial benefits.
Comment & Rating (3)