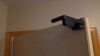
Door Stop Auto-Latch


Print Profile(1)
Bill of Materials
- Drywall Hanger x 2: If needed; depends on wall type and stud location
- Screw x 4: I used drywall screws on the wall and metal screws on the door.
- Paper Clip x 2: Can get by with one if it's a large paper clip and you're conservative on trimming
Description
To install: Get a level, a paper clip or two, 4 screws, a screwdriver, drywall hangers if needed, a pencil, and something to cut the paper clip with.
-Use a level on the top of the door to mark the wall.
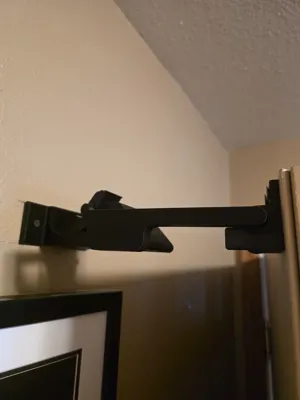
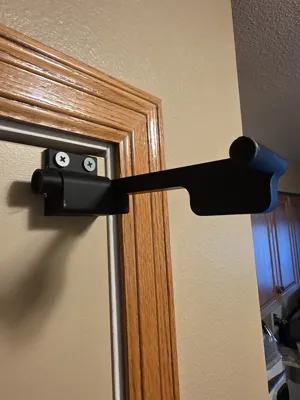
-Install the latch base on the door.
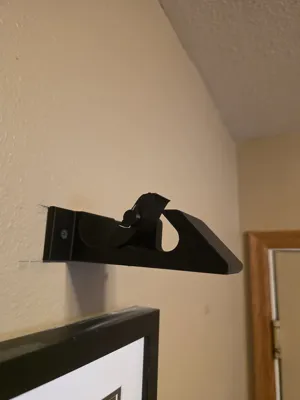
-Use the mounted latch base to set the base on the wall; the right side ledge for the latch hinge should be almost touching the side of the base when the door is fully open. Mark the edge of the base.
-Level the base on the wall using the two marks and the level to position.
-Mark through the screw holes.
-(Optional) Add drywall hangers on your screw holes if needed.
-Fasten the base to the wall.
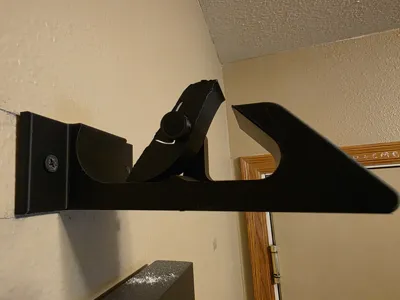
-Slide the rocker arm on the base, curved side down and spring arm to the right.
-Slide the base nut on the base to secure the rocker arm, then slide a paperclip through the hole. Bend and trim to fit. Make sure the paper clip does not extend past the plane of the rocker arm on either side or the latch will hang up. (You can also glue the nut in place, but if you break this then you have to replace the entire base.)
-Slide the latch hinge onto the latch base, making sure the weight section (the extruded rectangle on the arm) is facing down.
-Slide the latch nut unto the latch hinge and fasten with a paper clip. Bend, then trim the paper clip as necessary. Cycle the latch hinge to ensure clearance.
-(Optional) Add rubber bands or springs to the base and rocker for more feedback; you will also have to add a small rubber band around the latch hinge and right side ledge on the latch base to compensate. (I personally find that it's unnecessary.)
Push it open almost all the way - you'll feel a bump. That's the feedback saying where to stop pushing if you want it to latch open. Push again, through the feedback bump, to close. If you push through the feedback bump on the initial opening of the door, it will cycle the latch without locking open.
Please note that if your door hinge is set too close to the wall, this may not work for you.
License
You shall not share, sub-license, sell, rent, host, transfer, or distribute in any way the digital or 3D printed versions of this object, nor any other derivative work of this object in its digital or physical format (including - but not limited to - remixes of this object, and hosting on other digital platforms). The objects may not be used without permission in any way whatsoever in which you charge money, or collect fees.
Comment & Rating (8)