Highly Articulated Action Figure Wrestler PETG/ASA


Print Profile(1)
Bill of Materials

Description
Highly Articulated Action Figure Base
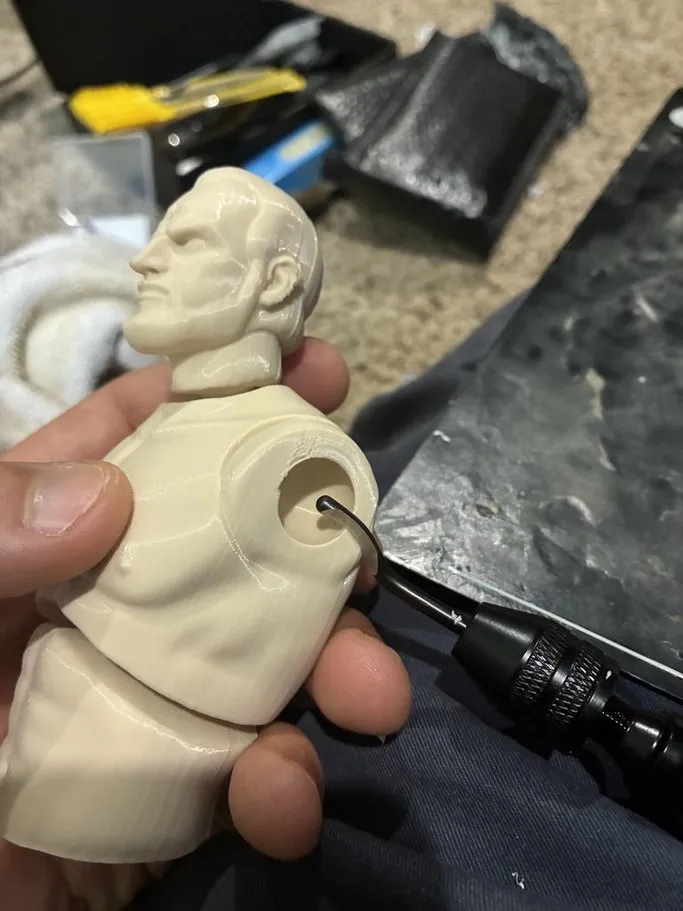
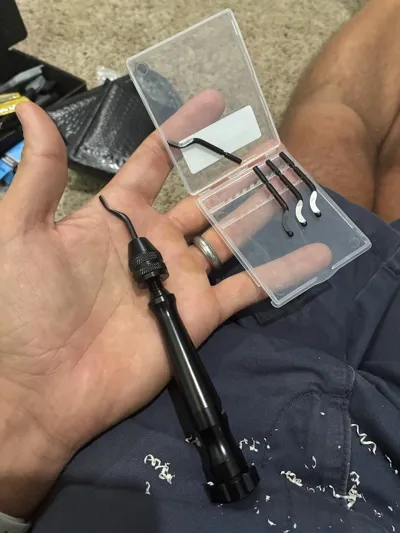
IMPORTANT: THIS IS NOT AN EASY PROJECT!!! A deburring tool (as shown in the images) is REQUIRED to assemble this model correctly, Without one, you will not be able to properly clear the joints for the necessary range of motion. ALONG WITH adhesive on the bed if necessary. IT SHOULD ALSO BE PRINTED IN PETG OR ASA!!!!
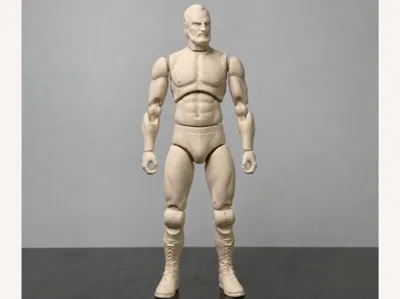
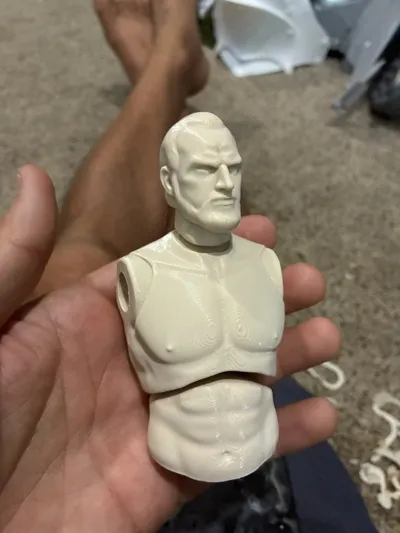
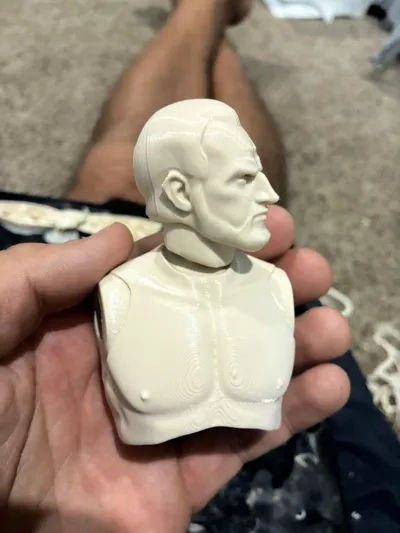
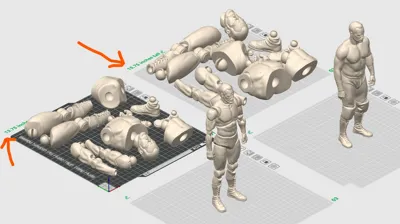
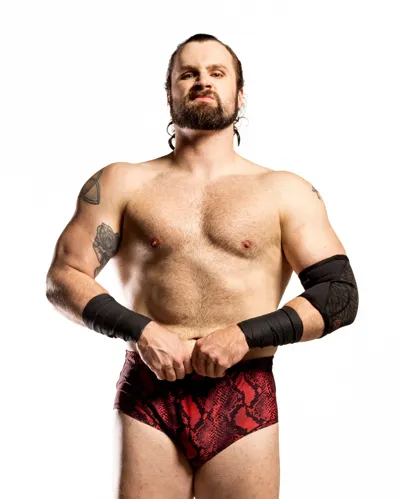
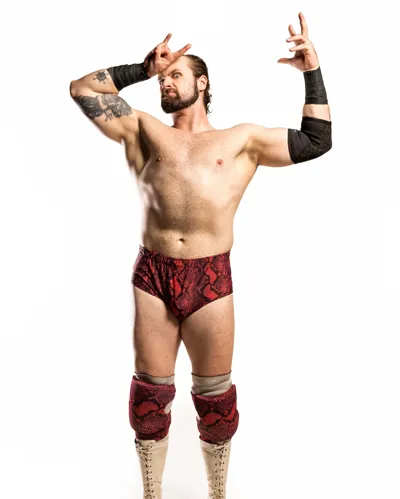
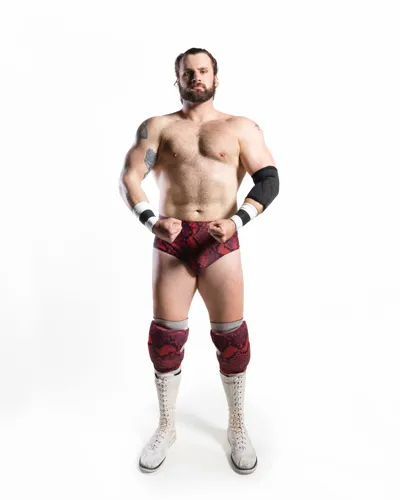
There are 4 print beds, #1 is in pieces standing 13.75", #2 is 15.75" tall and in pieces, 3 LOOKS like it will move but its static, and #4 is a good lifelike model of the model I used, the handsome devil drew hood (@handsome_devil_dh) for a company I partnered with, viral pro wrestling (@viral_pro), in pads.
Detailed Description
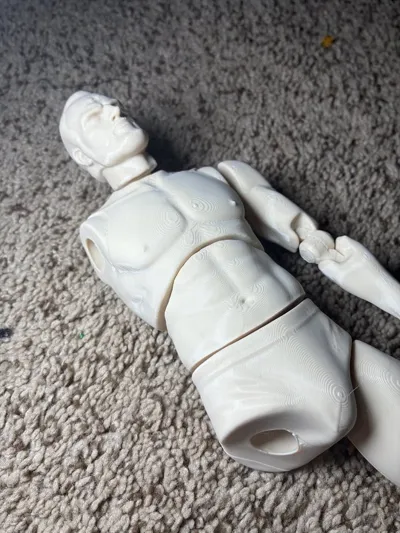
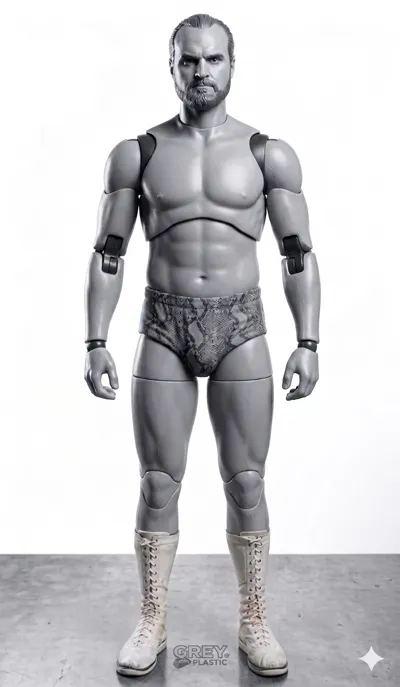
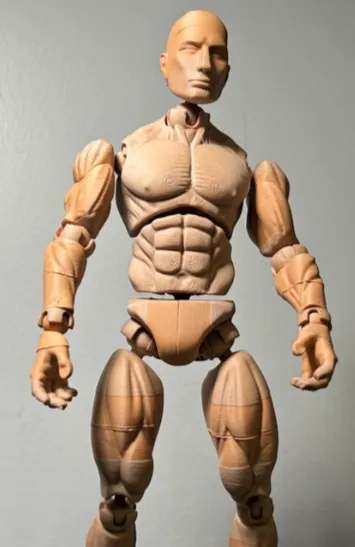
This 3D-printable, highly articulated action figure base is the ultimate blank canvas for your custom character designs. Whether you are creating a unique original character, a stylized hero, or a wrestler, this figure provides the modular foundation you need to bring your vision to life.
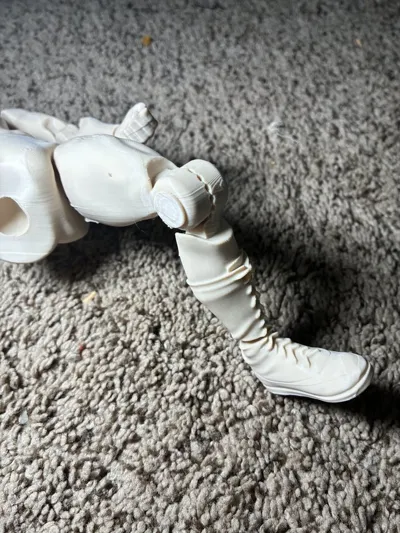
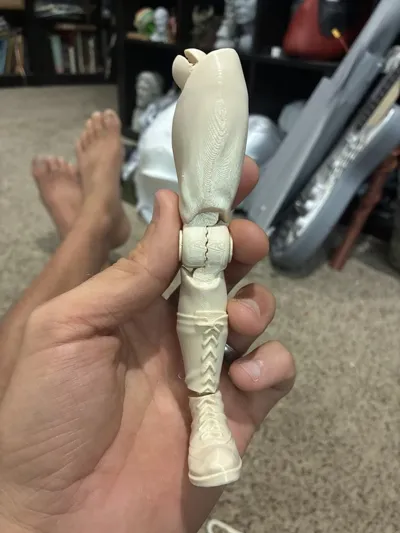
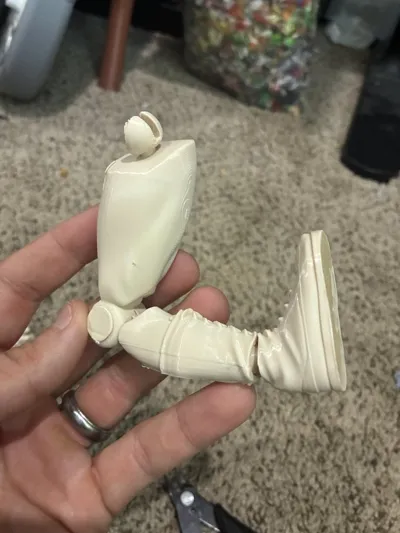
As seen in the attached images, the design features precise ball-jointed segments. These allow for dynamic posing and realistic movement. Because these parts require a tight fit for stability, I recommend printing this project using SUNLU PLA Meta; it offers exceptional layer adhesion, superior flow, and a beautiful matte finish that looks incredible even before painting.
Remixes & Future Projects
The potential for this base is limited only by your imagination:
- Wrestling Figures: Use this base to design your own champions. This specific version is modeled after the handsome devil drew hood (@handsome_devil_dh) for a company I partnered with, viral pro wrestling (@viral_pro).
- Superheroes & Sci-Fi: Use this as a core to sculpt custom armor, capes, or tech pieces.
- Articulated Models: Add custom heads, hands, or gear to fully differentiate your version.
Essential Resources
- Scaling & Prep: If you are adding armor or scaling this for different sizes, use my Cosplay Calipers for precise, real-world measurements.
- Bambu Studio Tutorial: For comprehensive guidance on how to size, scale, cut, pin, and orient this model inside Bambu Studio, watch my video here: https://youtu.be/Ckvo10JxrcEg.
- Coloring Your Prints: If you want to take your customization to the next level with multi-color printing, learn how to remesh and color effectively here: https://youtu.be/8JV66MnJp-4.
Previous Versions
Check out PLA-Boy Version 1 here: [Click Here]

Check out PLA-Boy Version 2 here: [CLICK HERE]
And now, as of 2/3/26, a FEMALE version: https://makerworld.com/en/models/2646181-petg-power-link-ultra-durable-poseable-heroine#profileId-2924724
⚠️ IMPORTANT: Skill Level & Printer Requirements
This is NOT a project for complete beginners. To achieve the tight tolerances and functional hinges shown in the photos, you must have a fine-tuned 3D printer. Also, as stated above, You should print him in PETG if at all possible. Why? PETG is the smarter choice because it offers significantly higher impact resistance and structural durability than PLA, ensuring the figure's delicate hinges won't snap during posing or play. Patient assembly is required, along with a deburring tool!!!. Because this model uses high-friction joints to maintain its poses, you will need to perform some post-processing "surgery" to get him moving!
🛠 How to "Separate" the Custom Hinges
The knee and elbow hinges were designed from scratch to be incredibly tight and stable. They are printed as a single unit and must be "broken apart" after printing to become functional. Follow these steps carefully:
The Lever: Use a thin, flat blade (like a hobby knife or THIN flathead screwdriver) to get under the ends of the hinge shaft on both sides.

- The Initial Crack: Carefully move the blade around the perimeter on both ends of the shaft.
The Wedge: If it remains stuck, wedge the flat blade between the two hinge pieces at the "teeth" of the hinge and TWIST to crack it open.

- The Release: Continue this process, carefully moving and TWISTING until the shaft breaks free and the hinge moves freely.
Refining the Joints: Depending on your print quality and flow rate, you may need to sand down the ball joints (shoulders/hips) for smoother operation.

- BE PATIENT! Forcing it too hard without the proper leverage can snap the limbs. Take your time!
Keywords & Hashtags
#ActionFigure #Articulated #3DPrinting #CustomFigure #DIY #Makerworld #SUNLU #Wrestling #ProWrestling #FigureDesign
And if you've come this far, maybe you've willing to come a little further... - Andy Dufresne #TeachAManToFish
If you want to learn to do what I do (and stay out of my inbox so you can make your own changes to this file), click this link: https://youtu.be/iFfUVc33sTk
You are always welcome to reach out and ask me questions, but know, that AI is INFINITLY smarter than me, so consult any reputable AI model first before asking me!!! #EmpowerYou : )
License
You shall not share, sub-license, sell, rent, host, transfer, or distribute in any way the digital or 3D printed versions of this object, nor any other derivative work of this object in its digital or physical format (including - but not limited to - remixes of this object, and hosting on other digital platforms). The objects may not be used without permission in any way whatsoever in which you charge money, or collect fees.
Comment & Rating (0)