Control Unit/Setup for GeeekPi Acrylic Case RPi


Print Profile(1)
Bill of Materials
- Lüfter 30x30x10 x 1: 5V
- Kippschalter x 6:
Description
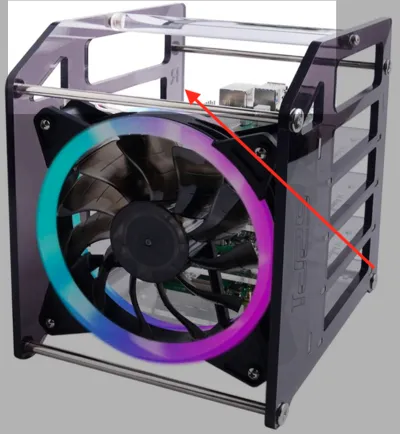
I built a setup for the GeeekPi acrylic case/rack for Raspberry Pi. It naturally works with the 4-layer and 8-layer racks, but switches are only provided for 4 Raspberry Pis:
- 1-4 for the Raspberry Pis
- 1 switch for the fan LED lighting ("L" = Light)
- 1 switch for the fan(s) ("F" = Fan)
The setup is designed to fit into the existing struts of the case.
In the middle, below the Raspberry Pi logo, there is space for a 30mm fan (10mm high).
To use the setup, you still need to get toggle switches (just search for “toggle switches” on the relevant platforms). Then solder them together accordingly and connect them to a 5V power source (I use a 5V12A LED power supply from MeanWell). The Raspberry Pis are then connected to the toggle switches with DIY USB-C connectors. Yes, it's a bit of a hack, but a nice project. And then you can switch the devices separately without having to laboriously disconnect the plug from the device every time.
Have fun.
License
You shall not share, sub-license, sell, rent, host, transfer, or distribute in any way the digital or 3D printed versions of this object, nor any other derivative work of this object in its digital or physical format (including - but not limited to - remixes of this object, and hosting on other digital platforms). The objects may not be used without permission in any way whatsoever in which you charge money, or collect fees.
Comment & Rating (0)