Cyber Loop Lamp - futuristic Sci-Fi light - WLED


Print Profile(1)

Bill of Materials


Description
Boost Me (for free)
Thank you for your support! 🥰
Attention! This model has an increased difficulty level for assembly. The lamp consists of many individual parts spread across multiple plates. Assembly requires soldering skills, special materials and tools, and patience
// UPDATE: With a lot of help from user user_3487393216 I was able to improve my instructions somewhat and also added a wiring diagram to the documents
If any questions arise that I have not yet been able to clarify in the description, please contact me in the comments section
Hello everyone,
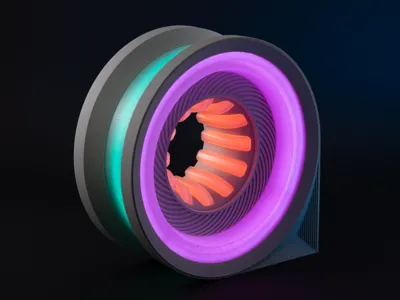
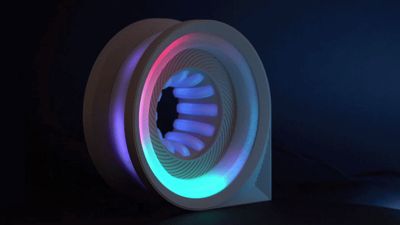
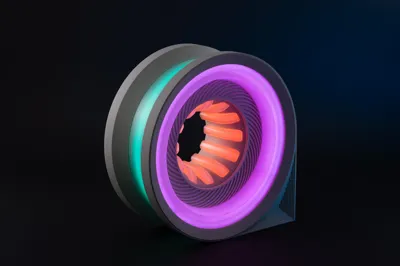
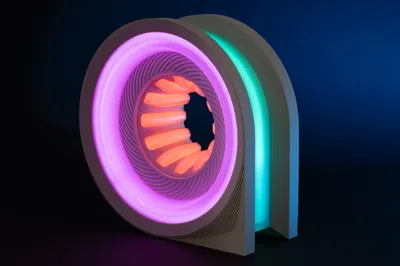
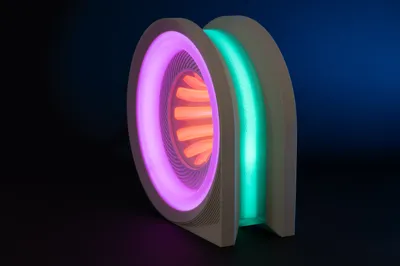
I am pleased to introduce the new Cyber-Loop-Lamp🥳. The lamp impresses with its minimalist yet highly complex housing. The heart of the light is its multi-layered, dynamic lighting concept, which creates a magical depth effect (infinity look)
A very special eye-catcher that will also amaze your guests 😍
The total height is approximately 25 cm / 9.8 inches
An ESP32 controller with WLED software controls the lighting effects. This controls almost 300 LED pixels of a very high-resolution LED strip with 144 LEDs per meter
For those of you familiar with "WLED," it is also possible to equip the lamp with a sound-reactive module, switches, or a remote control. Here I describe the basic installation for control using a WiFi smartphone app
🎨 Filament Selection: The housing should be printed from a slightly darker filament so that no light can shine through. (For a light filament like white or light gray, it is advisable to paint the inner side of the ring housing with an opaque, black acrylic paint so that no light can shine through. I did this with my light model.)
For the inner light diffusers, I recommend exclusively PLA Basic jade white. This has very good light transmission, makes the light beautifully soft, and is somewhat elastic
The outer, transparent diffusers are best printed in PETG Translucent; it is also somewhat elastic
☝️ Printing Tips: The print profile has already been optimized by me and the recommended settings are stored.
I have given the outer contours of the housing and the outer diffusers in transparent PETG a fuzzy-skin look, which fits the overall aesthetic very well
P.S.: It makes sense to follow the specified plate order, then you can already tinker and wire while the other parts are being printed 😉
📋 Parts List:
1x 2m addressable LED strip, 144 LEDs/meter 5VDC, WS2812, IP30
// 💰 alternatively 2x 1m SK6812 RGBW LED strip with white channel, 5VDC, 144 LEDs/m, IP30
1x ESP32 Controller / https://amzn.to/40FU5W8
1x Power supply 5 Volts with 6 Amperes
1x DC Power Jack 5.5 mm x 2.1 mm
Cables, needle-nose pliers, terminals, soldering iron, adhesive.
👉 If something is not available in your region, please contact me or leave a comment
💡Basic Wiring Guide for WLED: https://kno.wled.ge/basics/wiring-guides/
(In my experience, the level shifter can be omitted)
🤖 Recommended LED Strip Length:
1. Funnel: 12 x 8 LEDs = 96 LEDs
2. Upper ring: 101 LEDs
3. Rear ring: 80 LEDs
The electrical installation takes place in the "lower" housing part, where there is a recessed area. I have assigned a separate data output to each of the three light areas on the controller, which makes wiring a bit easier
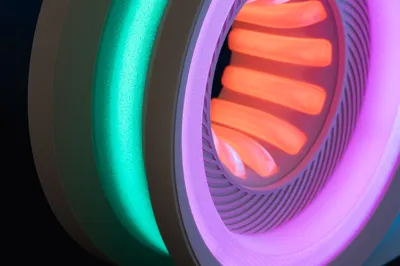
Funnel with 12 Light Segments
The inner funnel / tunnel has 12 light elements connected in parallel, all of which are identically constructed. Each of the 12 LED holders is equipped with 8 pixels of the LED strip, and the wiring is done downwards.
Then the LED strip is first placed on the white diffuser, then on the transparent diffuser. Finally, the finished modules are hooked into the funnel


Attached is a link to a video showing some of the installation steps: Instagram Reel
(unfortunately I have not sufficiently documented all steps, sorry!)
Once all segments are equipped with LEDs and wired, be sure to perform a function test Later adjustments to the cables and LED strips can be somewhat cumbersome
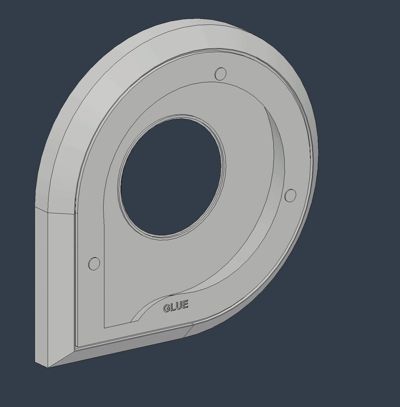
After all LED strips are installed in the upper and lower segments and the diffusers are in place, you can glue the top and bottom parts together
And now I wish you a lot of fun printing, crafting, and programming fascinating lighting effects. I am very much looking forward to pictures of your finished lamp! 📸 🤩


Membership
🚀 Get access to commercial licenses by having an active subscription. This includes all my actual makerworld models and future designs. You’re welcome to sell physical prints of my designs.
Documentation (1)
License
You shall not share, sub-license, sell, rent, host, transfer, or distribute in any way the digital or 3D printed versions of this object, nor any other derivative work of this object in its digital or physical format (including - but not limited to - remixes of this object, and hosting on other digital platforms). The objects may not be used without permission in any way whatsoever in which you charge money, or collect fees.
Comment & Rating (13)