CyberBrick Remote Control Prism Tank (Laser Emitting)


Print Profile(2)


Description
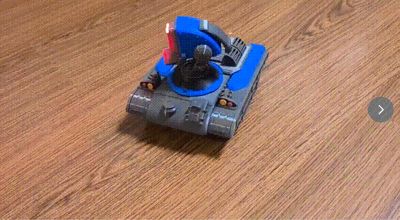
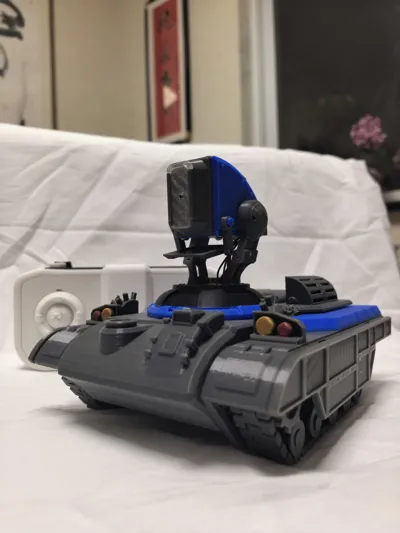
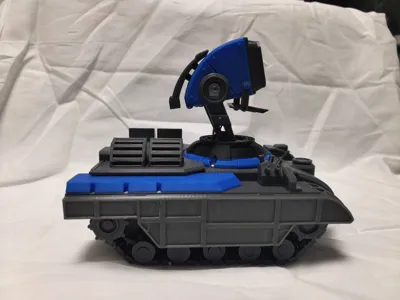
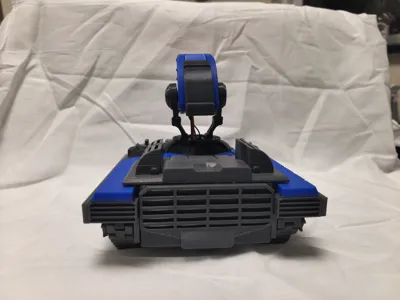
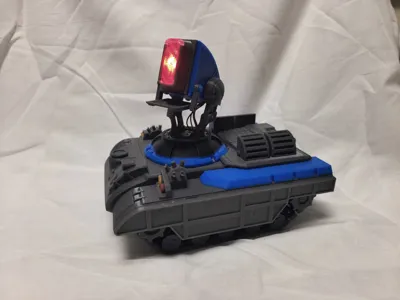
This Prism Tank model is inspired by the classic game Red Alert 2's Prism Tank. It combines the Bambu Lab CyberBrick hardware for an integrated design, creating a movable finished product equipped with a two-axis gimbal, laser emission capability, and autonomous movement. It replicates the classic game vehicle's shape, has a compact overall size, excellent appearance fidelity, and offers both collectible value and the fun of electronic control operation


1. Safety Warning
This product is equipped with a low-power laser emission module, which poses an optical hazard: After the device is powered on and operating, do not look directly into the laser beam. Do not aim the laser at human eyes, faces, or the eyes of any animals. Minors must complete assembly and power-on testing under the full supervision of an adult
2. Accessory Procurement Guide
In addition to the hardware included in the CyberBrick kit, the model also requires four M2.5×8 screws, a laser head, an electronic switch, and other components

The laser head and electronic switch were purchased from a Taobao store. Here are the purchase links:
Laser Head: https://item.taobao.com/item.htm?id=961097538410
Electronic Switch: https://item.taobao.com/item.htm?id=971025287549
The laser is modified with an electronic switch to function like a servo, connecting to a standard PWM control signal. The main controller can output a specific signal to turn on the switch and light up the laser, directly reusing the device's original servo control channel and simplifying hardware wiring
3. Track Assembly Instructions
Track assembly details cannot be fully displayed with static images. Please refer to the dynamic demonstration images below or follow the accompanying assembly tutorial video for step-by-step assembly. (Will be uploaded to Bilibili once organized)
I use toothpicks for track connection. This item is very common and does not require purchasing additional hardware

1. Connect the two tracks

2. Cut off the excess parts

Repeat this process 4 times, paying attention to the direction during installation
4. Remote Control Button Function Description
The accompanying remote control has clearly defined button functions: the left X, Y joysticks control the vehicle's forward, backward, and left/right turns; the right X, Y joysticks control the two-axis gimbal's pitch and rotation; and the top buttons control the laser module's start/stop. Refer to the button labels for quick operation of the entire vehicle

5. Hardware Wiring and Control Principle
A complete hardware connection schematic is provided, intuitively listing all component details and wiring methods for the main controller, motors, laser module, power supply, remote receiver, etc. Following the wiring diagram will enable the full functionality of the machine

6. Project Creation Summary
The Prism Tank model took over a month to develop, undergoing multiple iterations from referencing game concept art for modeling, repeated 3D printing for testing, to debugging electronic control circuits and optimizing gimbal and track structures. During the prototyping process, numerous discarded prints resulted from size adaptation and structural interference issues, leading to a mountain of accumulated waste

This is my first independent development of a complex model combining mechanical transmission, a two-axis gimbal, and laser electronic control. Due to limited experience, there are still many areas in the structural details and wiring layout that could be improved
Friends who like this classic Prism Tank model are welcome to offer more support. I will carefully collect and review all optimization suggestions and improvement ideas. I will then continue to optimize the model structure and electronic control solution based on these suggestions, iterating to perfect new versions
Boost Me (for free)
If you like it, you can support me
Additional Notes:
1. The quantity of M2.5×6 screws indicated in the assembly guide is an estimated value and has not been individually counted. Please refer to the actual quantity required for physical assembly
2. The laser defaults to always-on after the device is powered on, and this default setting cannot currently be modified in the CyberBrick client; if you do not want the laser to be on after power-up, you can press the circular button on the body to turn it off
3. This unit does not feature a conductive slip ring structure. Please do not rotate the gimbal more than one full turn at a time, as excessive twisting can cause internal wires to detach and components to be damaged. A slip ring structure will be added in subsequent revisions and optimizations
Version Update Notes (20260606):
1. The old version of the slicing file was missing the Bambu Lab original gearbox model, but the new version has completed the corresponding model files
Documentation (1)

License
You shall not share, sub-license, sell, rent, host, transfer, or distribute in any way the digital or 3D printed versions of this object, nor any other derivative work of this object in its digital or physical format (including - but not limited to - remixes of this object, and hosting on other digital platforms). The objects may not be used without permission in any way whatsoever in which you charge money, or collect fees.
Comment & Rating (0)