Self-moving caterpillar platform


Print Profile(0)
Description
Wishing you good health and good luck, whoever took the time to read this!
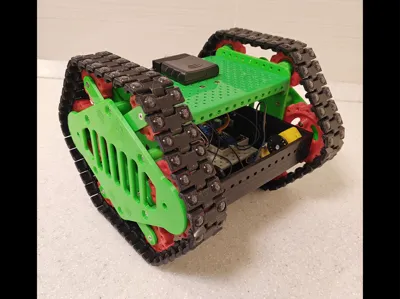
I present to you a model of a self-propelled tracked platform. The platform's undercarriage is designed using a "tracks encircling the entire body" design. Four TT geared motors (two per track) are used as motors. The power source is two 18650 batteries, which can be charged via a USB Type-C port. This model uses tracks made from rigid tracks shoes. To reduce friction, ball bearings are used in the undercarriage.
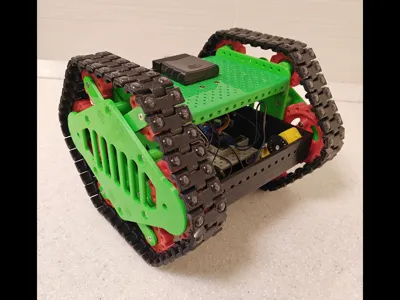
The final result is this:

Caterpillars.
So, let's start with the tracks. Our tracks are printed from black PETG plastic and look like this:

The tracks are fitted with anti-slip inserts, which are made from self-adhesive furniture door dampers (8mm in diameter). Like these:

For these inserts, special mounting spots with a depth of 1.2 mm are made.


The tracks are connected to each other by pins made from sections of the same filament (diameter 1.75 mm) from which they are printed, the total number of tracks is 42 per track.
The printing of the tracks was carried out without supports, in this position:

This ensures minimal post-printing rework. The holes in the fork section of the track must be cleaned with a 1.8 mm drill, and in the tail section - with a 2 mm drill.
General design
All parts of the model were printed on a Tronxy-D01 3D printer. The tracks and torsion springs were printed in PETG, while the remaining parts were printed in PLA.
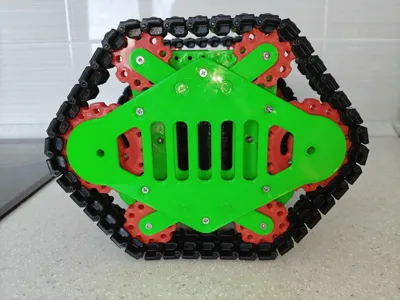
General front view:

General view from the rear:

Left view:

Front and back view:


Top and bottom view:


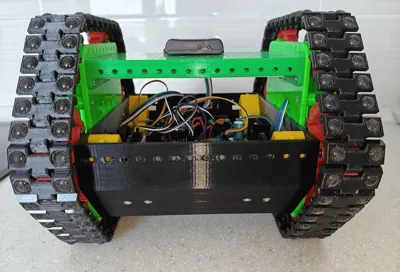
Top view with the top cover removed:

As was already mentioned at the beginning, the basis of the chassis is made up of tracks that cover the entire body.
Chassis (side wall removed):

Chassis, view from inside the body:


The track and support rollers are spring-loaded with torsion-type elastic elements, providing track tension and a soft suspension for the chassis. The torsion springs are printed with PETG plastic, as PLA does not have sufficient elasticity.

All chassis rollers are equipped with Chinese 6800Z ball bearings measuring 10x19x5.
Diagram and assembly procedure of the support roller unit:


Diagram and assembly procedure of the drive roller unit:


Chassis assembly diagram and order:


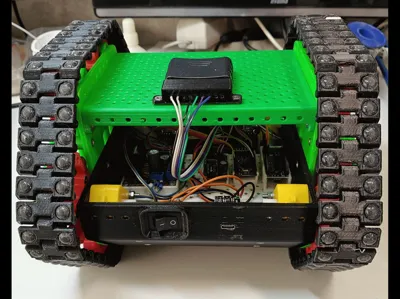
Component arrangement inside the case:

Battery unit:


Control system.
Schematic diagram:

The model is controlled using the PS2 remote control. The left stick controls the left track, the right stick controls the right track.
The model's movement is controlled in a simple way - using a "tank" scheme, changing the frequency and direction of rotation of the track motors using a PS2 remote control.
The track motors utilize feedback via optocouplers U4 and U6 and perforated disks on the shafts. This obvious increase in complexity is offset by stable motor control. Motor control is accomplished via PWM, using module U5 with a dual-channel L298N H-switch microchip and a separate U2 Arduino Mini controller.
The main control is implemented on the U3 Arduino Nano controller. This controller communicates with the PS2 U1 receiver and controls the motor controller via the I2C channel.
Resistors R1 and R3 – pull-up of I2C signal lines.
Resistive dividers R2, R6 and R4, R5 are required if you have a PS2 receiver with a 3.3V power supply. If the receiver has a 5V power supply, dividers are not needed, and all receiver pins can be connected to the controller directly.
The model is powered by two 18650 lithium batteries. The batteries are charged using a U14 charging and balancing module via a USB Type-C connector.
Comment & Rating (0)