EarthwormJim New Junk City Base (Multipart No AMS)


Print Profile(2)
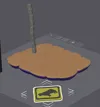
![[original] 0.12mm layer, 2 walls, 5% infill.](https://makerworld.bblmw.com/makerworld/model/US68bd4695d09bb4/799796598/instance/7fd2334f18e46060.png?x-oss-process=image%2Fresize%2Cw_100%2Fformat%2Cwebp)
Description
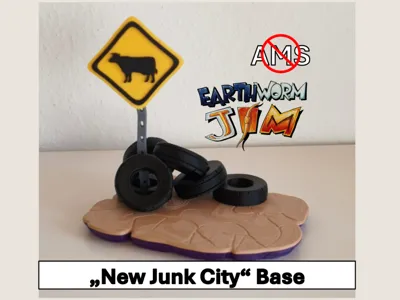
EarthwormJim - New Junk City Base (Multipart, No AMS)
Groovy! Complete your ultimate retro gaming display with the diorama base for my Earthworm Jim figure!
Boost Me (for free)
Please consider giving me a Boost! I’ve invested a lot of time, energy, and many test prints into perfecting this design to ensure it’s ready for you to enjoy. Your support means the world to me!
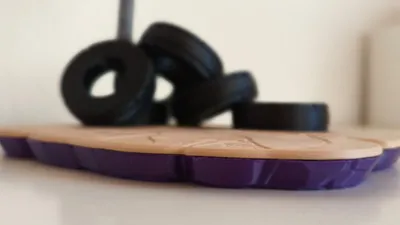
This model directly replicates the iconic atmosphere of the very first level of the game: New Junk City.
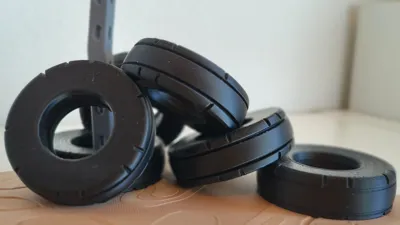
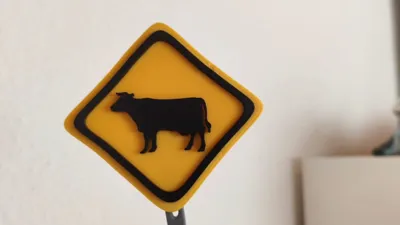
Featuring a stacked pile of old tires and the legendary, ominous "Cow Crossing" warning sign, this base is the missing piece to bring your favorite annelid superhero to life.
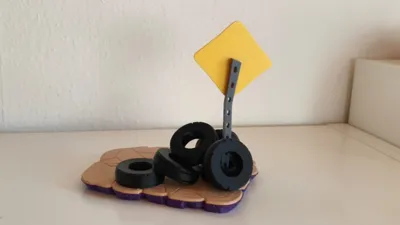
No AMS? No Problem! (Multipart Design)
This model is completely optimized for every single Maker, regardless of your hardware setup:
- Print by Color: Every section is separated into individual files.
- Zero Waste: No multi-color switching means zero filament poop and fast print times!
- Perfect Fit: Engineered with tolerances so everything slots together beautifully. A comprehensive, step-by-step assembly manual is included.
The Base measures 17.6 cm in height when fully assembled. With Jim on it its 24.9 cm in height.
My Earthworm Jim figure:

Check out my Multipart Models!:
Monkey D. Luffy Gear 5 transformation

Cute Halloween VOL1:

Cute Halloween VOL2:

Cute Cows

Please read before printing:
This model features fine details and delicate structures.
Make sure your print bed is clean and free from dust, grease, or residue to ensure strong adhesion.
Place your printer on a stable, vibration-free surface, and confirm that vibration compensation is correctly calibrated.
Before printing, double-check that your filament profile matches the material and that your bed temperature is properly set.
For more tips on this topic, check out this video on YouTube. video (Youtube).
Print Recommendation:
I recommend printing this Models with the orignal intendet Print Profil: [original] 0.12mm layer, 2 walls, 5% infill.
Support Structures:
Additional supports have been added to minimalize the risk of print errors.
Brim is enabled in for increased print stability.
The Design and my Print Profil is designed with minimal but necessary supports.
Assemble:
For assembly, I recommend using PLA glue or plastic glue, preferably a fast-drying one.
I personally use German super glue. It dries within a few seconds and creates a very strong bond.
I always recommend performing a dry fit test first.
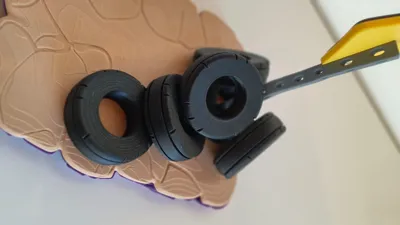
First, the sign. Glue the cow and the border onto the yellow sign. Now, glue the sign onto the pole. The recess in the pole helps with alignment here.

Glue the pins into the purple plate. Then, glue on the beige plate, using the pins for alignment. Next, align and glue the tires in place using the recesses and pins. Finally, glue the sign through the tire into its designated recess.

Check out my other Models!
License
You shall not share, sub-license, sell, rent, host, transfer, or distribute in any way the digital or 3D printed versions of this object, nor any other derivative work of this object in its digital or physical format (including - but not limited to - remixes of this object, and hosting on other digital platforms). The objects may not be used without permission in any way whatsoever in which you charge money, or collect fees.
Comment & Rating (12)