Any Filament Master Calibration Suite


Print Profile(1)
Description
Boost Me (for free)
If you Appreciate the amount of work I have put into this, I would appreciate a like, comment or a boost. downloading and printing from the file help me immensely. Thank you for your support!.
GoFundMyH2C!
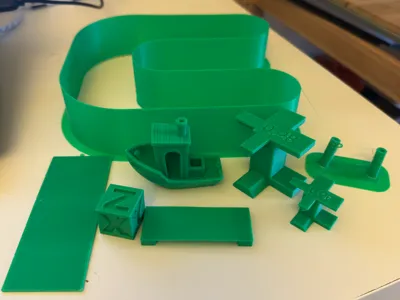
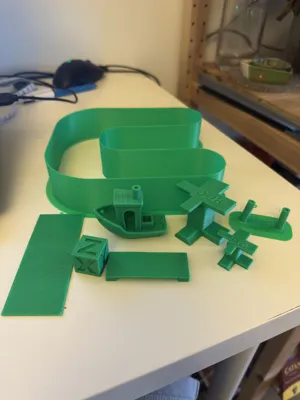
Master Filament Calibration Suite
One Model. One Workflow. Every Calibration Test You Need.
I have grabbed a bunch of different models made by other users and some of my own to help you calibrate and learn yourself. Please if this model helps you I think these guys deserve a like, download and print from their profiles.
Creators:
Me - MVS and Process =)
Make Wonderful Things - Bridge Test.
jimcorner - Flow Ratio Test.
Uncle Jessy - Support Test.
Tired of searching through dozens of separate calibration models every time you open a new spool?
The Master Filament Calibration Suite brings together the essential calibration tests required to tune almost any filament into a single organized workflow. Instead of guessing where to start or jumping between unrelated tests, this suite follows a logical order that allows each calibration to build on the last, helping you create accurate filament profiles with less wasted time and material.
Whether you're tuning PLA, PETG, ASA, ABS, TPU, Nylon, or specialty materials, this workflow is designed to help you achieve consistent, repeatable results.
Why This Exists
Many calibration collections provide the tests but not the process.
The order of calibration matters. Running a flow test before finding the correct temperature, or fine-tuning Pressure Advance before establishing proper extrusion settings, can lead to misleading results and unnecessary reprints.
This suite is organized to follow a practical calibration sequence that progressively refines your filament profile from broad adjustments to fine tuning.
Recommended Calibration Workflow
1. Pressure Advance (Rough)
Establish a baseline Pressure Advance value to improve extrusion consistency and reduce corner artifacts before moving on to other calibrations.
2. Temperature Tower
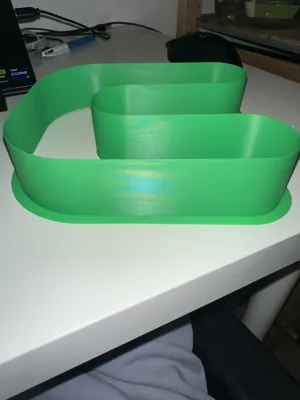
Identify the optimal printing temperature by evaluating surface quality, layer adhesion, stringing, bridging, and overhang performance.
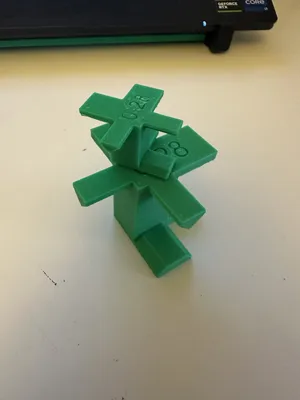
3. Maximum Volumetric Speed (MVS)
Determine the maximum flow rate your printer and filament combination can sustain while maintaining print quality.
4. Flow Rate (Rough)
Quickly narrow down the correct extrusion range using larger adjustment steps.
5. Flow Rate (Fine)
Fine-tune extrusion settings for improved dimensional accuracy, cleaner surfaces, and better overall print quality.
6. Pressure Advance (Fine)
Perform a final Pressure Advance calibration after flow and temperature have been optimized for the most accurate result.
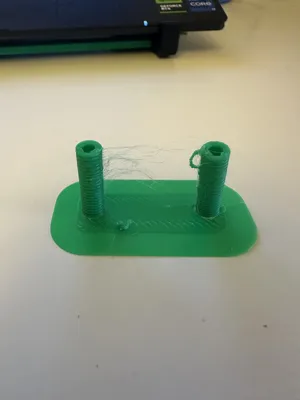
7. Retraction
Reduce stringing, blobs, and unwanted oozing by finding the optimal retraction settings for your filament.
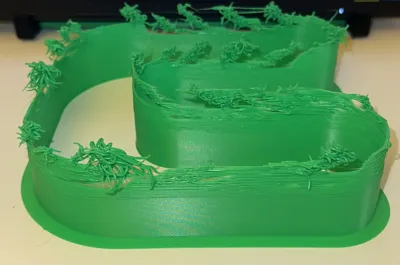
8. Bridging Flow
Calibrate extrusion specifically for bridge performance to improve unsupported spans and reduce sagging.
9. Bridging Speed
Determine the optimal bridge printing speed to achieve cleaner, stronger bridges with minimal drooping.
Included Documentation
The PDF attached will explain the process and has the pictures for where to put what and how to use this calibration suite.
Each test includes an explanation of:
- What the test measures
- How to evaluate the results
- Which slicer settings to adjust
- How much to adjust them by
- What common failures look like
For users who want a deeper understanding of the calibration process, detailed documentation may also be provided through an accompanying Google Doc covering each test in greater depth.
Designed For
- New filament profiles
- Unknown filament brands
- Specialty materials
- Printer tuning
- Consistent print quality
- Faster setup of new spools
- Reduced trial and error
The Goal
The goal isn't simply to pass a collection of calibration tests.
The goal is to provide a repeatable workflow that helps makers quickly and confidently tune any filament while minimizing wasted material, failed prints, and frustration.
If this suite helps you save time, filament, or failed prints, consider leaving a like, rating, or boost so other makers can discover it too.
Happy Printing!
Boost Me (for free)
If you Appreciate the amount of work I have put into this, I would appreciate a like, comment or a boost. downloading and printing from the file help me immensely. Thank you for your support!.
GoFundMyH2C!
Documentation (1)
License
You shall not share, sub-license, sell, rent, host, transfer, or distribute in any way the digital or 3D printed versions of this object, nor any other derivative work of this object in its digital or physical format (including, but not limited to, publishing derivative works outside the Makerworld platform or hosting on other digital platforms). The objects may not be used without permission in any way whatsoever in which you charge money or collect fees. Subject to the above restrictions, derivative works may be published only within the Makerworld platform, and all such derivative works must be licensed under the same SDFL‑C license, without modification or additional terms. You may download the digital versions of this object, 3D print it, and display images, videos, or usage demonstrations of 3D printed versions of the object on personal social media platforms or Makerworld official channels, provided that no digital versions of the object are shared or distributed.
Comment & Rating (7)