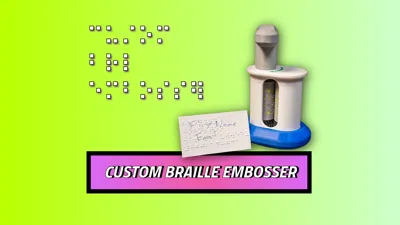
Custom Braille Card Embosser - Hand Operated


Print Profile(1)

Description
About
I started this project last year because I wasn't able to find a quick, low cost way to make custom braille business cards. Custom business card braille embossers aren't easy to buy anymore, and the remaining options usually mean a slate and stylus, a Perkins style brailler, or a fully electronic embosser (which is very expensive). Those tools all have their time and place, but none of them are a simple and inexpensive way to make a small batch of custom cards.
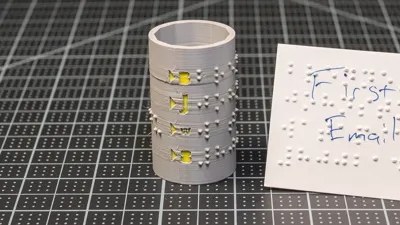
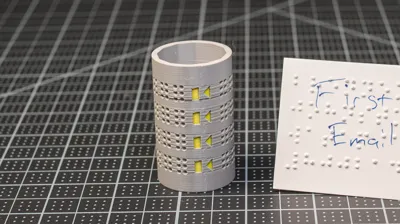
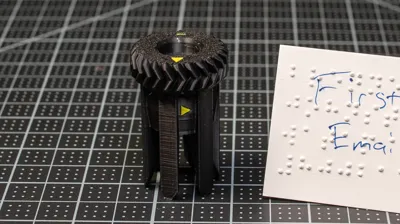
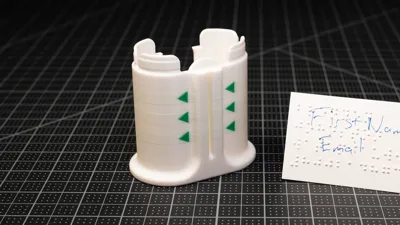
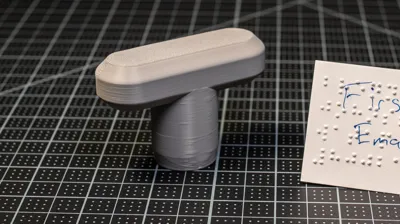
The device itself is pretty simple. It's fully 3D printed, hand operated, and snaps together from 10 parts with no fasteners, no springs, no glue, and no electronics. The braille message lives on a separate embossing cylinder paired with a matching counter cylinder. So, when the text changes, you only need to print a new embossing cylinder.
For the customizing part of the project, there is a browser based tool that handles the braille translation (powered by Liblouis) and generates both cylinder STLs for you. Your text and personal information never leaves your browser.
But if you just read that last sentence and said "NO THANK YOU!", that's completely fair. So there's also an OpenSCAD version included for anyone who prefers that workflow. The one tradeoff is that you'll need to grab your braille translation from a third party website and paste it into the OpenSCAD project yourself, which adds an extra step and is probably a steep learning curve if you haven't worked with OpenSCAD before.
The whole project is open source. My real hope is that others will develop this further than I'd ever have time to. There's lots of room for someone to refine the design or branch out into formats I never got around to, like full size pages, or different card sizes.
Parts List
Files |
|---|
| Embossing Device STLs |
| Example Customized Cylinder STLs |
| Sliced print profiles (.3mf) |
| CAD source: STEP + OBJ (for remixers) |
| Note: Fusion360 project file available at Printables |
10 device parts |
|---|
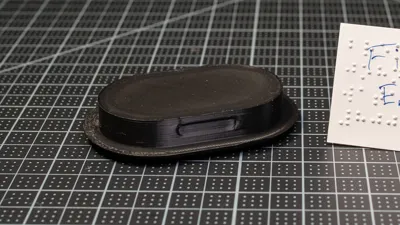
| P01 - Body Base |
| P02 - Body Top |
| P03 - Embosser Holder - A1 |
| P04 - Embosser Holder - A2 |
| P05 - Counter Holder - B1 |
| P06 - Counter Holder - B2 |
| P07 - Grip Extension Bottom |
| P08 - Grip Extension Top |
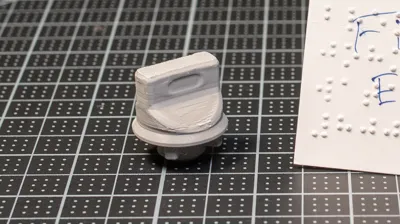
| P09 - Handle Connector |
| P10 - Handle Grip |
Two Ways to Generate Custom STL |
|---|
| Primary Web Based: Open https://braille-card-and-cylinder-stl-gener.vercel.app, follow Video #1 below, "Customizing braille, downloading STLs, 3D-print settings". |
| Backup OpenSCAD offline alternative: The OpenSCAD customizer is the offline, power user, backup for anyone not wanting to, or not able to use the browser based tool. |
| Note: Card thickness must match the cylinder thickness setting used. For example, 0.3 mm cylinders with 0.3 mm card and 0.4 mm cylinders with 0.4 mm card. |
Custom Cylinder Print Settings (Bambu Lab X1C tested only) | |
|---|---|
| Base preset: | High Quality (or any sub-0.2 mm layer-height profile) |
| Wall generator: | Arachne (not Classic) improves recessed dot accuracy |
| Seam control: | Highly recommended to use Seam Painting on the indicator letter and triangle area only, to keep the seam off the braille dots |
| Speeds (roughly half of Bambu Studio defaults): | initial layer 40, infill 75, outer wall 50, inner wall 75, small perimeters 40 (accelerations also halved) |
| Supports: | none |
| Brim: | none |
| Material: | basic PLA tested; PETG should also work with tuning |
| Measured: | 24.68 g, 8.14 m, ~$0.62 at $25/kg PLA, 3 h 5 min total |
| Note: If clean dots come out at default speed on your printer, keep the faster settings. If dots look fuzzy or under-extruded, slow the print as the first troubleshooting step. |
Assembly

| Tutorial Videos | |
|---|---|
Customizing braille, downloading STLs, 3D-print settings | |
Assembling the 3D-printed parts | |
Using the completed Custom Braille Embosser |
|
Directions |
|---|
| Sort the printed parts. Identify the two cylinders; the embossing cylinder has raised dots, the counter cylinder has recessed dots. Identify the matching holder pairs by the mark on the side: plus "+" (P03 + P04) goes with the embossing cylinder; minus "−" (P05 + P06) goes with the counter cylinder. Keep the two groups separate so they do not get mixed up. |
| Test fit each cylinder into its matching holder pair. Slide the cylinder in only partway first. The fit should be snug but still removable. If it is too tight to pull back out, sand the tight surfaces lightly and try again. Once the fit feels right, push the cylinder fully home into both holder halves. |
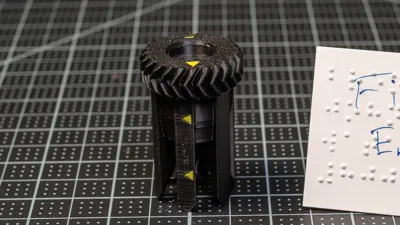
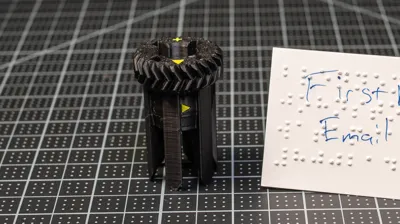
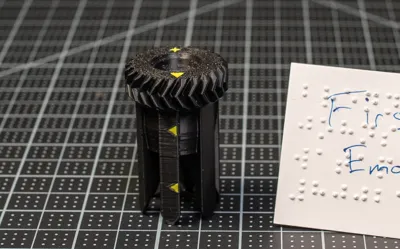
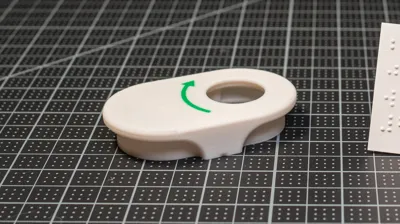
| Confirm the triangle indicator positions on each finished cylinder assembly. Every holder has triangles on the top, sides, and bottom. The embossing cylinder side triangles point RIGHT; the counter assembly's side triangles point LEFT. When the two assemblies are brought together the top and bottom triangles should point directly at each other, the side triangles should mirror each other, and the gear teeth should interlock cleanly. |
| (Optional) Install the Grip Extension before adding the cylinders. Slide the top piece (P08) down over the Body Base (P01) from above. Set the bottom piece (P07) on a flat, solid surface, line up the base + top above it, and press down firmly until it clicks into place. Skip this step if you do not want the longer grip. |
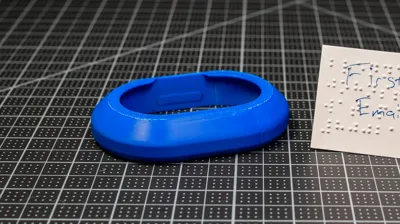
| Test fit the Body Top (P02). Snap it onto the Body Base once and remove it again to confirm it seats and releases cleanly. If it is hard to pull off, brace the lip of the lid against a solid surface and pull down to pop it off. Set the lid aside for now. |
| Install both cylinder assemblies into the Body Base. Hold the two aligned cylinder assemblies in one hand, palm facing up and bring the Body Base over them with your other hand. Double check the orientation: embossing cylinder on the LEFT (X-shape on top); counter cylinder on the RIGHT. Slide the assemblies in gently. At about the halfway point they should stay put on their own. Re-check the triangle alignment once seated. |
| Insert the Handle Connector (P09). Its X-shaped end drops into the matching X-shape on top of the embossing-cylinder holder (left side). |
| Snap the Body Top (P02) back into place over the cylinders. Press straight down until it clicks. |
| Snap the Handle Grip (P10) onto the Handle Connector. Press down until it clicks into place. |
| Test the mechanism. Rotate the handle a couple of turns. It should feel a little stiff but not difficult. If rotation feels jammed or hard, pull the lid off and re-check the alignment (embossing left, counter right, triangles mirrored). |
How to Use |
|---|
| Align the indicator triangles on both cylinders so they point directly at each other (starting position). |
| Rotate the device so the rollers are horizontal. |
| Drop a card of 0.3 mm or 0.4 mm between the rollers. |
| Turn the handle forward about a half turn. |
| Verify dots are embossing correctly |
| Roll the card forward and backwards several times to fully emboss the dots |
| Note: To change the message, pull off the lid, swap in a new embossing cylinder, realign the triangles, and continue. |
Troubleshooting |
|---|
| Dots flat topped or crushed — Card thickness doesn't match the plate pair. Use the matching 0.3 mm or 0.4 mm pair. |
| Dots too shallow or missing — Cylinder print quality. Reprint cylinders using the Instructions above. |
| Card braille dot tears — Card too thin try using the 0.3 mm thickness setting. |
| Hard rotation — Cylinders misaligned. Remove the lid, realign triangles, embossing-left and counter-right. |
| Cylinders hard to swap — Use a small flathead screwdriver carefully to pry upwards. |
This is an open hardware project |
|---|
| Hardware: CERN-OHL-W v2 |
| Documentation, photos, videos, written tutorials: CC BY-SA 4.0 |
| Project software/scripts: GPL-3.0-or-later |
| Customizer software (deployed web app AND vendored OpenSCAD copy in this download): PolyForm Noncommercial 1.0.0 — free for personal, educational, and non-commercial use; commercial use is not permitted. |
More Info & Credits |
|---|
| Device designed by Brennen Johnston. |
| Plate generator code from the companion projects braille-card-and-cylinder-stl-generator (web-based, primary) and braille-stl-generator-openscad (OpenSCAD, alternative). |
| Braille translation by the open-source Liblouis library. |
| Project made possible with the support from the Washington Assistive Technology Act Program (WATAP) - a statewide program that helps Washingtonians of all ages and abilities make informed decisions about, and gain access to, assistive technology. Learn more: https://watap.org/ |
| Project made possible with the support from the University of Washington Center for Research and Education on Accessible Technology and Experiences (UW CREATE) - an interdisciplinary research center whose mission is to make technology accessible and to make the world accessible through technology. Learn more: https://create.uw.edu/ |
| Documentation template by Makers Making Change / Neil Squire Society (CC BY-SA 4.0). (Coming Soon) |
| Related earlier braille project: Better Braille Alphabet Board |
Note: If you build one, please post a comment or make. Thank You!
Comment & Rating (3)