Side-Access Power Switch Extender for X2D P2S P1S


Print Profile(1)
Description
The model details are just below—feel free to scroll down!
Boost Me (for free)
Thanks for checking out my design! If you liked it, a Boost would mean a lot. I truly appreciate every follow, download, like, and boost. Thank you for your support!

- Making 3D Printing More Fun & Functional. -
◀ Printer Upgrade Collection ▶


◀ My Favorite / Previous ▶


Overview
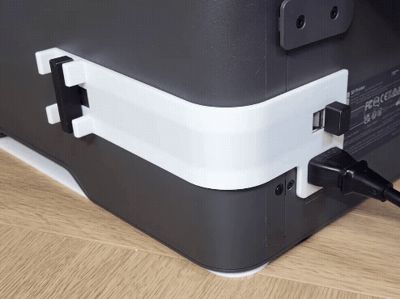
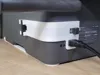
A mechanical side-switch extender for Bambu Lab 3D printers (Type:Core XY) that routes the rear power switch to the side.
Why I Created This
Reaching for the printer’s rear power switch is a daily hassle, especially in tight spaces. I wanted a way to turn the machine on and off without stretching my arm or moving the printer just to find the switch.
I designed this extender to bring the power control right to the side. Now, you can operate the switch instantly and comfortably from a natural, front-facing position.
Why this model?
Turn off your printer in 1 second—even in tight spaces
No more reaching around to the back of your printer. Perfect for tight setups, enclosures, or server racks where rear access is blocked or restricted.
Crisp, zero-lag actuation with no friction or play
Sliding the side knob triggers the rear rocker switch instantly.
Compatibility for Bambu Lab Series
- P2S
- X2D
- P1S
- X1C
- P1P
Quick Guide
- Printing (Recommended Material): It is recommended to print this model in PLA. Other materials like ABS or PETG may cause tight tolerances, potentially making assembly difficult and the slider mechanism stiff.
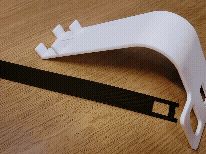
- Ribbon Insertion: Slide the Flexible Slider Ribbon through the internal curved track of the Main Body.

- Knob Attachment: Snap the Switch Knob directly onto the front peg of the ribbon until it clicks.

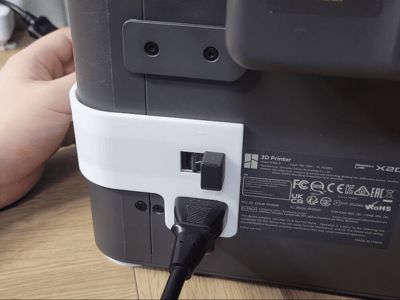
- Rear Connection: Clamp the Switch Actuator over the bridge at the rear tip of the ribbon, then push the Lock Pin through to sandwich and lock it.
 ▶
▶ 
- Mounting: Align the Switch Actuator over the stock power switch, then push the 3-pin power cord firmly into the socket to clamp the entire assembly against the chassis.(Note: Due to subtle cable tolerances, the fit may vary slightly.)

Operation: Slide the side knob Forward (Y-minus) to turn the power ON. Slide it Backward (Y-plus) to turn the power OFF

Design Philosophy
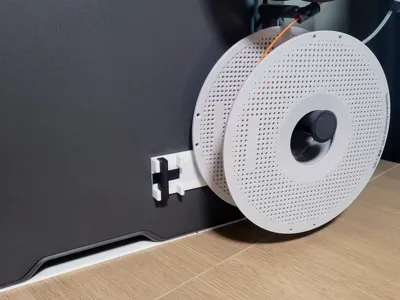
- Exquisite Positioning (Zero Interference) The switch has been extended to a precise, calculated position that never interferes with the chassis handle—ensuring the printer remains fully portable—while completely avoiding any clearance issues with the stacked spools or filament on the back.
- Safety-First Slide Mechanism To eliminate the risk of accidental shutdowns, a slide switch mechanism was chosen over a standard push button. This ensures that even if you bump into the printer or touch it unexpectedly during operation, the power will not be cut off. It requires intentional action to operate.
- Bi-directional Access via Lock-Pin For maximum accessibility, the mechanism is linked directly to the lock-pin assembly. This allows you to actuate the power switch from either the side knob or by directly moving the lock-pin from the back, ensuring seamless operation even in tight enclosures or during rear maintenance.
🛑 Use at your own risk. The designer is not responsible for any damage caused by use or misuse of this model.

License
You shall not share, sub-license, sell, rent, host, transfer, or distribute in any way the digital or 3D printed versions of this object, nor any other derivative work of this object in its digital or physical format (including - but not limited to - remixes of this object, and hosting on other digital platforms). The objects may not be used without permission in any way whatsoever in which you charge money, or collect fees.
Comment & Rating (68)