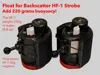
Float for Backscatter HF-1 Strobe +220g buoyancy!


Print Profile(1)
Description
Boost Me (for free)
If you find this design useful, please share your appreciation in the form of a Boost. Your support helps to encourage and reward creators that freely share their designs to the community!

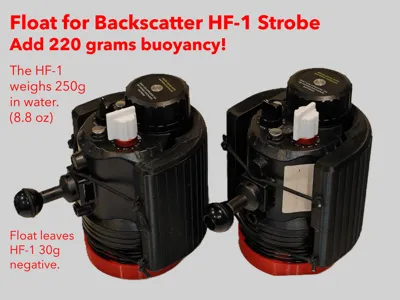
Float for Backscatter HF-1 Strobe
Add 220 grams buoyancy!
The Backscatter HF-1 is one of the best strobes for underwater photography, but it's biggest drawback is how much it weighs in water.
The HF-1 is 250 grams (8.8 oz) negative in water with batteries.
This 3D printed float will add 220 grams of buoyancy leaving it just 30 grams negative. (1 oz) You don't want to have the strobe be positively buoyant. Slightly negative is easier to handle and balance the overall system.
Balancing your rig is important. If you need to add additional buoyancy to your camera rig, I suggest using float arms or Stix jumbo floats on the arm segment closest to your housing. Leave the second arm connected to the HF-1 without additional buoyancy.
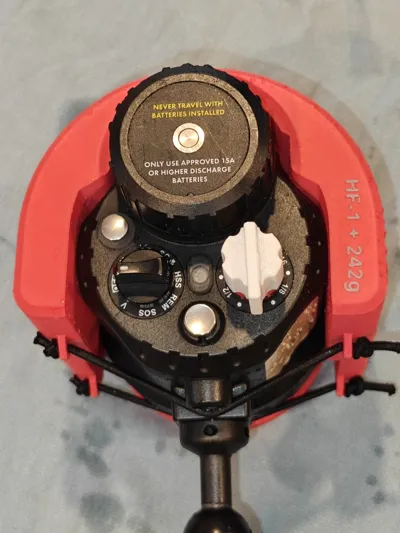
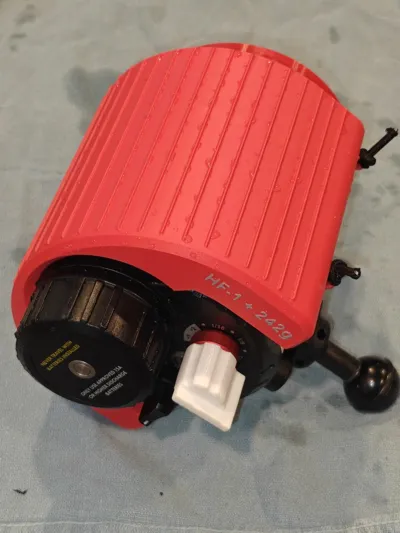
Attach Float to the HF-1:
The float has anchor points that will allow you to thread 1/8 inch (3 mm) bungee cord. Many divers keep 1/8 bungee on hand as it is so useful. It can be bought in bulk online or at any dive shop. Tie a simple overhand knot at each end of the bungee to keep it from slipping thru the anchor. It should be just slightly taught with plenty of elasticity to pull over the strobe and keep it snug.
I have only tested to depths of 130ft/40m, but they may survive greater depths. As these floats are completely external to the strobe and housing, there is no risk to your equipment should they fail.
Testing your floatation:
After you have printed and done any needed cleanup of the brim and any sanding required, wash and dry it carefully. Using a digital counter scale with 0.1 gram accuracy, weight the floatation port. Write this value down, perhaps on a bit of painter’s tape place inside the ring. After your initial dives with the ring, remove and dry it carefully. Shake it around. Hear any water? Weight it again. If the recorded weight has changed, your float probably leaked. (Note: You might see about 0.5 gram extra weight after drying. I have found that ABS/ASA takes few days to fully dry after diving, even when it looks dry.)
If your float gains 1.0 grams or more, it probably took on water. Carefully review the printing parameters. If your initial print was not VERY CLEAN off the printer, you might have to make adjustments and try again.
Note before printing: This is a technical and exacting print. It requires very specific and exact filament and printing parameters. If you ignore or change the defined print profile and settings it is very likely that your float will not work. Surviving at 4 atmospheres of pressure 100 feet underwater requires a very strong and watertight object. These settings ensure that your float will survive to at least 130ft/40m. The float attempt to strike a balance between strength and weight, maximizing buoyancy while minimizing dry weight. They could be made stronger at the expense of buoyancy, or lighter at the expense of survivable depth.
Print Preparation:
To get the strongest and most successful part possible, it is recommended to use a printer with a heated chamber. The Bambu H2 series and X2D all meet these criteria as of May 2026. Printing ASA or ABS without a 65C heated chamber will result is weaker layer bonds. You want this part to be as strong as possible. I have also created versions of this part with PETG, but this filament is heavier. ABS or ASA are very strong with less mass. If you choose to attempt PETG, the settings for filament and slicer listed below should be largely the same. (substitute nozzle temps 5C higher than the default for PETG rather than the ASA values suggested)
After printing, carefully remove all of the support material. If there is stringing, blobs, or lines, the can be sanded using medium grit 400 and fine grit 1200 sandpaper. After sanding wash the part with soap and water using a toothbrush. Repeat sanding if necessary. If the float ring slips easily over the port itself, you should be good to go.
Print Profile Settings:
Filament Settings:
- Bambu Labs ASA or ABS dried for 12 hours
- Flow Ratio: 1.11
- Shrinkage 99.5
- Retraction .55mm
- Nozzle Temp: 270 / 275C
Slicer Settings:
- .4mm nozzle
- .1mm layer height
- 4 wall perimeters
- .5mm outer wall, inner wall, top surface
- 1.5 bridge flow
- concentric top / bottom surface pattern
- 2mm top shell thickness
- 2.2mm bottom shell thickness
- 5% Rectilinear infill (5% rect or gyroid gives good support for the top with minimal material)
- 100mm/s & 150mm/s outer & inner wall speeds
- 100mm/s top surface speed
- 25mm/s bridge speed
- No supports needed
- Outer Brim ON
License
You may create derivative works based on this object, provided that all such derivative works are published exclusively on the MakerWorld platform and include proper attribution to the original creator. You may not share, upload, host, distribute, or publish this object—or any derivative work of this object—on any other digital platform, marketplace, or distribution channel. Commercial use of this object and any derivative works is strictly prohibited. This includes, but is not limited to, selling, renting, sublicensing, or using the object in any context in which you receive monetary compensation or other financial benefits.
Comment & Rating (0)