Illegally Good – Kärcher Handle


Print Profile(1)
Description
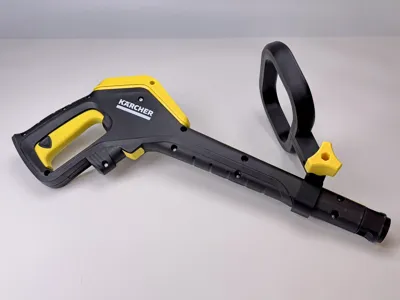
Illegally Good – Kärcher Handle
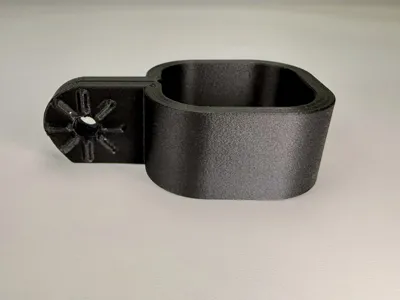
To improve the handling of the Kärcher high-pressure cleaner, I developed this handle. It allows for significantly more comfortable and less fatiguing work. For the development, only a K4 model was available to me. Should other models have a different high-pressure gun, the attachment can be easily adapted by a specially designed clip. In principle, installation is also possible on other devices by exchanging the clip. The clip and handle are equipped with interlocking teeth that reliably prevent accidental adjustment.
Printing
Neither support structures nor an AMS are required for printing. Changes to the settings of my print files should only be made if you are familiar with the respective effects.
Material
PETG is particularly well suited for this component. Since it is a garden tool, I recommend avoiding PLA, as it can become brittle over time due to UV radiation. PETG is also more impact-resistant than PLA and reliably withstands stronger mechanical stress.
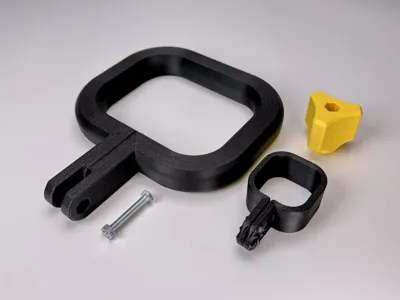
Additionally, an M6 x 40 mm hex screw and an M6 nut are required. I used standard steel screws for this. Those who have stainless steel available can also use it; however, it is not strictly necessary.
Assembly
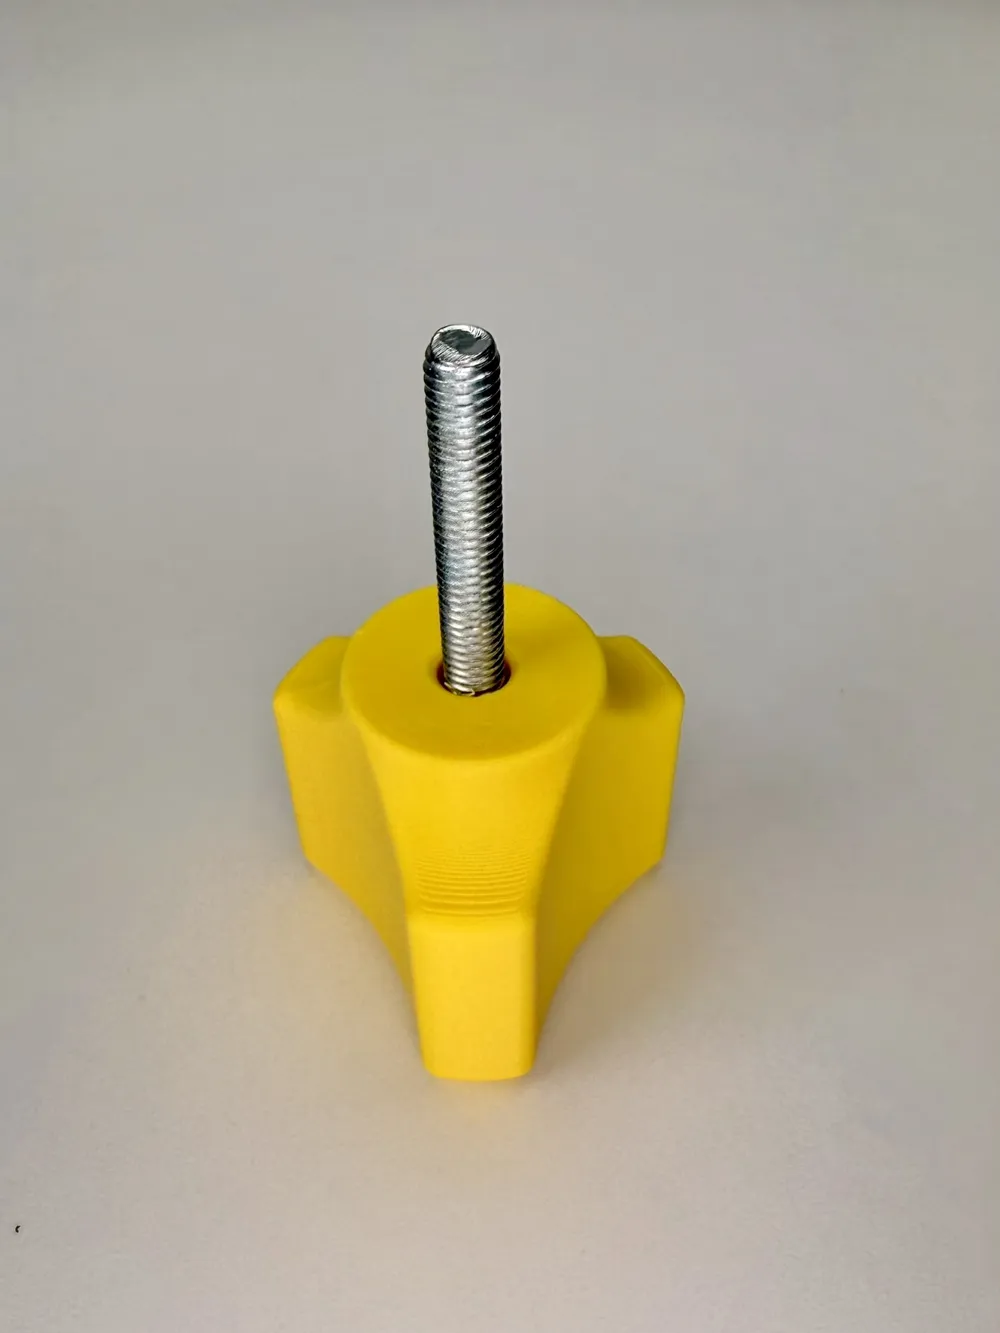
- Press the nut into the hexagonal recess of the handle.
- Slide the clip with the tab upwards onto the high-pressure gun, but not yet all the way to the final position.
- Attach the handle onto the tab of the clip.
- Pierce the thin layer in the knob from the outside with the screw. This is intentional and saves the need for support structures.
- Insert the screw into the knob from the other side until it fully protrudes on the opposite side.
- Lightly screw the knob with the screw into the nut, but do not tighten it yet.
- Now slide the clip towards the trigger. Since the high-pressure gun is slightly conical, the clip will automatically find the correct position.
- Adjust the handle to the desired angle. It automatically locks in 45-degree increments and is then secured with the screw.
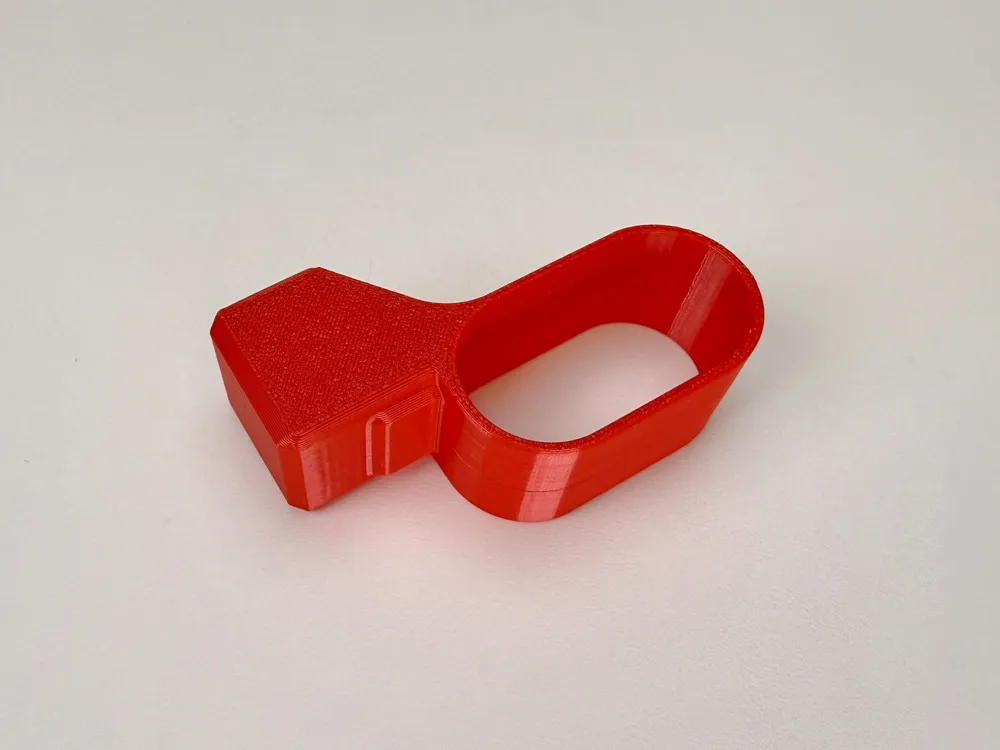
Safety Clip
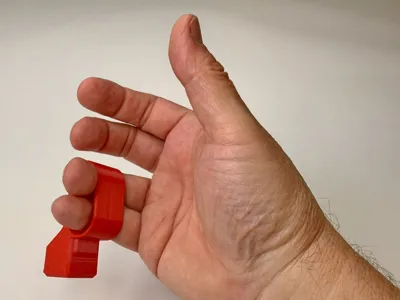
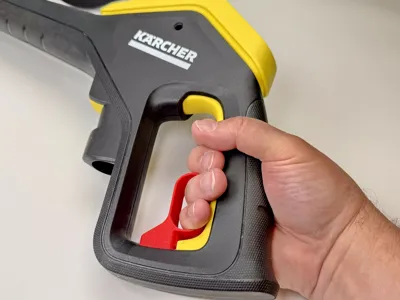
Additionally, I developed a clip to secure the trigger.
This clip is held with the two lower fingers and inserted into the gap after actuation. Deliberately, no rigid fixation is created, as this would pose a significant safety risk with a high-pressure cleaner. To release the trigger, it is sufficient to lightly pull out the clip. Should the high-pressure gun be accidentally dropped, the clip will immediately detach, so no danger arises.
I expressly advise against tying down or permanently fixing the trigger in any other way!

License
You may create derivative works based on this object, provided that all such derivative works are published exclusively on the MakerWorld platform and include proper attribution to the original creator. You may not share, upload, host, distribute, or publish this object—or any derivative work of this object—on any other digital platform, marketplace, or distribution channel. Commercial use of this object and any derivative works is strictly prohibited. This includes, but is not limited to, selling, renting, sublicensing, or using the object in any context in which you receive monetary compensation or other financial benefits.
Comment & Rating (11)