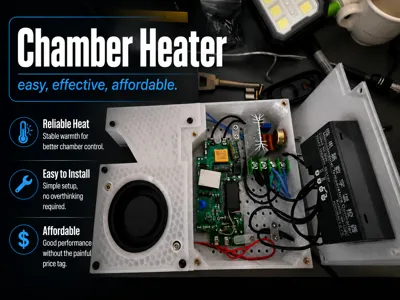
Snapmaker U1 Chamber Heater —Effective, Affordable


Print Profile(1)
Bill of Materials


Description
A compact DIY chamber heater for enclosed 3D printers, designed to help reach and maintain higher chamber temperatures quickly, consistently, and without spending a fortune.
The main electronics for this build cost approximately 26.86 USD based on the linked components listed below.
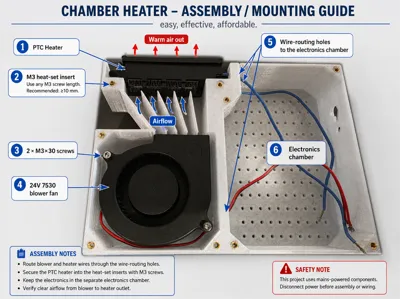
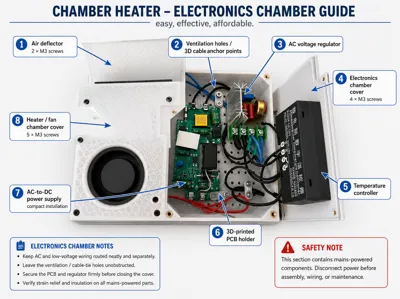
This heater uses a 100W PTC air heating element, a 24V blower fan, a digital temperature controller, an AC voltage regulator, and a separate electronics chamber inside a 3D-printed housing.
The goal was simple:
Easy to build. Effective in use. Affordable enough that your wallet does not need therapy.
Boost Me (for free)
thanks 😇👏🏽
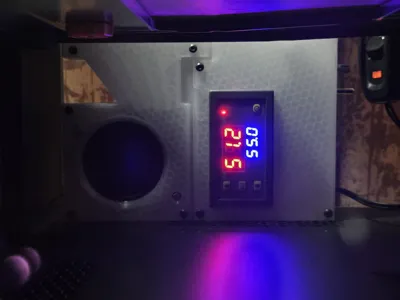
Tested Performance
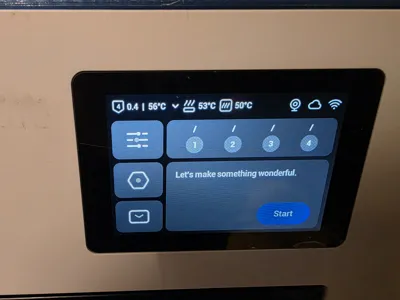
Tested with a Snapmaker U1 enclosed 3D printer:
- Without using the heated bed:
Chamber temperature reached 50°C in approximately 20 minutes - With the heated bed set to 80°C:
Chamber temperature reached a stable 65°C in approximately 10 to 15 minutes
Actual results may vary depending on printer size, enclosure insulation, ambient room temperature, airflow, heater placement, and how well the printer chamber is sealed.
How It Works
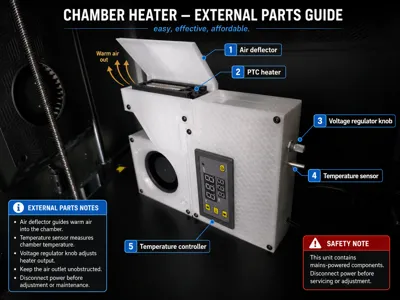
The heater is powered on and off manually using the inline switch.
The target temperature is set on the digital temperature controller. Once set, the controller remembers the selected temperature until you change it again.
When the printer chamber reaches the target temperature, the controller automatically turns the heater off. When the chamber temperature drops below the target, the heater turns on again.
Basic workflow:
- Turn the heater on manually using the inline switch.
- Set your desired chamber temperature on the controller.
- Let the controller regulate the heater automatically.
- Turn the unit off manually when the print is finished.
The voltage regulator allows the heater output to be adjusted, so the PTC heater does not always have to run at full power.
Important Printing Material Requirement
This model must be printed with high-temperature materials only.
Recommended materials:
- ABS
- ASA
- PC
- Other suitable heat-resistant engineering filaments
Do not print this with:
- PLA
- PETG
PLA and PETG are not suitable for this project because the heater housing is exposed to elevated chamber temperatures and heat from the internal heater assembly.
For a chamber heater, this is not the place for optimistic PLA dreams. Use the spicy plastic.
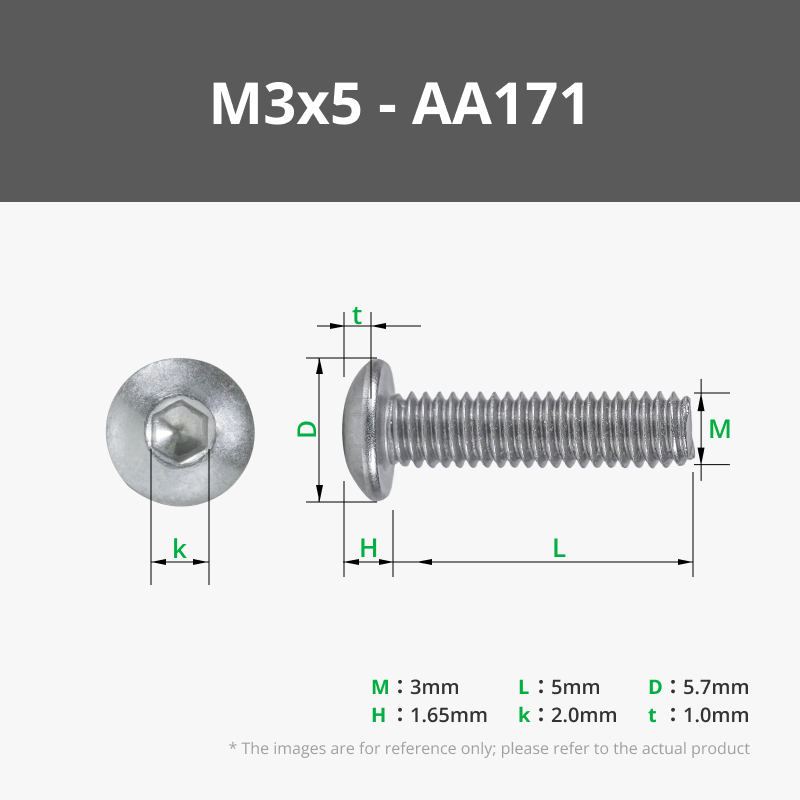
Required Hardware
- 13 × M3 heat-set inserts
Minimum length: 4 mm or longer - 11 × M3 screws
Length: 10 mm or longer - 2 × M3 screws
Length: 30 mm
Electronic Components
I will include links to the electronic components so the listed prices are actually achievable and easy to compare.
| Component | Approx. Cost |
|---|---|
| 100W 220V PTC air heating element | 6.10 USD |
| AC voltage regulator | 1.90 USD |
| W3230 digital temperature controller, AC 110–220V | 4.26 USD |
| 12W AC 110/220V to 24V DC transformer / power supply | 7.76 USD |
| 10A inline switch | 1.91 USD |
| 24V 7530 blower fan, 2-pin | 4.93 USD |
Approximate electronics cost: 26.86 USD
This price does not include filament, screws, heat-set inserts, and wiring.
Short Explanation/purpose of the Electronics used
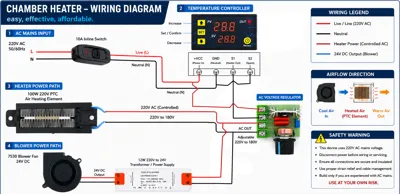
- AC voltage regulator:
The PTC heater can exceed 100°C when powered directly at full 220V/110V. That is too hot for a safe and sustainable setup when printing ABS/ASA. The voltage regulator reduces the input voltage to the PTC heater, lowering its maximum temperature to around 70–80°C. Digital temperature controller:
Turns the heater on and off automatically to maintain the selected chamber temperature.PV: current temperature reading
SV: Target temperature.
- 12W AC 110/220V to 24V DC transformer / power supply:
Converts mains AC power to 24V DC for the blower fan. I used the same type shown in the component link but removed its outer casing to save space inside the electronics chamber. Do this and mount, insulate, and protect it safely. - 24V 7530 blower fan:
Pushes powerful air through the PTC heater and into the printer chamber. - 10A inline switch:
Used as the manual power switch for turning the heater unit on and off.

Wiring Diagram

Assembly 01

Assembly 02

Assembly 03
Notes About Voltage
This build uses mains-powered components. The listed PTC heater is 220V, and the wiring diagrams are based on a 220V AC setup.
If you live in a 110V region, make sure every component you use is suitable for your local mains voltage. Do not mix incompatible voltage-rated parts.
Safety Warning
This project uses mains voltage and heat-producing components.
Build this only if you are experienced and confident working with AC electrical wiring. Incorrect wiring can cause electric shock, fire, damage to your printer, or injury.
Before building or using this project:
- Disconnect power before wiring, adjusting, or servicing.
- Insulate all exposed terminals properly.
- Use proper strain relief for all cables.
- Keep AC wiring separated from low-voltage DC wiring.
- Use heat-resistant wiring where appropriate.
- Make sure the heater outlet is never blocked.
- Do not leave the heater running unattended.
- Verify wiring according to the actual labels on your components.
- Use at your own risk.
For extra safety, I strongly recommend adding appropriate protection such as a fuse, thermal cutoff, grounding where applicable, and a properly rated enclosure according to your local electrical safety standards.
Disclaimer
This is a DIY modification for enclosed 3D printers. I am sharing the design, component list, wiring concept, and my own test results, but every build environment is different.
You are responsible for checking the electrical safety, thermal safety, component ratings, wiring, and suitability for your own printer.
Be careful, be reasonable, and remember:
Warm chamber good. Spontaneous indoor campfire bad.
Comment & Rating (7)