


Print Profile(4)
Description
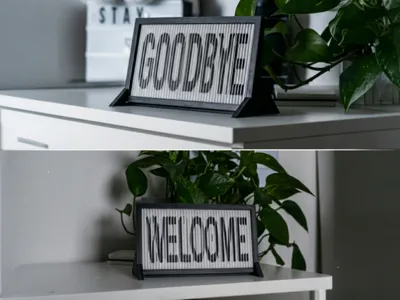
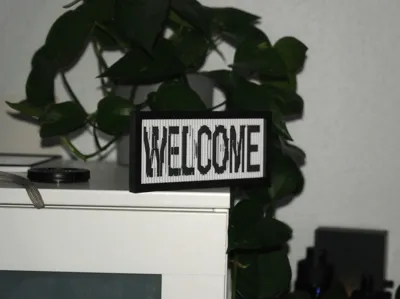
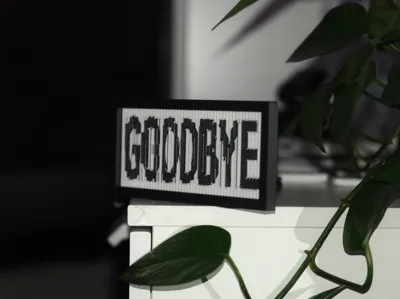
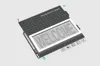
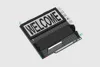
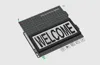
Discover the Magic of Lenticular 3D Design! This fully parametric and modular sign changes its message depending on your viewing angle. Walk past it from the left and read "WELCOME"—look at it from the right and see "GOODBYE".
Thanks to a highly optimized physical prism engine, this effect works purely through 3D geometry and light reflection. No multi-color printer (AMS) required! It is a mechanical illusion that will blow your guests' minds.
🌟 Features & Customization Options
This project is 100% parametric and modular. By using the MakerWorld MakerLab / OpenSCAD Customizer, you can change everything to your liking:
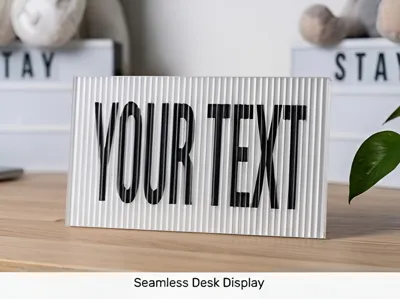
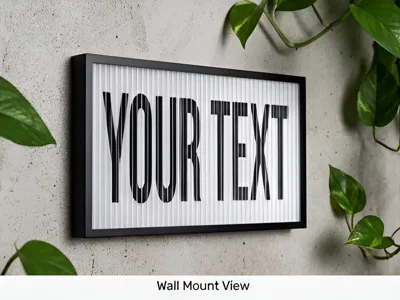
- Your Own Text: Change "WELCOME" and "GOODBYE" to any custom text or names you want.
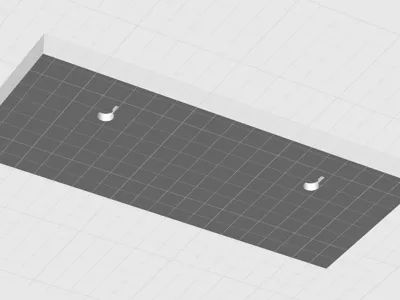
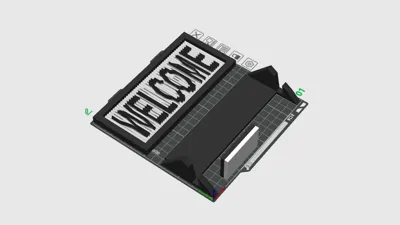
- Fully Modular Display Options: Choose between an elegant Desk Stand (auto-adapting), a clean Wall Mount (with built-in keyholes), or a Flat Surface plate.
- Custom Typography: Adjust fonts, sizing, character spacing, and vertical line spacing.
- Auto-Fit Engine: Automatically stretches and scales your text to perfectly utilize the maximum printable area without clipping.
- Adjustable Frame Styles: Choose between a sleek Minimalist frame, a 3-Step Elegant Classic border, or a Playful Wave profile.
🚀 Ultimate Print Settings for Maximum Effect
A pre-sliced, ready-to-print profile for a 0.4mm nozzle is included! If you slice it yourself using the customizer, follow these precise steps to get a razor-sharp lenticular effect:
- Layer Height: 0.12 mm (First Layer: 0.20 mm)
- Why: Thicker layers create visible steps on the lenses, which ruins the light refraction. 0.12mm ensures smooth prism slopes.
- Line Width: Fix to 0.40 mm
- Why: Standard slicers often use 0.42mm or 0.45mm. Forcing exactly 0.40mm keeps the tiny lens grid mathematically perfect.
- Wall Generator: Set to "Classic" (NOT Arachne!)
- Why: Arachne dynamically changes line widths to fill gaps, which distorts the exakt 3.2mm lens width. Classic keeps it consistent.
- Z-Seam Position: "Aligned" or "Back"
- Why: If set to Random, the printer puts tiny start/stop blobs on the lenses, creating optical distortion. Keeping seams in the back ensures flawless surfaces.
- Outer Wall Speed: 40–50 mm/s
- Why: Printing too fast introduces minor vibrations. Slowing down the outer walls ensures the crispest, sharpest prism peaks.
- Ironing: Strictly TURN OFF!
- Why: Ironing melts the sharp optical tips into a flat plastic soup. The effect will be completely destroyed.
Pro-Tip for Perfect Tips: Print the sign together with the desk stand on the same build plate. The travel time between objects gives the fine white lens-tips enough time to cool down and solidify before the next layer begins.
🔥 How to get the BEST Effect: The Paint Bucket Method For a flawless, ultra-sharp multi-color contrast with zero color bleeding in Bambu Studio / OrcaSlicer:
Why this gives the ultimate result: Thanks to the aggressive 50° ridge geometry of this V7.1 engine, the color snaps perfectly to the text relief. This creates a razor-sharp contrast inlay that makes the lenticular effect pop like crazy! |
🎨 Filament Recommendations
- Go Matte: Use Matte Filament (e.g., Matte White / Matte Black). Glossy PLA reflects ambient light in all directions, which washes out the effect. Matte PLA absorbs light beautifully and creates deep, precise shadows.
License
You shall not share, sub-license, sell, rent, host, transfer, or distribute in any way the digital or 3D printed versions of this object, nor any other derivative work of this object in its digital or physical format (including - but not limited to - remixes of this object, and hosting on other digital platforms). The objects may not be used without permission in any way whatsoever in which you charge money, or collect fees.
Comment & Rating (3)