AI Boombox (Home Assistant)


Print Profile(3)

Description
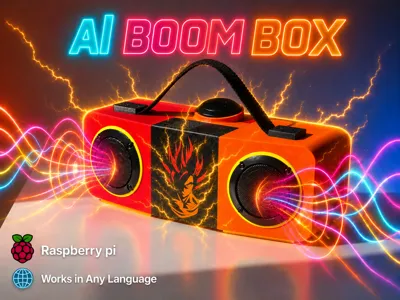
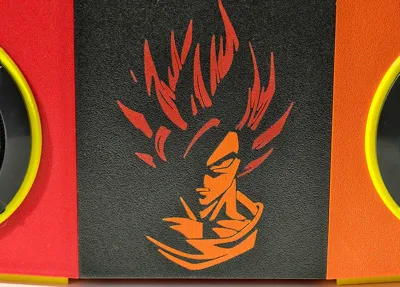
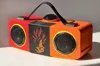
AI Boombox 🎵 🎵🎵
What is this?
A Raspberry Pi-powered AI smart speaker that combines Hi-Fi audio quality and voice-controlled AI in one device.
Basically, it's baby Jarvis! 💪
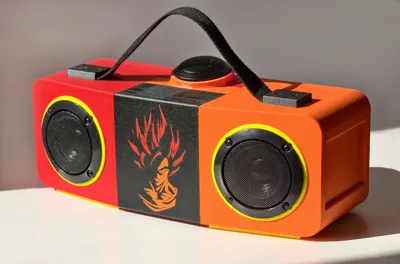
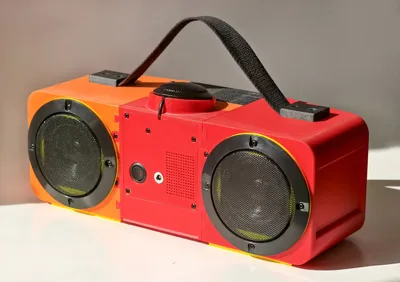
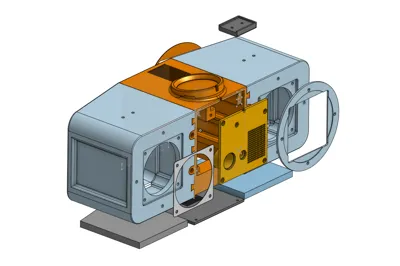
The 3D model / enclosure is designed to be versatile, easy to assemble, and easy to disassemble, with plenty of space for electronics, batteries, and custom hardware.
The design consists of three main sections:
- Left speaker chamber
- Right speaker chamber
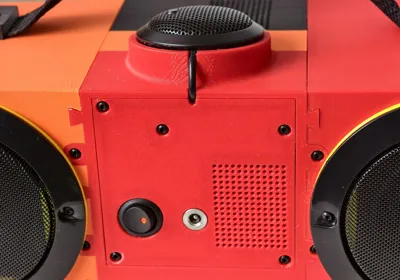
- Center compartment for the battery, amplifier, Raspberry Pi, or other electronics
The design uses a minimal number of buttons, but additional controls can be easily added to the rear panel if needed.
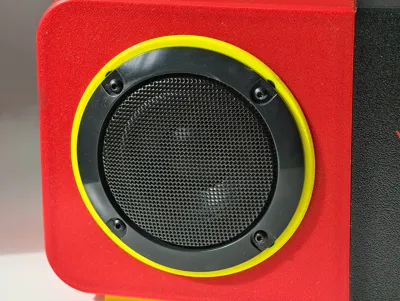
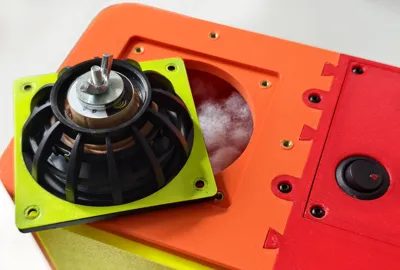
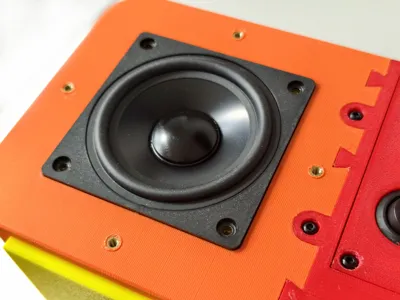
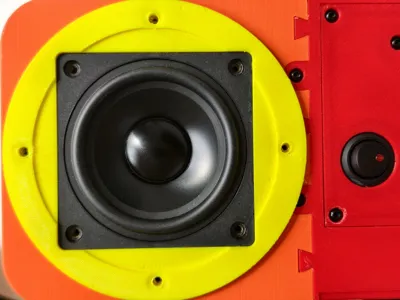
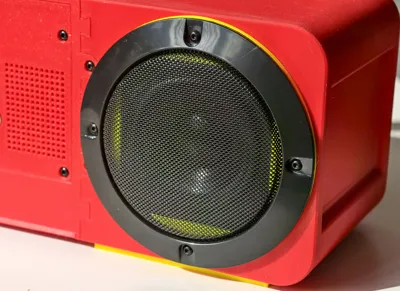
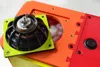
Each speaker chamber is designed for one full-range driver and one passive radiator (A passive radiator is a speaker cone without a magnet that uses air pressure to move and enhance bass).
The speaker chambers must be airtight. only a small cable passage connects them to the center compartment and after routing the cable, seal the opening with hot glue to maintain an airtight enclosure.
The Project Itself
I will provide links to all the resources, including parts, code, setup instructions, and everything needed to build the project.
However,If you decide to build it yourself and don’t know Linux commands or Python code, like me, you’ll probably need to use AI tools such as Claude, Gemini, or ChatGPT. I'm not a programmer - I wrote the code with the help of AI "vibe coding," and it turned out to be surprisingly easy.
Please keep in mind that I won't be able to provide technical support. I'm simply sharing the idea, the files, and the general direction so others can enjoy building and customizing their own version.
This is a portable AI assistant, boombox, and smart home companion powered by a Raspberry Pi 4B.
It can be programmed to work in virtually any language and customized to perform almost any command you can imagine.
The version shown here is not fully local because I use it in Bulgarian, where local voice model support is still limited.
For English, a fully local setup may be possible.
The original concept was entirely my own, while the software was developed with the help of Gemini and Claude AI.
The goal was to create a portable speaker that could:
- Play music using voice commands
- Hold natural AI conversations
- Control smart home devices
- Work as a Bluetooth speaker
- Be controlled from a phone through a local HTTP web interface
The design philosophy is simple: minimal buttons, maximum voice control. The final build ended up larger than originally planned, but the sound quality makes it worth it. A smaller, kid-friendly version is already planned for a future project.
Project Overview
Link to the Code and Description: Google Drive
Everything is included: the code, documentation and build schematic.
Key Features
- Interaction: Wake-word activation “Alexa”(or can be any word) or a phone-based HTTP remote control.
- Smart Audio: AI-driven YouTube search, local MP3 playback, and automated "Autoplay" functionality.
- Intelligent Logic: Integration with Gemini (or any model) for natural conversations.
How It Works
- WAKE WORD — Picovoice Porcupine listens for "Alexa"
- ↓ or HTTP trigger from phone (ALEXA button)
- BEEP — short sound signals listening
- RECORD — VAD (WebRTC) records while speaking, stops on silence/time
- ↓ can be interrupted by END button (phone)
- STT — Google Speech-to-Text (online)
- COMMAND — text checked against command list
- ↓ if not a command → Gemini AI answers
- TTS — EdgeTTS (online) generates voice
- ↓ MP3 → ffmpeg → WAV 44100Hz mono → aplay
- RESPONSE — audio plays through HifiBerry
Software Components
- STT - Google Speech API
- TTS - EdgeTTS
- For higher-quality voices, you may use paid voice models
- LLM - Gemini 3.1 flash lite (or any model)
- For better responses, you may use paid AI models
- Music - YouTube (yt-dlp + mpv)
- HTTP - Phone Remote HTTP server on port **8888**, accessible from any device on the same WiFi. `http://gemini.local:8888`
Main Bill of Materials (BOM)
You will need the following core components:
- Computing: Raspberry Pi 4B (4GB recommended) + SD Card
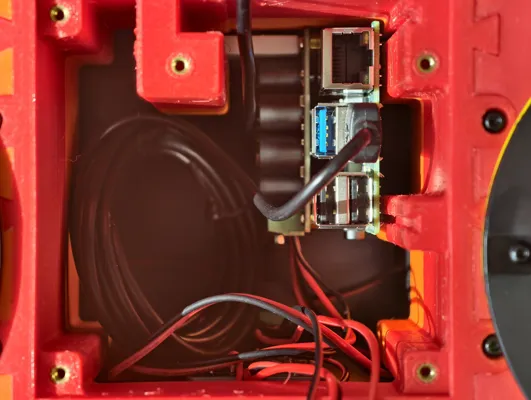
- Amplifier: Inno-Maker Raspberry Pi HiFi AMP Module (TAS5713)
Audio Hardware:
- Input: USB Omnidirectional Conference Microphone
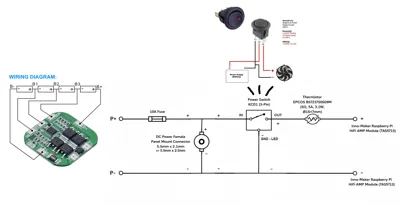
- Power:
- 16.8V 2A Charger (or any that fits)
- 4S Li-ion Battery configuration, using quality 21700 cells with 2x Holders
- 4S 20A BMS (or any that fits)
- Power Switch KCD1
- DC Power Female Panel Mount Connector 5.5Mm X 2.1/2.5mm (Depends on the charger)
- 10A Fuse
- Thermistor (EPCOS B57237S0509M,5Ω, 5A, 3.1W, Ø15×7mm)
- 0.52 mm² 20 AWG Silicone Electric Wire Cable
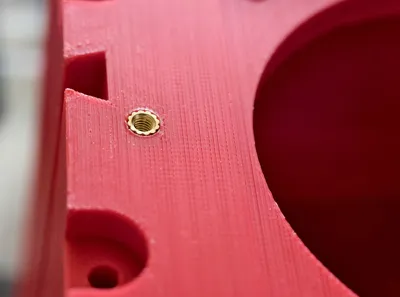
- Assembly: Heat Insert Brass Nuts(M3*6*4.5) and Screws (M3 x 8mm, 10mm, 12mm).
Build Notes
- Important: Power only the Inno-Maker AMP Module. Do not connect separate power directly to the Raspberry Pi at the same time.
- You will need motherboard standoffs(M2.5 12mm+6mm) to mount the Inno-Maker AMP Module to the Raspberry Pi.
- The speaker protectors are optional. The front speakers protectors are 3", and the rear's are 4".
- The battery holders are designed for 21700 cells, but you can also use 18650 cells if preferred.
- Any USB microphone should work. I have included a center enclosure version without the top microphone mount, allowing you to position your microphone wherever you like (hot glue works perfectly for this).
- Other Raspberry Pi models may also work, but I chose the Raspberry Pi 4B (4GB) because it doesn't require a fan, runs quietly, has low power consumption, and provides more than enough performance for this project.
- I used several connectors to make assembly and disassembly easier, including XT30 connectors and male/female crimp terminal connectors.
- Most of the parts can be found on Amazon, Temu, AliExpress, or in local stores. The speakers are probably the hardest components to find. If you're in Europe, you can get them from SoundImports
- Soldering battery holders is a bit tricky, so I used phosphoric acid to make the soldering easier.
- Alternatively, you can use spot welding to connect the batteries.
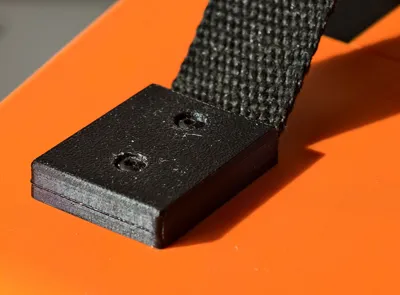
- For the upper handle, I used an old belt, but you can improvise and use whatever you prefer.
Hit that boost button before it overheats from pure awesomeness! 😎🔥
Boost Me (for free)
🚀 Follow for more awesome designs!
Membership
Enjoying this? Support me or get a Commercial License here ➡️ ➡️ ➡️
Stay Аwesome!
License
You shall not share, sub-license, sell, rent, host, transfer, or distribute in any way the digital or 3D printed versions of this object, nor any other derivative work of this object in its digital or physical format (including - but not limited to - remixes of this object, and hosting on other digital platforms). The objects may not be used without permission in any way whatsoever in which you charge money, or collect fees.
Comment & Rating (2)