Tarnished (Raging Wolf Armor) – Elden Ring


Print Profile(3)

Bill of Materials

Description
Boost Me (for free)
If you like this model, I’d appreciate a free boost. This supports the development of more designs. : )
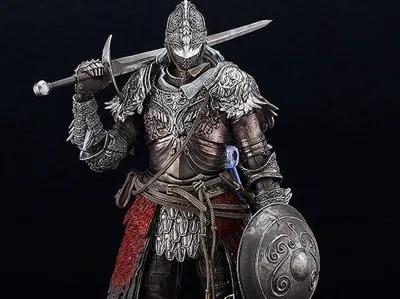
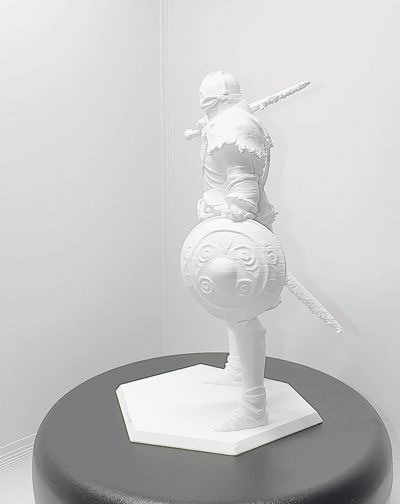
Arise, Tarnished! This impressive 3D model brings the iconic Raging Wolf Armor (Raging Wolf Set) from Elden Ring directly to your 3D printer. The figure perfectly captures the grim "Soulsborne" atmosphere: Equipped with a bastard sword resting casually on its shoulder and a detailed round shield, this model is ready for the Lands Between
Special attention is given to the armor's fine engravings, the flowing fur on the shoulders, and the fabric trim. A perfect project for all fans of Elden Ring, Dark Souls, and challenging painting
Print Recommendations:
- Layer Height: 0.12 mm or finer (e.g., 0.08 mm). The armor has extremely fine details and filigree work. Those with a resin printer (SLA) should definitely use it to capture every minute detail of the helmet and chainmail
- Infill: 10% - 15% (Gyroid or Lightning). A slightly higher infill (approx. 20%) in the leg and ankle areas ensures a more stable stand
- Supports: Absolutely necessary. Tree-Supports are ideal for safely supporting the sword, shield, and overhanging fur/fabric parts without damaging the armor's fine details during removal
- Brim: A brim is strongly recommended as the contact area of the feet with the print bed is quite small relative to the figure's overall size
Feel free to share your finished and painted prints in the comments – may grace be with you
This is an unofficial, fan-made 3D model (fan art). All rights to the character, design, and associated franchise depicted belong solely to the original creators, rights holders, and publishers. This model was created out of pure fan passion and is intended exclusively for private, non-commercial use. Selling these 3D files or the resulting physical models is not permitted.
🧩 Quality & Feedback
• Please post a "Make" with a photo – this helps others and improves visibility.
• Feedback/Issues: Briefly state: Printer, material, layer height, temperature, photo of the problem area.
📄 License / Usage
• Private use according to the model license.
• Commercial use (sales/shop/production) only with an appropriate commercial license membership.
🛠️ Troubleshooting (Briefly)
• Stringing: Lower temperature slightly + check retraction/travel.
• Elephant's foot: Reduce first layer flow/temperature or use Elephant-Foot Compensation.
• Connector too tight: Check calibration/flow, do not scale; if necessary, lightly sand.
My Setup – for a better overview and as a transparent insight into my current equipment. This is how my personal work and technology setup is presented.

License
You shall not share, sub-license, sell, rent, host, transfer, or distribute in any way the digital or 3D printed versions of this object, nor any other derivative work of this object in its digital or physical format (including - but not limited to - remixes of this object, and hosting on other digital platforms). The objects may not be used without permission in any way whatsoever in which you charge money, or collect fees.
Comment & Rating (4)