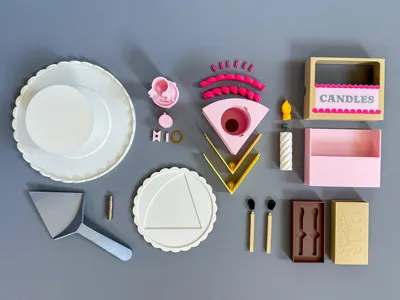
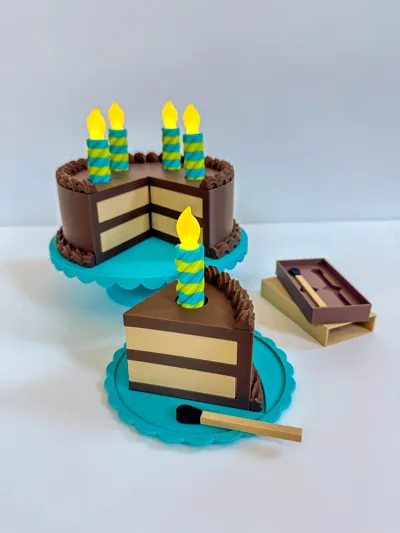
Birthday Cake Set with LED Candles & Matches


Print Profile(2)

Bill of Materials


Description

Happy Birthday! Happy Anniversary! Happy Tuesday! 🎉 Whatever the occasion, you will need this Cake Set to properly celebrate 😊
Fun features in this set include:
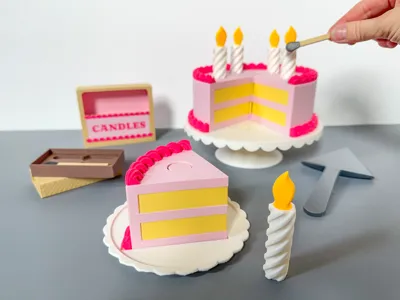
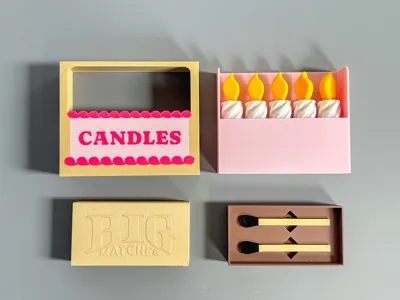
- Candles that light up (turn on and off) with magnetic matches
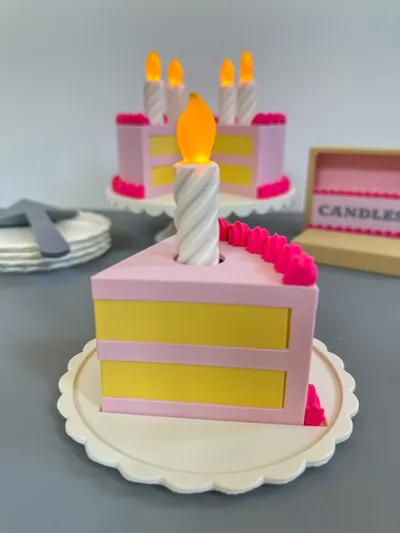
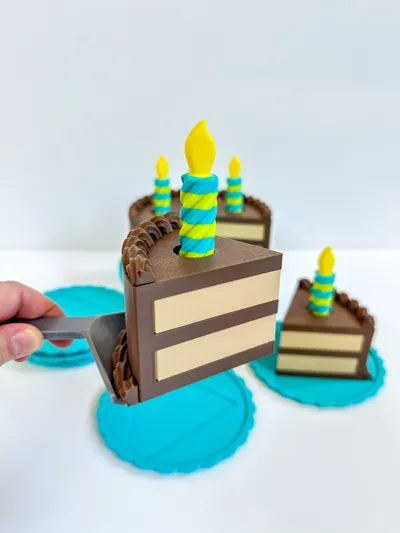
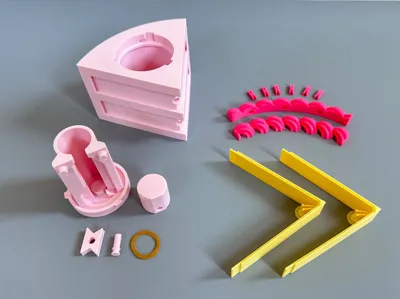
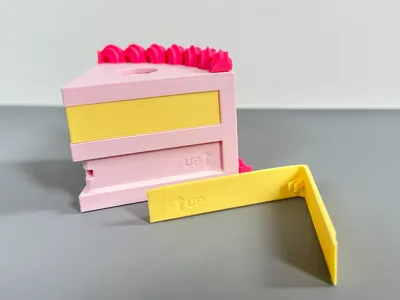
- Cake slices with a center that allows you to insert a candle and then take it out
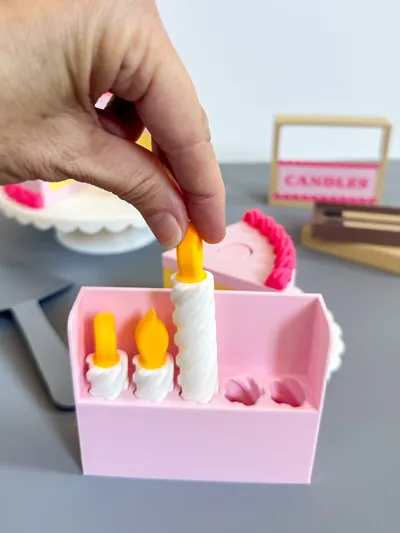
- A candle box that spins the candles into place
- A cake stand with magnets to help hold the cake slices in place
Boost Me (for free)
If you like this model, please give it a boost 🚀 Thanks so much!! Erin
Please note you will need to purchase the following components:

(5) Single White LED Magnetic Control Switch Lights (Warm)
https://us.store.bambulab.com/products/single-led-magnetic-control-switch-light?id=42865579753608
- (5) 1.4 x 16mm Rubber Bands (RA001)
https://us.store.bambulab.com/products/rubber-bands?id=42614449766536
- (10) 8x3 Neodymium Magnets (5 for the cake stand + 1 per cake slice(x 5 slices) = 10)
https://us.store.bambulab.com/products/round-magnet?id=42424856510600
(If these are out of stock in Maker Supply they can also be purchased here: https://amzn.to/4u7ck2l )
- NOTE: you will also need (2) 8x2 neodymium magnets BUT each LED light comes with a 8x2mm magnet so you do not need to purchase these separately.

PLA Basic or Matte works great
0.2mm layer height (except for candle_body and candle_flame need 0.16mm layer height)
15% Infill
Supports and brims needed on some parts (see detailed directions below👇🏼)
This is a large collection that I have divided into two separate 3mf project files:
Birthday Cake, Stand, Plate and Serving Spatula 3mf:
Plate #1 (Cake Slice_body): 1 color, supports added
Plate #2 (Top & Bottom Frosting, Pins): 1 color
Plate #3 (Layer Covers):1 color, supports added
Plate #4 (Piston, Bowtie Latch and Peg): 1 color
- Specific adjustments for piston:
- line width outer wall 0.6mm
- line width inner wall 0.6mm
- outer wall speed 50 mm/s
- inner wall speed 100mm/s
- supports added
- Important: DO NOT CHANGE ITS POSITION ON THE PRINT PLATE - It needs to print on its side so it moves smoothly within the chamber when assembled. If you position it to print in an upright position, the resulting layer lines will rub against the layer lines of the inside of the chamber causing more friction and noise (aka more difficult to move up and down and it’ll be extra noisy).
Plate #5 (Chamber for Piston): 1 color
- supports added
- “pause print” added at layer 19 (layer height 3.8mm) to insert 8x3mm magnet (after magnet is inserted resume the print)
Plate #6 (Cake Stand): 1 color
- line width outer wall 0.6mm
- line width inner wall 0.6mm
- order of walls inner/outer/inner
- “pause print” added at layer 19 (layer height 3.8mm) to insert 8x3mm magnets (after magnets are inserted resume the print)
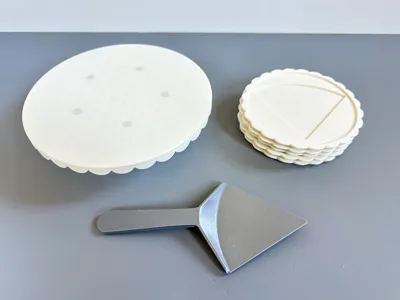
Plate #7 (Plate): 1 color
Plate #8 (Serving Spatula): 1 color, supports settings adjusted to improve ‘scarring’ of supports once removed (to make the handle smoother)
Birthday Candles, Candle Box, Matches and Matchbox 3mf:
Plate #1 (Candle_body x 5): 1 color, layer height 0.16mm, Arachne wall generator selected ‘on’
Plate #2 (Candle_body x 5): 2 colors (stripes), layer height 0.16mm, Arachne wall generator selected ‘on’
Plate #3 (Candle Flames):1 color, 0.16mm layer height, Arachne wall generator selected ‘on’
Plate #4 (Candle Box_lid): 3 colors, brim ears added to corners
Plate #5 (Candle Box): 1 color, wall generator Arachne selected ‘on’
Plate #6 (Match_tips): 1 color
- pause print added at layer 23 (layer height 4.6mm) to insert 8x2mm magnet into each tip (after magnets are inserted resume the print)
Plate #7 (Match_sticks): 1 color, supports added
Plate #8 (Matchbox_tray): 1 color, brim ears added to corners
Plate #9 (Matchbox_cover): 1 color, inner and outer brim added
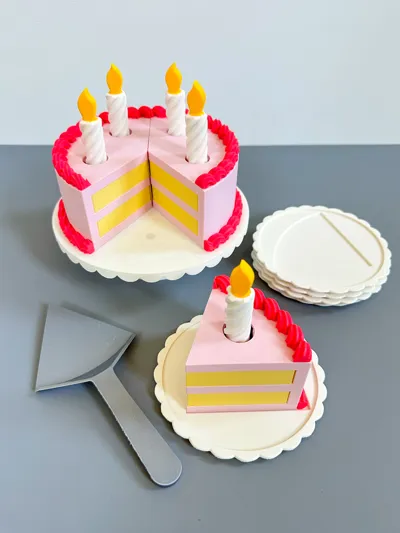
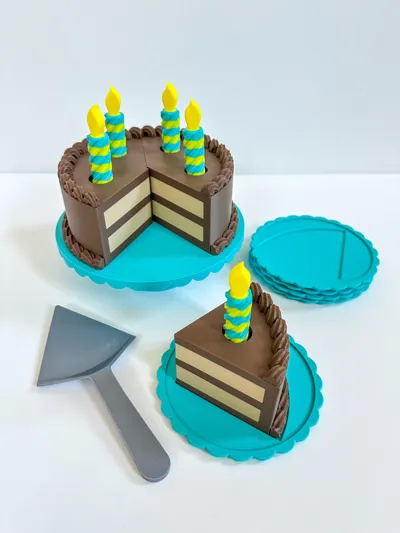
Note: There is a magnet at the bottom of each assembled Cake Slice and corresponding magnets in the Cake Stand. I added the magnets to keep the cake in place. I designed the Cake Stand with a flat surface so a spatula could slide under and pick up the slices easily BUT I found when it was flat, the slices slid all over the place. Adding magnets helped keep the cake on the stand and the slices in a nice circular formation.
How to insert the magnets when printing:
Cake Slice_center piece: When the print is paused, insert a 8x3 mm magnet into the hole. Be mindful of the orientation of this magnet. If you print multiple cake slices I recommend keeping the orientation of the magnets the same for each slice. After the magnets are inserted, resume the print.
Cake Stand: When the print is paused, insert a 8x3 mm magnet into each hole. Be mindful of the orientation of the magnets. You want them all facing the same direction (also make sure they are orientated to attract to the magnets in the cake slices). After the magnets are inserted, resume the print.
Matches: When the print is paused, insert a 8x2 mm magnet into each tip. After magnets are inserted resume the print (orientation does not matter for these magnets).

How to Assemble the Candles:
- Insert an LED light (facing up) into the base of the Candle Flame and then screw the Candle Body onto it.
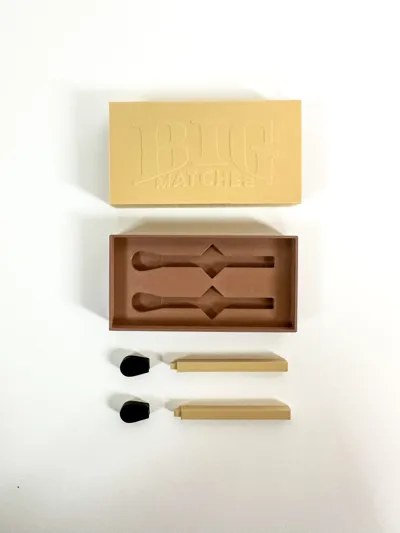
How to Assemble the Matches:
- Remove the supports off the end of the Match Stick and then push the Match Tip onto it. Use a small drop of superglue if needed to secure it into place.
See Photos for How to Assemble the Cake Slices:


That's it!😅😂

My designs are free for personal and non-commercial use. I offer a commercial license on Thangs. Here is a link if you'd like to check it out 👉 https://thangs.com/designer/3DPmom

If you like my work and want to help support it, you can buy me a Diet Coke at https://www.buymeacoffee.com/3dpmom Thanks so much! 🤗 Erin
License
You shall not share, sub-license, sell, rent, host, transfer, or distribute in any way the digital or 3D printed versions of this object, nor any other derivative work of this object in its digital or physical format (including - but not limited to - remixes of this object, and hosting on other digital platforms). The objects may not be used without permission in any way whatsoever in which you charge money, or collect fees.
Comment & Rating (7)