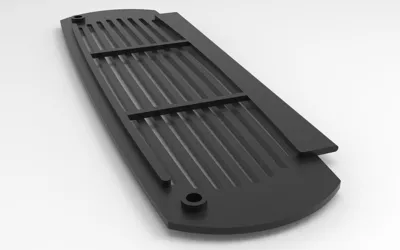
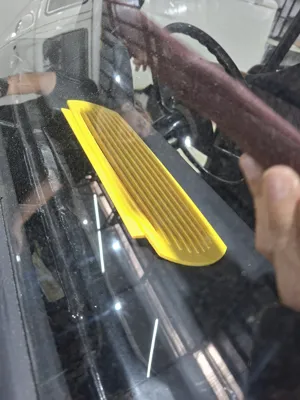
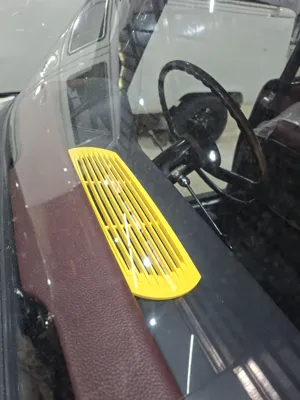
Mercedes-Benz W110 / W111 Dashboard Speaker Grill


Print Profile(1)

Description
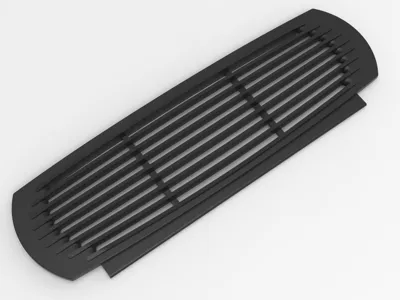
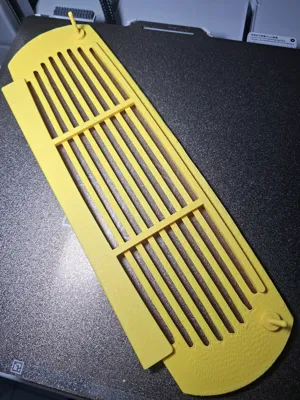
Mercedes-Benz W110 / W111 Dashboard Speaker Cover Grill (Replacement Part)
Replaces OEM Part Number: A1106800017 (A 110 680 00 17) Note: This is a high-quality, 3D-printed aftermarket replacement part designed to fit and function like the original factory component.
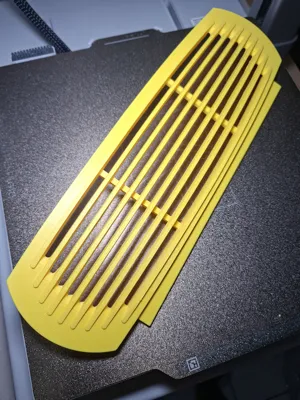
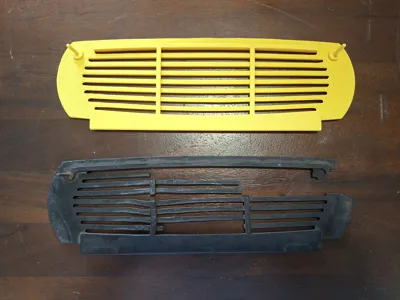
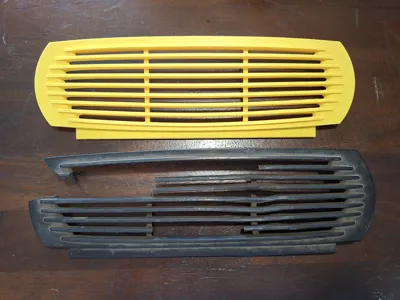
Finding an intact original dashboard speaker cover for a Mercedes-Benz W110 or W111 is incredibly difficult nowadays, and the market prices are skyrocketing. The factory plastic parts are often brittle, warped, or cracked due to age and decades of direct sun exposure. This model was created as a precise, durable, and ready-to-install solution for classic automotive restoration!
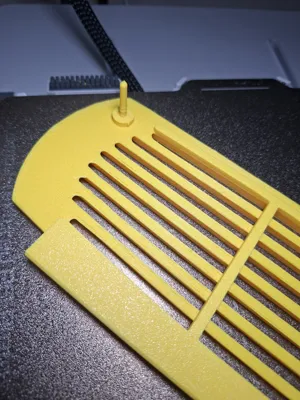
This part has been meticulously reverse-engineered to ensure its curvature and overall dimensions perfectly match the dashpad.
⚙️ Print Settings & Slicer Recommendations: The included print profile (.3mf) is already optimized for the best results. If you are slicing it yourself, please follow these guidelines:
- Filament: It is highly recommended to use heat-resistant materials such as PETG, ABS, or ASA (Tested using Bambu Lab PETG HF). Avoid PLA, as this component will be exposed to direct, intense sunlight behind the windshield.
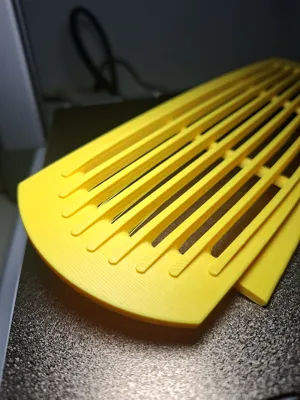
- Layer Height: Use 0.12mm Fine to achieve a very smooth top surface curvature transition and to minimize visible layer lines.
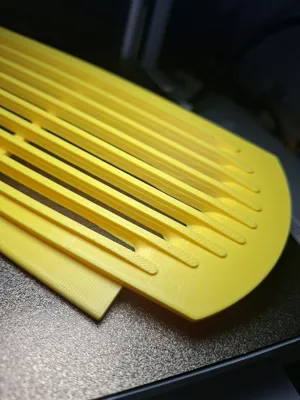
- Print Orientation: Position the part diagonally across a 256x256 mm build plate to accommodate its length.
- Special Features: Ensure the "Detect Thin Wall" setting is ENABLED so the thin grille fins print completely solid without hollow internal gaps.
- Supports: Use full Normal/Snug Supports on the bottom overhangs to maintain the dimensional accuracy of the structural mounting points.
🛠️ Post-Processing Guide (Automotive Finish): To achieve a texture that blends perfectly with the classic interior, follow these finishing steps:
- Carefully remove all supports from between the grille fins.
- Wet sand (using soapy water) the visible top surface using 400, 600, and finally 800 grit sandpaper.
- Spray a light coat of Plastic Adhesion Promoter (PP Primer) to ensure the paint bonds strongly to the PETG material and prevents future flaking.
- Apply a Filler Primer / Epoxy to fill any remaining micropores or layer lines.
- Finish with Satin Black or Matte Black spray paint to match the original dashpad texture.
Designed by MadHaxStudio. Happy restoring! Don't forget to share photos of your successful prints and your newly installed speaker cover in the comments section.
License
You shall not share, sub-license, sell, rent, host, transfer, or distribute in any way the digital or 3D printed versions of this object, nor any other derivative work of this object in its digital or physical format (including - but not limited to - remixes of this object, and hosting on other digital platforms). The objects may not be used without permission in any way whatsoever in which you charge money, or collect fees.
Comment & Rating (3)