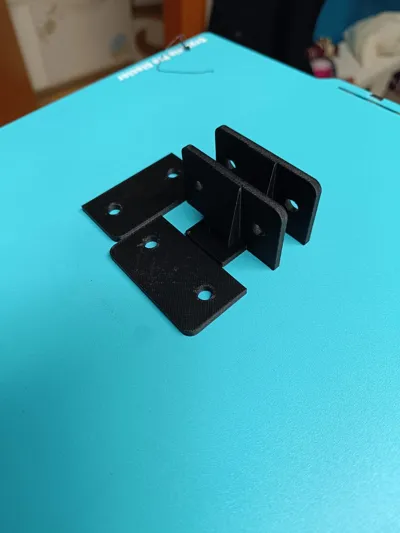
Technics Turntable Cover Hinge Kit (M5 Bolt)


Print Profile(1)
Description
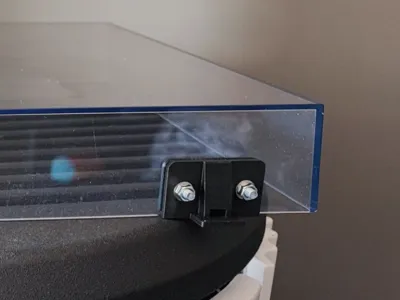
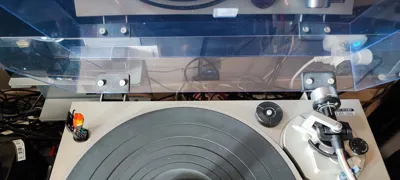
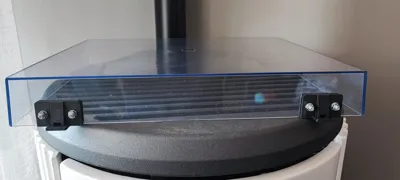
This is a functional replacement/repair kit for Technics dust covers with integrated plastic tabs. Over time, the original molded plastic tabs that slide into the hinge mechanisms frequently crack or snap off entirely under the constant tension of the springs.
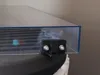
Instead of buying an expensive or hard-to-find replacement dust cover, this design allows you to completely repair your original cover. By cutting away the broken plastic remnants and drilling two holes, you can securely bolt these heavy-duty hinges directly to the plexiglass using standard M5 screws and nuts.
Compatibility
These hinges are compatible with a wide range of vintage Technics turntables that share this specific slide-in hinge design, including (but not limited to):
- SL-Series: SL-D1, SL-D2, SL-D3
- SL-Q Series: SL-Q2, SL-Q3, SL-Q200, SL-Q300
- SL-B Series: SL-B1, SL-B2, SL-B3
- SL-DD/BD Series: SL-DD2, SL-DD22, SL-BD22
- Other models: SL-3200, SL-3300, SL-5200, etc.
Note: Please check the dimensions of your specific hinge housing before printing, as Technics used a few different hinge styles across different eras (e.g., SL-1200 series uses a completely different mechanism).
Hardware Required
- 4x M5 Screws (Button head or hex head recommended, length depends on your preference, approx. 12-15mm is usually ideal).
- 4x M5 Nuts (Standard or Nylon lock-nuts to prevent loosening over time).
- 4x M5 Washers (Highly recommended to distribute the clamping pressure on the acrylic/plexiglass cover and avoid cracking).
Installation Instructions
- Clean the surface: Carefully cut or file down the remains of the broken original plastic tabs so the back of the dust cover is completely flat.
- Mark and Drill: Align the printed replacement hinge on the dust cover, mark the hole centers, and carefully drill the holes through the plexiglass.
- Tip: Use a sharp drill bit at low speed with very light pressure to prevent the acrylic from cracking.
- Assemble: Insert the M5 bolts through the washers and printed part, then tighten the nuts on the inside. Do not over-tighten, or you risk cracking the vintage plexiglass.
- Slide into place: Slide the cover back into the original metal/plastic chassis hinges.
Recommended Print Settings
- Material: PETG, ABS, or ASA. PLA is not recommended for this application, as the spring tension from the turntable chassis will cause PLA to creep (deform) over time, eventually loosening the grip or snapping.
Comment & Rating (1)