Ultra Simple X2D Bed Leveling Parametric Quick Release Dial Indicator Clip


Print Profile(2)
Description
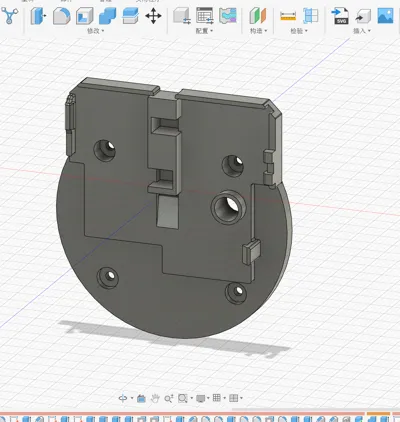
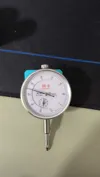
Heatbed leveling buckle, specifically for X2D, suitable for dial indicators and test indicators. Can be parametrically adjusted to fit dial indicators of different sizes.
Installation instructions: Remove the back plate of the dial indicator and replace it with the printed quick-insert back plate.
Usage instructions: Before use, align the bearing holes on the extruder's front panel with the printed part. When disassembling, gently press the buckle on the right side and it will come off.
What if the size is not suitable? Use parametric generation to create a model of the appropriate size.
Parameter description:
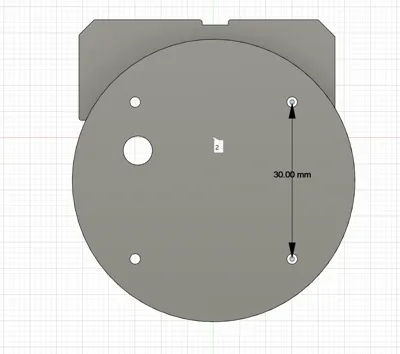
Remove the back plate of the dial indicator and measure its approximate diameter.
Refer to the third image for the screw center distance.
For screw specifications, fill in the size of the screw you removed, 2mm or larger.
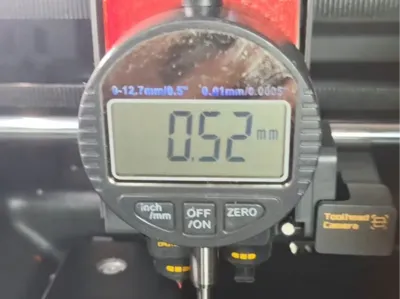
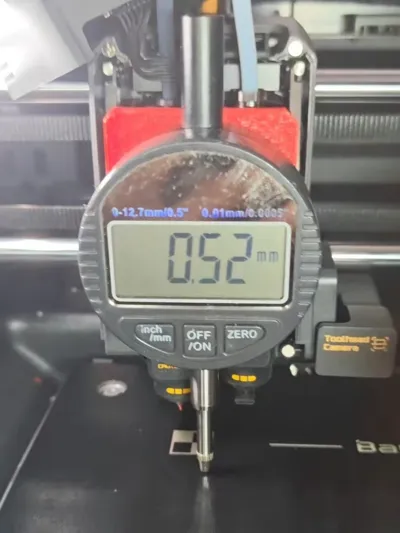
Leveling instructions: Heat the print bed to 50°C or 70°C and wait 2 minutes for it to fully heat up. (The temperature depends on the material usually printed.)
In the motion control interface, click Free Movement (you can manually drag the tool head).
Lower the heatbed, install the dial indicator, and adjust the heatbed height. (When raising the heatbed, be careful not to crash it; the soft limit for free movement is already off.)
Move the dial indicator to the center, zero it, and start manual leveling.
Mainly adjust three screws (do not touch the screw in the top right corner. If you are unsure, refer to the official wiki tutorial and search for the keyword: leveling).
License
You may create derivative works based on this object, provided that all such derivative works are published exclusively on the MakerWorld platform and include proper attribution to the original creator. You may not share, upload, host, distribute, or publish this object—or any derivative work of this object—on any other digital platform, marketplace, or distribution channel. Commercial use of this object and any derivative works is strictly prohibited. This includes, but is not limited to, selling, renting, sublicensing, or using the object in any context in which you receive monetary compensation or other financial benefits.
Comment & Rating (0)