Scrap mechanic radio speaker


Print Profile(2)
Description
Hello everyone!
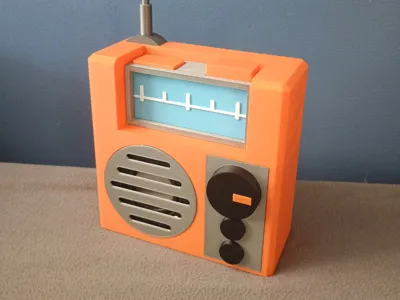
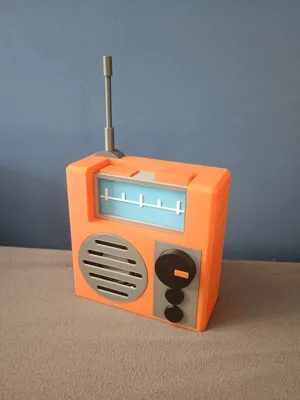
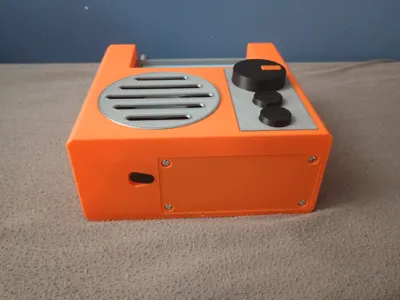
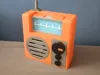
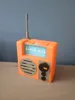
I have been playing scrap mechanic for a while now and I thought it would be really cool to have a real working radio from the game as a bluetooth speaker. So I spent some time trying to replicate the in game model as closely as possible.
While designing this model I made sure it can be printed in multiple pieces so it would'nt require an AMS. There are some parts where you will have to manually pause the print and switch filament on a single layer (for the screen and the volume knob). I also made sure it can be printed on every bambulab printer.
If you want to print this model through a different slicer make sure you have the right support settings so they are easy to remove (0.28mm Z-offset works well in my experience) and make sure you dont print supports in the M3 nut slots in the bottom as they are very hard to remove.
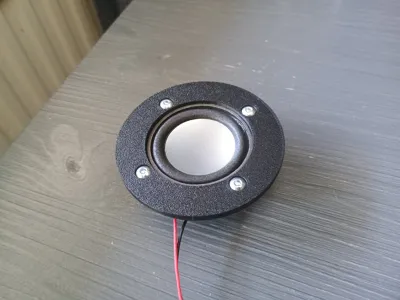
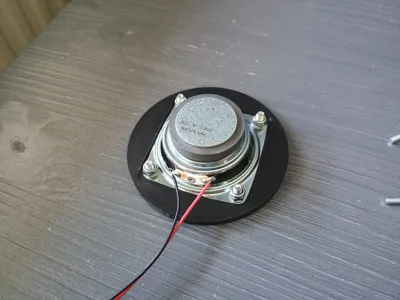
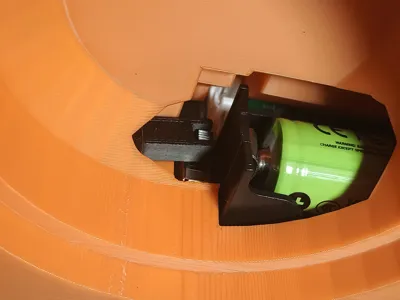
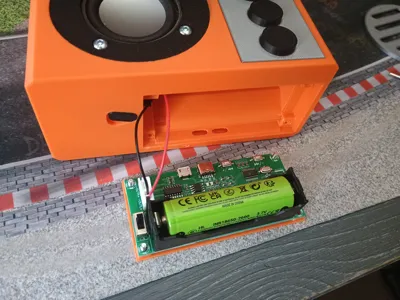
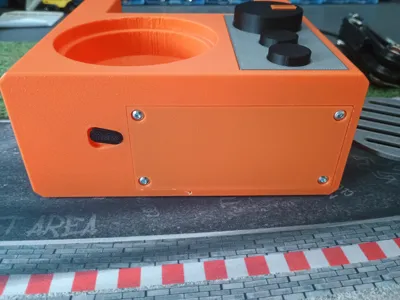
You will need some non-3D printed parts: 4 M3 nuts, 4 M3x8 hex bolts, 4 M4x8 (or 10) hex bolts, 4 M4 locknuts, a 18650 3,7V battery, a PAM8403 bluetooth PCB and a 4 ohm 3W speaker with a diameter of 5cm. All other parts are 3D printed.
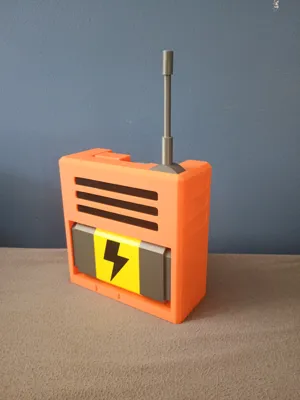
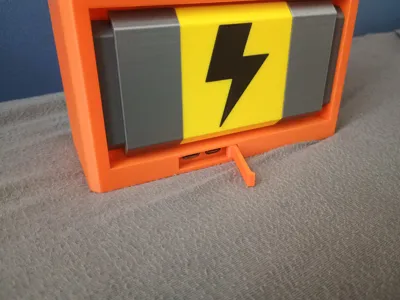
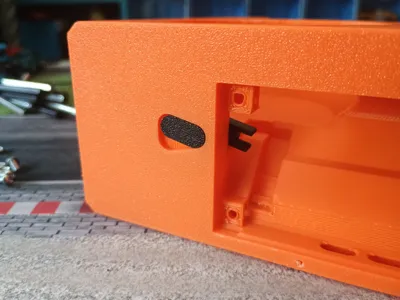
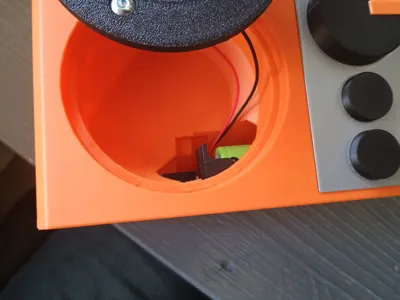
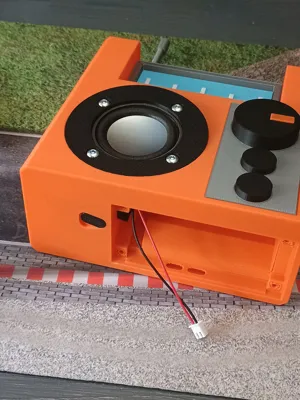
Assembly should be fairy straightforward. First print/buy all of the required parts and remove the supports. Then start building up the radio body by glueing the screen and the top buttons to the screen housing, the front buttons to the button panel, the antenna pieces to the antenna base, the battery parts to the yellow battery piece(make sure this is dried before you glue it to the back) and the three black inserts for the rear grille. When all these pieces are done you can glue them in their respective spot. Next grab the M4x8 (or 10) bolts and insert them. Glue the on/off button parts together by putting some glue on the top of the lower part and fitting it through the hole while you hold the top part in place and make sure the top part is turned exactly 180 degrees from the bottom part(let this connection dry well so it wont break once you closed everything up). Then solder one of the speaker wires included with the PCB to the back of the speaker and mount the speaker to the speaker mount with the 4 M4 locknuts. Turn the radio over so you can acess the bottom and fish the speaker wire through the hole in the speaker housing. Grab your 18650 battery and insert it into the PBC. Plug the wire in the left audio output (the one closest to the battery) and place the PCB on the table. Slot the 4 M3 nuts in their respective slots in the bottom and screw in the PCB and PCB holder with the M3x8 bolts. Before tightening the bolts make sure the USB charger on the rear lines up with the port so a USB cable can fit all the way in and the power switch on the PCB is inside the switch forks. You can push the PCB through the speaker housing if you need to. Now tighten the bolts to secure the PCB in place, these bolts dont require that much force so don't tighten them too much. Next place a little bit of glue on the edge of the speaker housing and press the speaker mount into the housing. This should be a pretty tight fit so ensure you line up the bollts correctly. Then place the silver speaker grille over the speaker. Lastly grab the little orange axle and the charging door. There is a little hole in the bottom of the radio where the axle can fit. Place the charging door in its place and push the axle in. Now charge it up and listen to scrap radio!
If you want to print this model but don't want to build a speaker I will release a smaller version without the electronics as a display model.
Enjoy!
Comment & Rating (0)