Ultimate exhaust solution for 3D printer studio


Print Profile(1)
Description
Exhaust System Design Purpose: Integrate existing FDM and resin 3D printer exhaust ducts to achieve unified outdoor discharge.
Current Situation and Pain Points:
The original walls had no reserved exhaust holes, and temporarily routing pipes outside the window was inconvenient, resulting in extremely low utilization of the exhaust system.
Although the workshop was already enclosed and partitioned to shower room standards, the current exhaust method only transfers waste gas from the machine enclosure indoors, without truly expelling it outdoors.
Odors generated when printing non-PLA filament accumulate in the room and spread to other areas when the door is opened, posing a health hazard.
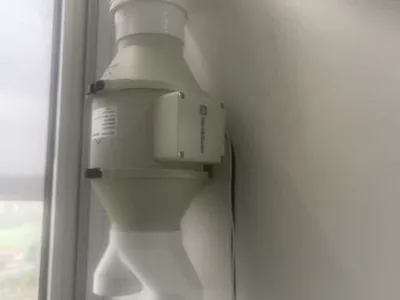
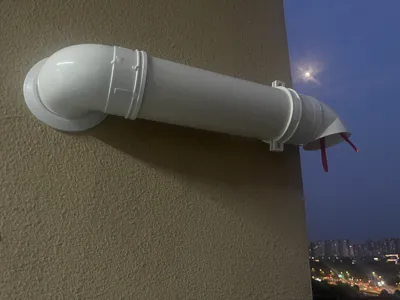
With this, there's no more worry about opening windows affecting air conditioning, attracting mosquitoes, causing drafts, or impacting heating. Indoor and outdoor are completely isolated, and all waste gas is directly discharged outside through the pipes. The inline duct fan was also upgraded, with the diameter increasing from 3 inches to 4 inches, and a variable frequency brushless motor was adopted to meet quiet operation and long-term use requirements.
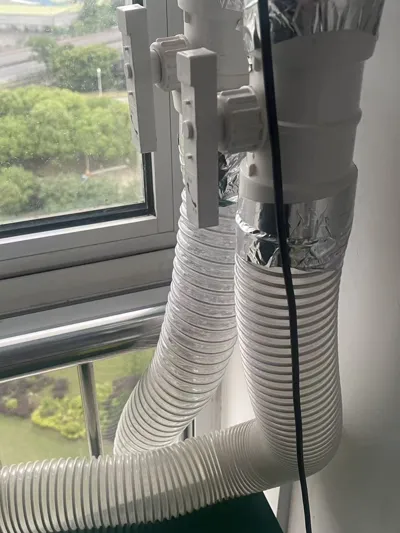
Of course, a prerequisite for this solution is having an exhaust hole in the wall. Additionally, rigid pipes are much more efficient for ventilation than aluminum foil flexible ducts, as their inner walls are smooth without creases, and bends transition smoothly without obstruction.
Most users have misconceptions about printer exhaust modifications, believing that merely extending the duct, raising it to a high point, or constricting the diameter at the end will achieve directional and efficient exhaust.
In reality, the axial fan in the original equipment's chamber has low static pressure and is only suitable for short-distance, low-resistance direct exhaust conditions. Routing ducts upwards adds gravity and frictional resistance, while constricting the diameter at the end creates local throttling losses. Both significantly increase the resistance of the duct system. Limited by the fan's low static pressure characteristics, the system cannot generate stable and sufficient airflow pressure difference, making it difficult for waste gas to be directionally transported to the end of the duct. Instead, it often accumulates in the chamber and the front section of the duct. This results in an exhaust system that appears complete but has extremely low actual waste gas removal efficiency, failing to achieve the desired VOC (Volatile Organic Compounds) and odor control effects.
These are "Doubao's" explanations and suggestions regarding Bambu Lab 3D printer exhaust. It shows that if the flexible duct is too long or its direction is unsuitable, the exhaust effect is compromised.
Most exhaust solutions on the platform merely provide a place for the ducts, whether connecting to the printer or extending outside the window. However, it's often unknown if the internal gases are actually expelled, and the effect is often unsatisfactory.
I. Basic Principles
Ordinary models rely on natural air diffusion, and single flexible duct exhaust has limited effect.
Bambu Lab enclosed models come with an active variable speed exhaust fan, where the flexible duct only provides directional guidance. The longer the duct, or the more unreasonable its path/bends, the greater the wind resistance, and the poorer the exhaust effect.
II. Solution Comparison
1. Flexible Duct Only
Suitable for scenarios with short, straight ducts, printing PLA/PETG, and available window ventilation. When printing engineering materials like ABS/ASA, the machine automatically reduces fan speed, easily leading to waste gas accumulation.
2. Flexible Duct + Variable Frequency Inline Duct Fan
The fan provides low-speed guidance, without disturbing chamber temperature. It can counteract duct resistance and is suitable for long ducts, multiple bends, enclosed spaces, and various engineering filaments.
III. Flexible Duct Installation Notes (Flexible Duct Reference Only)
Length: If the total length exceeds 2 meters, the exhaust effect significantly weakens.
Path: A slight downward slope is optimal; horizontal is secondary; an upward slope throughout creates the greatest resistance, severely affecting exhaust.
Bends: Avoid 90° sharp bends and continuous bends; try to use large radius gentle bends.
IV. Selection Recommendations
For short, straight ducts and printing PLA/PETG: a single flexible duct is sufficient.
For long ducts / upward slopes / multiple bends, printing engineering materials, or enclosed environments: install a fan for low-speed operation; high-speed forceful extraction is prohibited.
V. Fan-less Optimization
Keep the flexible duct short, straight, and slightly downward, with its opening directed outside the window. Open the window for ventilation, and a desktop fan can be used to assist in dispersing odors.
VI. Tip
Given weak airflow in enclosed chambers and complex ducting with high-odor filaments, it is recommended to use a low-speed fan to assist exhaust.
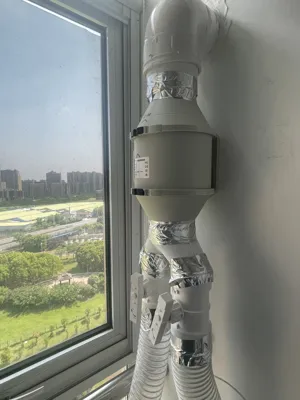
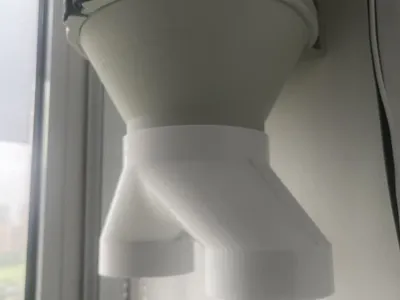
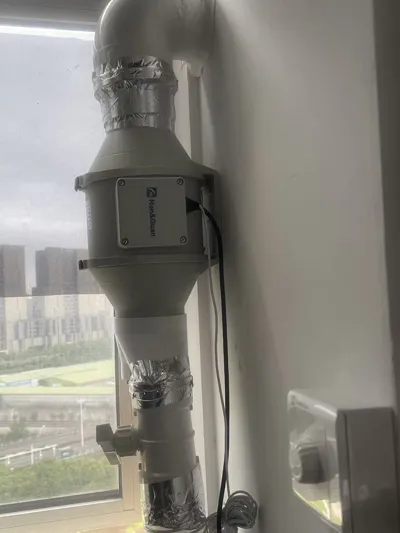
The entire exhaust system layout is:
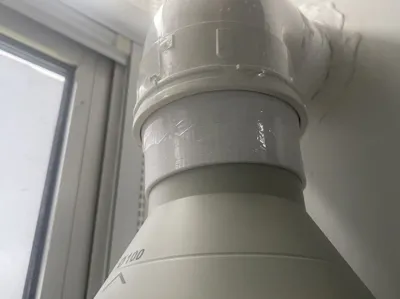
3D Printer→→75mm flexible duct→→Air volume control valve→→T-junction→→4-inch inline duct fan→→Reducer→→110mm elbow→→110mm PVC pipe→→110mm elbow→→110mm PVC pipe→→110mm exhaust vent

All printed parts used are in the model files and are labeled and described on separate plates, which can be clearly identified by combining with the title model images.
The links below are for the exhaust interfaces (flanges) of relevant FDM and resin 3D printers
Below are the finished components that need to be purchased, with a nomenclature and function description for each:
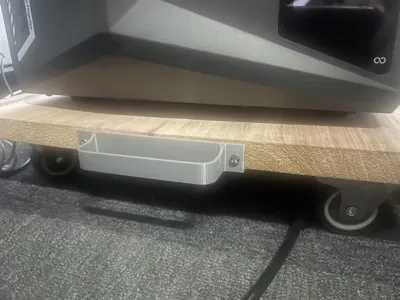
1. Pipe Hangers (used for fixing PVC pipes to the wall)

2. PVC Manual Air Volume Control Valve (used to control the opening and closing of exhaust ducts; when one printer is in use, the other exhaust duct can be closed)

3. PVC Ducting (used for connecting to the printer exhaust port)

4. 110mm Internal Elbow (used for 90° turns in 110mm pipes)

5. Variable Frequency Inline Duct Fan (4-inch | Air volume 366m³/h)

6. 110mm PVC Pipe (outer diameter 110mm, thickness 2mm+)

7. 110mm Exhaust Vent (to prevent gas backflow)

In summary: This solution is suitable for individuals with strong DIY skills, as it requires installation, wiring, pipe fitting, and more, along with the use of some small power tools.
License
You shall not share, sub-license, sell, rent, host, transfer, or distribute in any way the digital or 3D printed versions of this object, nor any other derivative work of this object in its digital or physical format (including - but not limited to - remixes of this object, and hosting on other digital platforms). The objects may not be used without permission in any way whatsoever in which you charge money, or collect fees.
Comment & Rating (0)