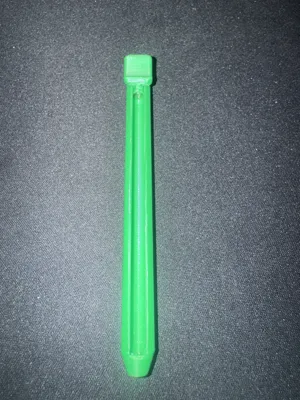
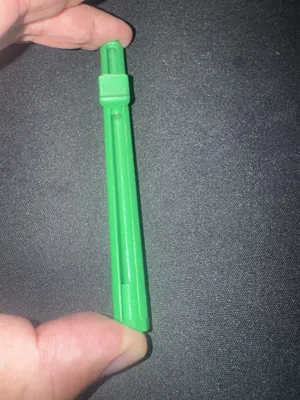
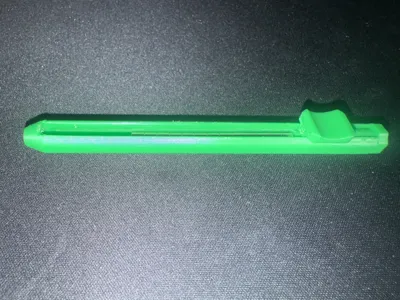
Multi pen ( 2 in 1 magnetic pen and mag dispenser)


Print Profile(1)

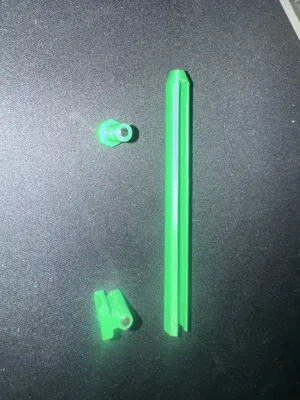
Bill of Materials


Description
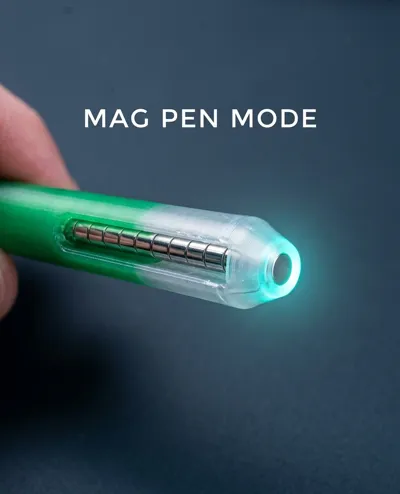
The 2 in 1 mag pen is a sleek, pocket-sized mechanical pen designed to store, carry, and satisfy your hands by dispensing 4mm x 3mm neodymium magnets with a genuinely addictive tactile slide action.
How It Works
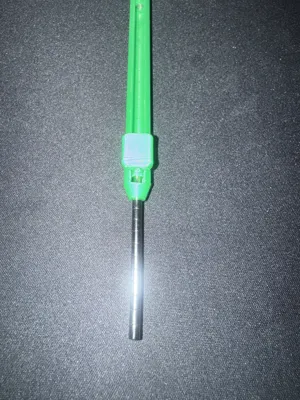
Instead of dealing with loose containers or rattle-prone cases, this pen turns your magnets into a single, cohesive unit.
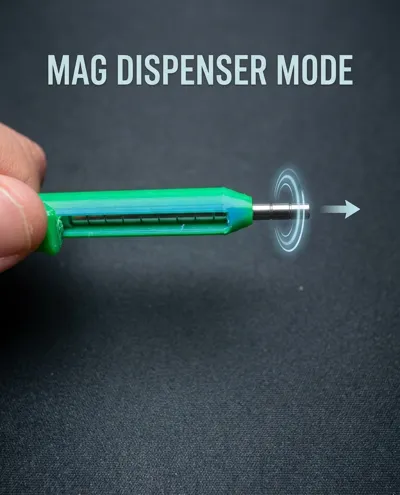
By hiding a strong anchor magnet inside the thumb slider, the whole stack of 20 magnets fuses together into a solid magnetic column. When you point the pen down, the magnets hold their ground against gravity and stay securely locked inside. When you slide the button forward, it pushes the lead magnet right out of the tip so you can pluck it off or sweep it onto a surface with a crisp, clean snap. Pulling the slider back hides the remaining chain safely inside the body.
Design Features
This design is built from the ground up to offer a premium, satisfying experience that functions as flawlessly as it looks:
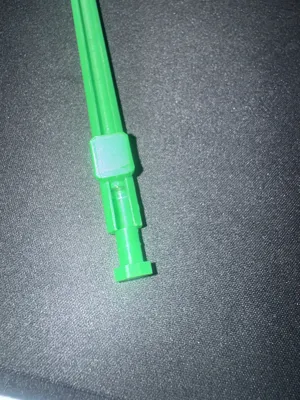
Frictionless Floating Pad:
The ergonomic thumb button is engineered with a built-in clearance extension. The pad hovers perfectly clear of the main chassis, ensuring a smooth, frictionless slide that eliminates plastic-on-plastic rubbing or binding.
Octagonal Anti-Roll Body:
The 8-sided profile doesn't just feel comfortable to hold; it also keeps the pen right where you left it on your desk or workbench instead of rolling away.
Satisfying Snap-Fit Cap:
The end cap features a tiny built-in relief chamber. When you push it into the back of the pen, the plastic compresses slightly and then locks home with a heavy, deliberate snap.
Clean Epoxy Pockets:
Both the slider and cap have tiny recessed pockets engineered specifically to hold a drop of 5-minute epoxy. This lets your internal anchor magnets sit perfectly flush without overflowing or ruining your print tolerances.
🚀 Print & Assembly Instructions (For Your Description Field)
Print Orientation
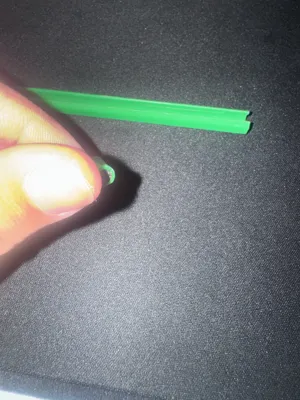
- Barrel/Body: Print vertically. Use a brim if you experience bed adhesion issues. 3 perimeters (walls) recommended.
- End Cap: Print vertically, flat face down on the bed.
- Slider Plunger: CRITICAL: Use your slicer's "Place on Face" tool and lay the wide, flat back of the thumb protection pad completely flat on the build plate. The cylinder plug should point straight up like a flagpole. This ensures maximum strength along the layer lines.
Hardware Required
- 20 Neodymium Disc Magnets (Size: 3.8 x 4.15 mm).
- 5-Minute Epoxy or high-strength Cyanoacrylate glue.
- A tiny dab of Bambu Lab mechanical grease.
Assembly Steps
- Glue the Slider: Mix a tiny bit of epoxy into the front glue pocket of the slider. Insert one magnet. Ensure it sits perfectly flush.
- Glue the Cap: Check the polarity of your slider magnet. Insert a magnet into the Cap's epoxy pocket facing the same polar direction so they pull continuously.
- Lube the Core: Apply a micro-dot (half a grain of rice) of Bambu Lab grease to the outside skin of the slider cylinder. Wipe it thin. Insert it into the barrel tracks and slide it back and forth to distribute the glide.
- Load & Click: Load your remaining 20 magnets through the front tip of the pen (the internal anchor will pull them right in!). Snap the rear cap into place until it clicks locked. Your Apex Flux is armed and ready.
!!! Very important: 2 in 1 tool can be use as a mag dispenser and also a mag pen. It can be customized through @Makerlab wot your specific needs (diameter and thickness of the magnet, number of magnets, etc). For the slider use the minimum 4.7 mm in the slider neck extension.
Additional information to be take into account:
- use a bit of Bambulab lubricant grease on the slider for better handling
- sand body of the pen only if needed (100 grit sandpaper and only wet sanding)
- use 5 minutes epoxy or other rapid glue to secure the magnet system in place
- 3 magnets needed for the system, 1 for the cap and 2 for the slider (check polarity)
- enjoy your combo tool
P.S.: split into objects and enjoy the multi-colored pen
License
You shall not share, sub-license, sell, rent, host, transfer, or distribute in any way the digital or 3D printed versions of this object, nor any other derivative work of this object in its digital or physical format (including - but not limited to - remixes of this object, and hosting on other digital platforms). The objects may not be used without permission in any way whatsoever in which you charge money, or collect fees.
Comment & Rating (1)