X2D buffer position adjustment (optimizing filament changer feed path)


Print Profile(2)

Description
Boost Me (for free)
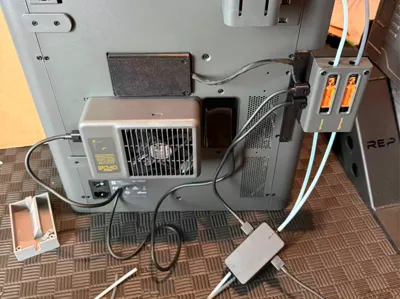
Since I have multiple AMS units, placed on the left side and below the printer, the existing filament switcher solutions have too many corners and too long filament tubes, frequently causing errors
According to the official plan, the wiring should be like this

Modified plan

The filament tube is much shorter, and there are fewer bends
Below is the installation tutorial
First, you need to prepare an extension cable for the filament switcher


After purchasing these two, solder them yourself. Note that the soldering should be in the same direction
You can also directly purchase from the link below
GH1.25 with buckle male to female extension cable high-temperature silicone wire 2P3P4P5P6P - Taobao

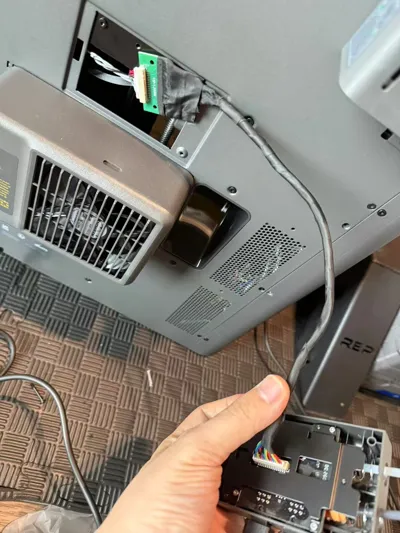
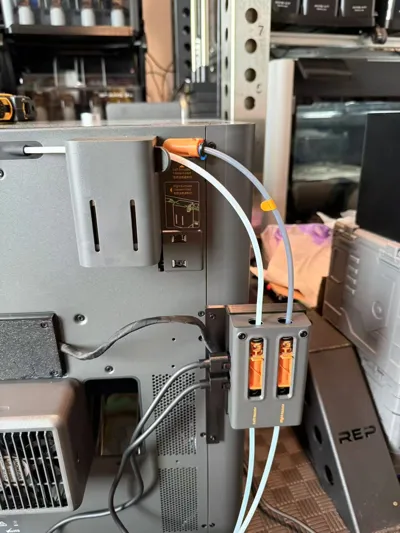
Then unscrew these two screws (don't lose them, they will be used again) and remove the buffer

Use the prepared extension cable to connect the printer and the buffer

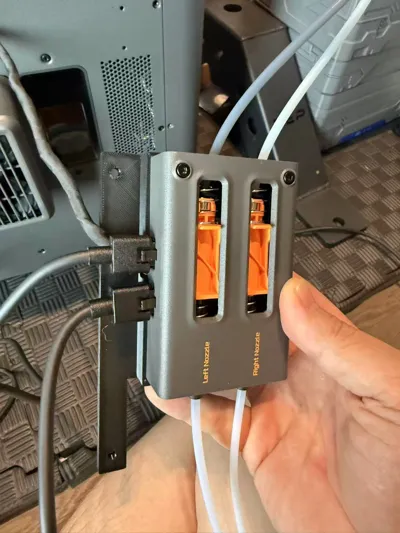
Lock the printed cover plate with the ST3X10 screws included with the filament switcher

Use the original buffer screws to lock the buffer onto the bracket

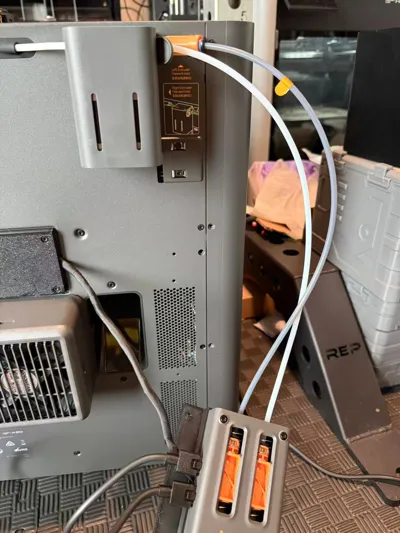
Unscrew these two screws on the printer

Use the ST3X10 screws included with the filament switcher to lock the buffer in place. Then re-cut the PTFE tube

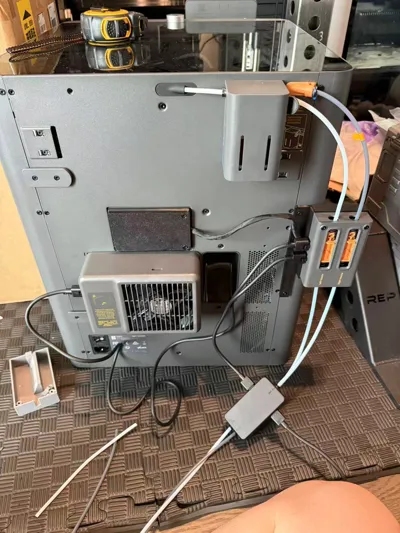
Connect the wires as shown in the picture above
Thank you for your support
License
You shall not share, sub-license, sell, rent, host, transfer, or distribute in any way the digital or 3D printed versions of this object, nor any other derivative work of this object in its digital or physical format (including - but not limited to - remixes of this object, and hosting on other digital platforms). The objects may not be used without permission in any way whatsoever in which you charge money, or collect fees.
Comment & Rating (1)