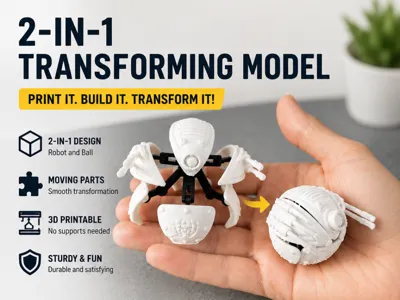
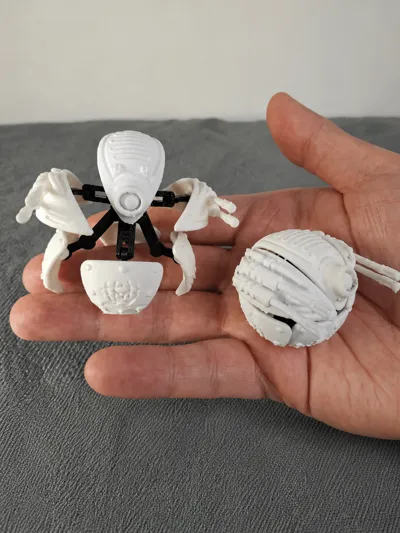
Transforming sphere robot


Print Profile(2)
Description
I create my models to be as creative and unique as p
Boost Me (for free)
every boost will help me a bit for gettig better/ pls help me!
ossible. So that you can also print them and of course - completely free!
It is important to read the description below carefully to maximize the quality of the model...
If you liked any of my models and you appreciate my modeling work - I would really appreciate a compliment from you or even just a positive comment. Thank you!
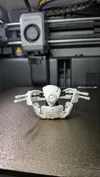
- Even with 3D printing in mind while designing, this print still tests your bed adhesion, overhangs, over/underextrusion, printing curved surfaces, debossed printing on curved surfaces, printing tall thin objects, printing small embossed features and more. Because its sphere design allows only a small portion of the parts to be in contact with the bed, weighs only a few grams, this makes a great printer tester.
- Everything is oriented correctly, supports are only needed under those big blasters of his and brim is advised but not necessary if you have your printer dialed in.

- You can print it in any layer height you want but it has some fine details which are better shown in lower layer height.
- For the inner core I would suggest to use PETG, ABS, ASA - something more flexible because of the snap joints. The outer shell can be printed out of any material but the PLA is the easiest to print.
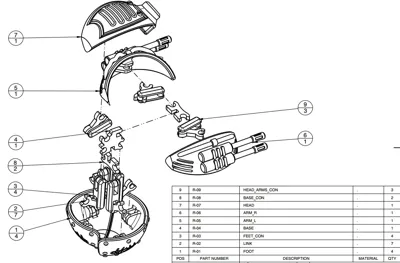
- Number of parts is in the picture below and I prepared two beds so you can print everything at once. For the best results print those two beds in a different colour.
Assembly:
Assembly is not hard. Just connect R-04 (base) with R-08 (base connector) through the slots. It will stay in place but a drop of superglue never hurts.
Than position it according to the drawing. To the lower four snap in holes insert 4x R-03 (feet connector) and on those 4x R-02 (link). To the link just attach the feet.
Connect the arms and head in a similar manner, but instead of R-03 (feet connector) use 3x R-09 (head and arms connector).
Tip: use fuzzy skin on the faces of armour and core, that are touching. This way it will have more resistance when positioning.
And you are done! Enjoy!

Future plans:
If you guys like this robot I will definitely add more. Like removable blasters, different type of blasters or heads and more. Feel free to write me your ideas and I will try to add them.
For example I started working on a Gatling gun attachment:

For cleaning of the prints you can use my mini utility knife. Is is perfect for these small parts.
https://www.printables.com/model/1176925-tiny-utility-knife-keychain
Boost Me (for free)
If you like the model, a boost really helps me create more flying designs like this 🚀

License
You shall not share, sub-license, sell, rent, host, transfer, or distribute in any way the digital or 3D printed versions of this object, nor any other derivative work of this object in its digital or physical format (including - but not limited to - remixes of this object, and hosting on other digital platforms). The objects may not be used without permission in any way whatsoever in which you charge money, or collect fees.
Comment & Rating (32)