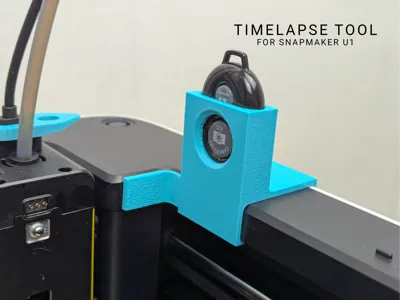
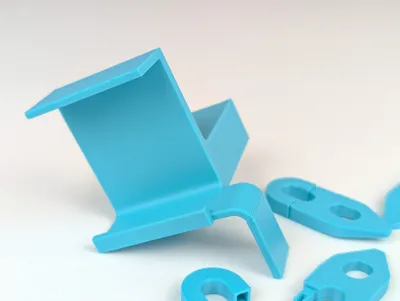
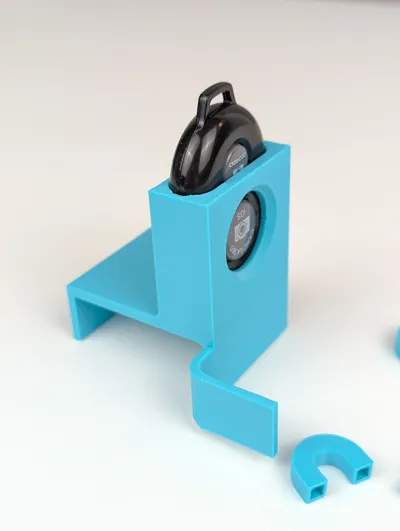
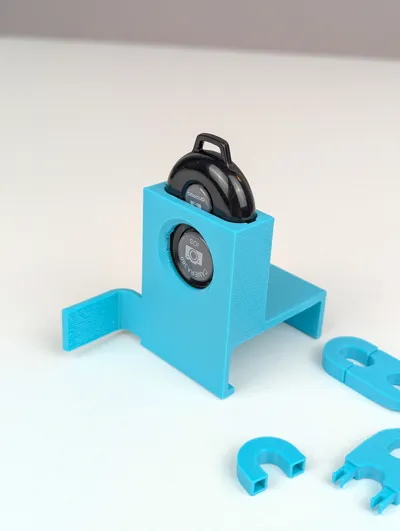
Snapmaker U1 Shutter Timelapse tool


Print Profile(1)
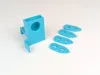
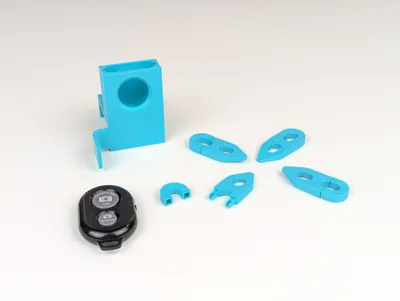
Bill of Materials

Description
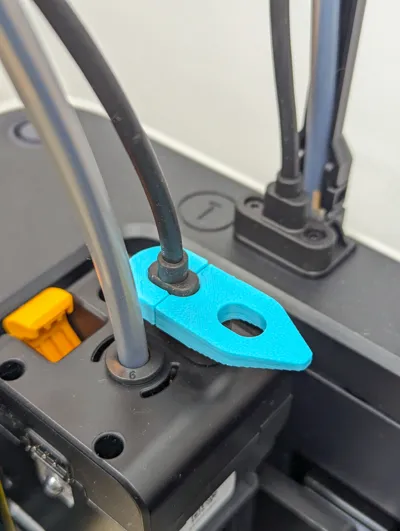
⚠️ Important:
Install the shutter holder everytime only AFTER bed leveling.
If you leave it mounted during calibration/homing, the printer may hit and damage the holder.
📸 Easy Timelapse Mod for Snapmaker U1
Hello everyone!
I created a simple shutter timelapse setup for the Snapmaker U1 that lets you easily create smooth timelapse videos using your smartphone and a cheap Bluetooth remote shutter. Timelapse videos are perfect for TikTok, Instagram Reels, and YouTube Shorts.
They make the printing process look fast, satisfying, and engaging — great for growing your audience or showcasing your prints.
Boost Me (for free)
Boost me if you like my model. It supports me to design new models!
🧰 What You Need
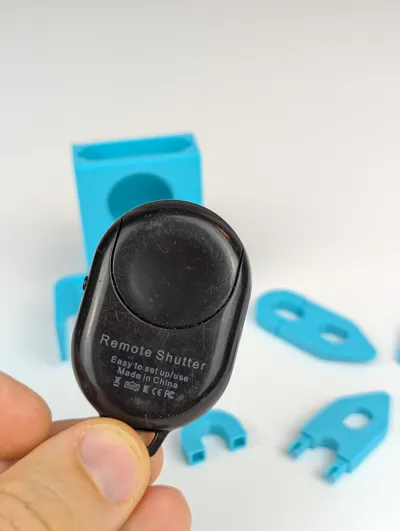
- Bluetooth remote shutter (AliExpress / Amazon)
- Smartphone (iOS or Android)
- Timelapse editor app:
- Premier Pro
- DaVinci Resolve (Desktop)
- Velocity Lapse / CapCut (Mobile)
🛠️ Installation
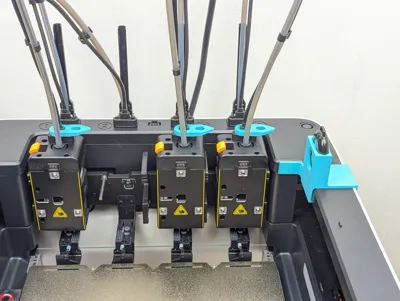
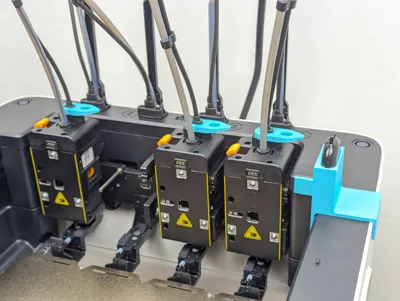
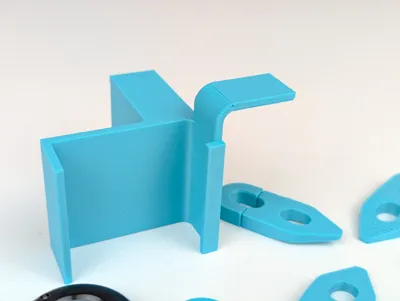
- Mount the shutter holder onto your Snapmaker U1 frame.
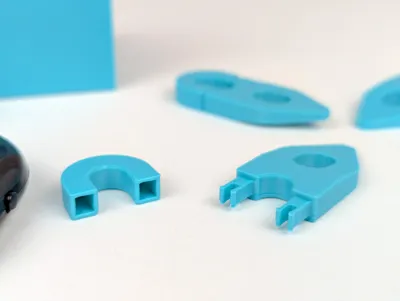
- Insert the Bluetooth shutter button into the printed holder.
- Secure the two-part locking clips (“fingers”) onto each hotend. Before installing them on the printer, repeatedly open and close the clips a one time so they loosen up and move smoothly.
- Position your phone so the nozzle moves out of frame during each photo.
- Modify your timelapse G-code (see below).
- Enjoy
🧾 Timelapse G-code Setup
1. Open printer settings

2.Paste my modified g-code to “Layer change G-code”:

;AFTER_LAYER_CHANGE
;[layer_z]
SET_PRINT_STATS_INFO TOTAL_LAYER={total_layer_count} CURRENT_LAYER={layer_num+1}
G91 ; relative positioning
G1 Z0.6 F1200 ; small Z-hop
G90 ; back to absolute positioning
G1 X250 Y265 F18000 ; move diagonally first
G1 X265 Y265 F18000 ; then move along X to final parking position
G4 P100 ; short 0.1s pause
G1 X255 Y265 F18000 ; move 10mm left after shutter press
G4 P2000 ; 2-second pause for phone to take picture
3. Save settings with new name

Due to many requests for commercial licenses for my 3D models I created a Patreon page. You can become a member to get permission for commercial use or just want to support my work:
https://www.patreon.com/c/PlasticDreams3D
License
You shall not share, sub-license, sell, rent, host, transfer, or distribute in any way the digital or 3D printed versions of this object, nor any other derivative work of this object in its digital or physical format (including - but not limited to - remixes of this object, and hosting on other digital platforms). The objects may not be used without permission in any way whatsoever in which you charge money, or collect fees.
Comment & Rating (0)