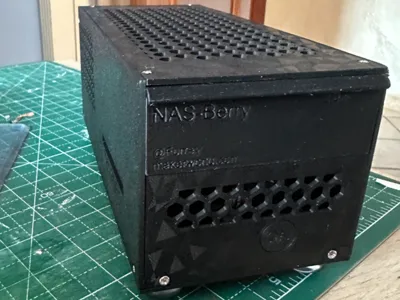
NASBerry By Furrey


Print Profile(1)

Description
NASBerry By Furrey

Requirements:
- Raspberry Pi 5: https://www.raspberrypi.com/products/raspberry-pi-5/
- Screws and Inserts: https://www.amazon.it/dp/B0CSDK6M3T
- Feet (can also be printed): https://www.amazon.it/dp/B0B63LZX7C?th=1
- USB hub (Get one with a USB3 connection) https://it.aliexpress.com/item/1005004786344707.html
- Flat Micro SD Adapter: https://it.aliexpress.com/item/4001209386882.html
- External SATA to USB Cable: https://it.aliexpress.com/item/1005005691551583.html
- RJ45 Male to Female Cable: https://it.aliexpress.com/item/1005010214927918.html
- 90° USB C Cable: https://www.amazon.it/dp/B0CR5S8CBX?th=1
- Raspberry Pi 5 PCI-E Module (+M2): https://www.amazon.it/dp/B0F389CXSX?th=1
Software:
- Raspberry OS https://www.raspberrypi.com/software/operating-systems/
- OpenMediaVault: https://www.openmediavault.org/
In this guide, I will not cover how to install the software; you will find many more complete and exhaustive guides out there than I can provide
Step 1:
Print all the parts; if you use the file with my print profile, there are a few things to consider


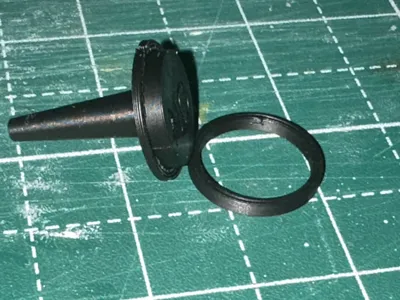
To ensure the smoothest possible surface in contact with the supports, I created a support directly in CAD with a 0.2mm tolerance. With my print profile, it will print as a single body, but you will only need light pressure with fine tweezers where you see an "unusual" layer to detach it from the button. If you want to print with your own profile and use default supports, use the "Pulsante" model instead of "Bottone"


The same applies to all panels, but here I let the slicer handle it. Use a thin tool to apply pressure from the other side of the panels to remove the thin support created by the slicer.

Regarding the base, the same principle as the first case applies; that is, I created the support directly in CAD. After removing this support, there are 2.5mm threaded holes if you want to print your own feet. If you want to use the silicone feet available from the provided link, you can also leave the holes for better adhesion of the foot adhesive.
Step 2:
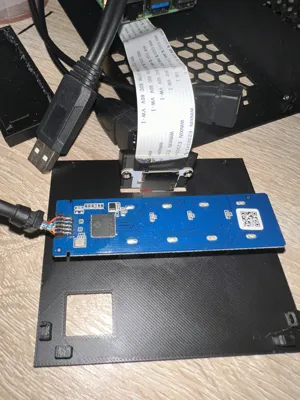
Take the USB hub and disassemble it to retrieve the circuit board. The casing is snap-fit, and you can easily reassemble the hub at any time.


Step 3:
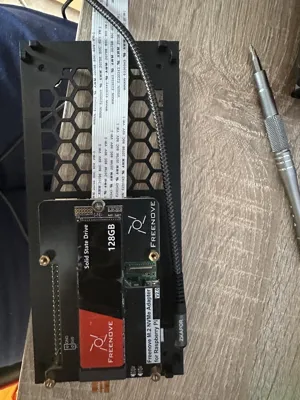
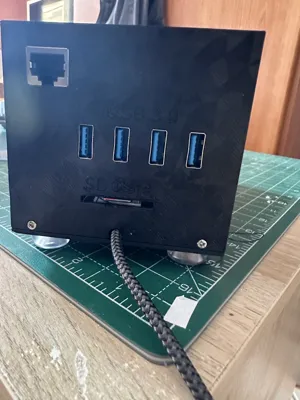
Take the back of the NASBerry and screw in the Flat Micro SD extension with the 2.5mm screws included in the purchased screw and insert kit.

Take the previously disassembled hub PCB and snap it into the protruding slots above by applying light pressure.

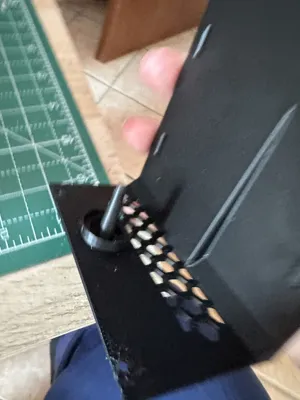
Finally, snap in the RJ45 adapter. A dab of hot glue is recommended, as the fit is perfect, but removing and reinserting the Ethernet cable might dislodge it

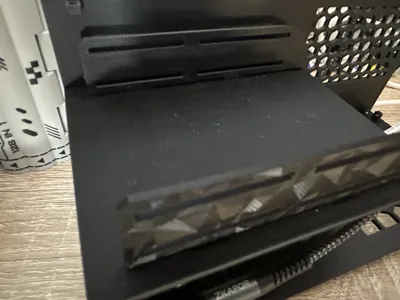
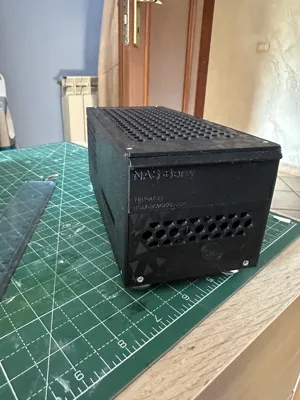
The final result is this

Step 4:
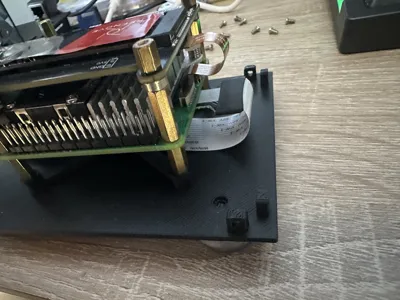
Mount the Raspberry Pi with its heatsink and PCI-E adapter using the inserts from the kit, not those that come with the adapter, as they will be too small for the base's housing. Insert the SSD and the flat Micro SD extension, routing it under the Raspberry Pi, and snap everything into the base's housing.

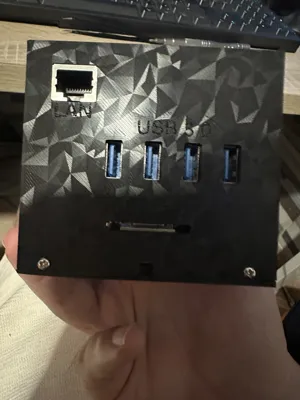
Connect all cables to the free USB ports (I recommend leaving the USB 3 ports free for inserting the SATA adapters)

Step 5:
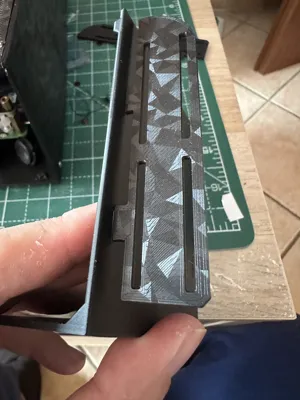
Take the front panel with the 2 wings. For practical reasons, I separated these parts; now they need to be reunited to create the housing for two 2.5” HDDs.

Take the button and slide it into its slot (the orientation is guided by a pin that will center it)

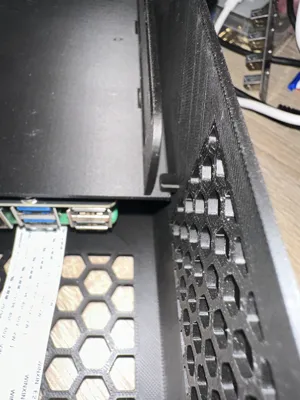
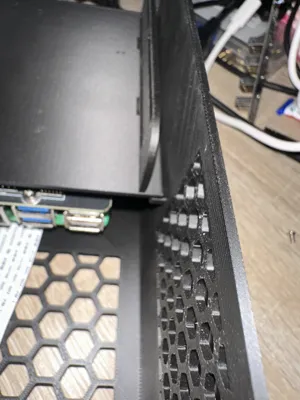
Step 6:
Assemble all panels, being careful to position the front panel over the pin on the side panels. This acts as a support to prevent the front panel from flexing when the HDDs are inserted.


Before mounting the back of the NASBerry, snap the USB C power cable into the hole below the Micro SD slot.

Complete the assembly by screwing everything together, and your NASBerry will be ready. Now you just need to install the OS, the software, install the 2.5 HDDs, and you'll have a small NAS.
License
You may create derivative works based on this object, provided that all such derivative works are published exclusively on the MakerWorld platform and include proper attribution to the original creator. You may not share, upload, host, distribute, or publish this object—or any derivative work of this object—on any other digital platform, marketplace, or distribution channel. Commercial use of this object and any derivative works is strictly prohibited. This includes, but is not limited to, selling, renting, sublicensing, or using the object in any context in which you receive monetary compensation or other financial benefits.
Comment & Rating (0)