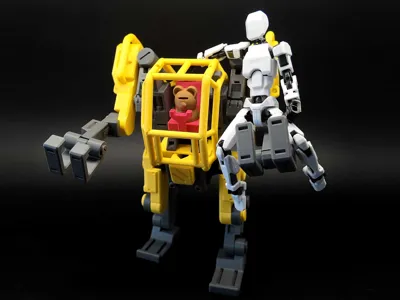
Steelmane Industries Heavy Engineering Mech | Unitree Robotics Dual-Form Mech | Multi-articulated | 1/16 scale | Lego compatible


Print Profile(3)
Description
Membership
Welcome! ✨ ☕ Buy Me a Coffee: Support my work and keep me caffeinated! 💼 Commercial License: For business use and legal authorization only. Please note: There are currently no exclusive files or bonus content with this tier. It serves purely as a commercial permit. Thanks for your support! ❤️


Update:
2026/6/3
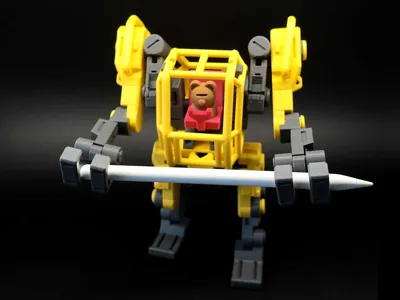
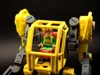
Thanks to the creative ideas from friends in the comments section, I have modified the seat, and it can now fit Lego minifigures!

Warm Tips:
🧩 Easy Assembly
All parts feature snap-fit or slot designs, allowing for initial assembly by hand. To accommodate different printer models, I intentionally left wider tolerances in some areas. If any parts are loose, simply fix them with a small amount of super glue, which will not affect the appearance or functionality. It is recommended to dry-fit first before deciding whether to use glue.
⚙️ Minimal Supports
To balance complex structures with printing success rates, only a very small amount of supports (concentrated in localized overhangs) is pre-set in the model. After printing, they can be easily removed with minimal post-processing, saving significant cleanup time.
⏳ Printing Time
Due to its rich structural details or larger volume, the total printing time for this model is typically longer (with official default settings). However, each print will yield a sturdy, reliable, and worthwhile finished product.
🔧 Expandable / Customizable
Adjustable space has been reserved in the design for future updates and replacement accessories (such as card slots, bases, pendants of different sizes, etc.).
💪 Durable Design
Key stress points have been thickened. Even if assembled with glue, the model remains sturdy and durable after assembly, suitable for long-term preservation.
Background Introduction:
Inspired by the GD01 manned mecha released by Unitree Robotics
Star Sea Journey · Steel Mane Industrial Standard · Heavy Engineering Mecha
Model Specifications
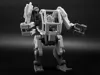
Model: M-C04-QE "Porter"
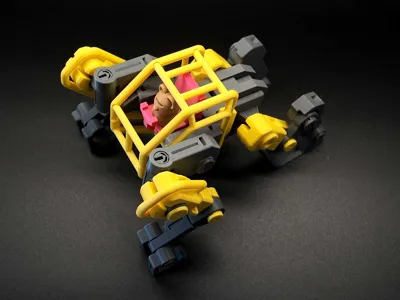
Positioning: High-altitude climbing / Heavy material handling / All jobs where scaffolding is undesirable
Height: 2.8 meters upright, 2.0 meters prone
Armament: None. Its two hands are its entire armament—each hand has only two fingers, thick enough to crush I-beams, yet nimble enough to tighten an M6 bolt. Steel Mane engineers call them "opposing finger clamps," while pilots call them "right hand and left hand"
Paint Scheme: Engineering yellow for the main body, with deep gray-black for the chassis and joints. This is not a designed color scheme; all Steel Mane engineering equipment is sprayed with these two paints when leaving the factory—yellow means "you can see it," and black means "you can avoid it"
Story
The first day the little bear pilot climbed into the cockpit, he brought a cup of hot coffee.
The engineer said, "The seat will rotate." He said he knew. The engineer said, "When switching from upright to prone, there's an axle under the seat that rotates ninety degrees." He said he knew. The engineer said, "Your coffee will spill." He said no—he had deliberately held the cup between his legs.
After the first mode switch, he used three packs of wet wipes to clean his pants.
Later, he switched to a lidded cup. The lid was fastened so tightly that a straw couldn't even be inserted. During the second mode switch, changes in cabin pressure popped the lid off, spraying coffee onto the ceiling, which dried to look like an abstract painting. The maintenance worker asked what the painting was called. He said it was called "The First Time the Climber Ascended the Cooling Tower, the Pilot Forgot to Put the Cup in the Storage Compartment".
Now he uses a screw-top stainless steel insulated mug, tightening it in advance before every mode switch and placing it in the storage slot on the side of the seat. His colleagues said he had finally learned. He said he hadn't learned, but that the vengeful spirits of the previous three cups had warned him in a dream.
Assembly Instructions:


Notes:
- My printing devices are A1 mini, P1S, and X2D, using default parameter settings and minimal supports.
- Contains small parts. Please ensure adult supervision during children's play or assembly, and prevent swallowing!
- This was not easy to create. If you like it, please give a five-star review! (If you have any questions, please leave a comment, and I will help you resolve them as soon as possible)
- Before printing, please clean the build plate! Clean the build plate! Clean the build plate! Important things repeated three times!
- Wish you happy printing~
Boost Me (for free)
Your support is what keeps me going! I'll be sharing more fun and exciting designs with you all. Thank you! ✨
License
You shall not share, sub-license, sell, rent, host, transfer, or distribute in any way the digital or 3D printed versions of this object, nor any other derivative work of this object in its digital or physical format (including - but not limited to - remixes of this object, and hosting on other digital platforms). The objects may not be used without permission in any way whatsoever in which you charge money, or collect fees.
Comment & Rating (18)