


Print Profile(2)

Bill of Materials

- Sunlu Transparent PLA - Green x 1: https://a.co/d/dS6GZB4 x 1:
Description
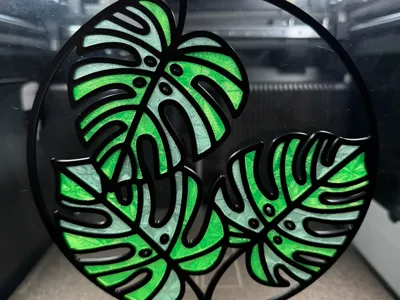
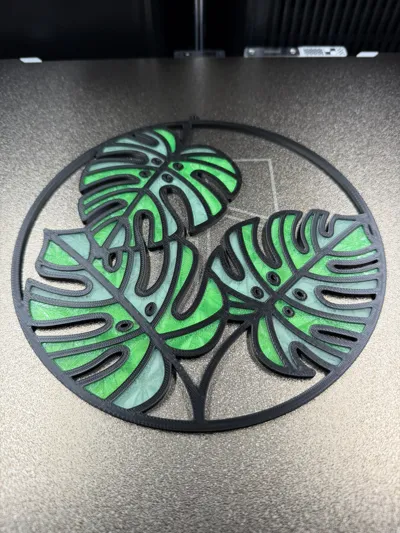
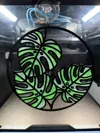
Here's another stained glass featuring monstera leaves. I designed it in a way that allows anyone to print all the pieces separately. So whether you have an AMS or two or none at all, it can still be printed. If you have no AMS, you’ll need to separate all the pieces and print them one color at a time. If you only have one AMS, you can just go ahead and print. If you have a dual nozzle printer, then you can utilize both nozzles to save on waste. NOTICE: Unfortunately this model is too big for the A1 Mini, and I don’t recommend resizing it, as the tolerances might be off and the pieces won’t fit properly.
NOTICE: You’ll have to print the stained glass pieces first and then move onto the frame. When printing the frame, it will pause so you can place all the stained glass pieces in their places. I also advise you to use some double-sided tape or anything that can temporarily hold the stained glass pieces in their respected places so the part cooling fan doesn’t blow them out. I simply cut some double-sided tape and crumbled it up into a ball and stick it on the underside of the stained glass piece and put it into place. You can adjust the filament settings if you choose not to use the tape method by following the instructions below.
UPDATE: I have found that the part cooling fan doesn't turn off sometimes and this can cause an issue. You can still try and change the settings, but I'd be prepared to turn off the part cooling fan after you've resumed the print. I only have an H2D to show where to go on the printer screen to turn off the part cooling fan. But it should be similar on most of the printers that have the same screen. If you don't, I suggest you look through the printers screen and see where those settings are. The part cooling fan will turn back on when it moves to the next layer. Pics are below.


Modify cooling settings for filament: To modify the cooling settings for the black filament to not activate the part cooling fan when it's laying down the filament over the glass pieces, you'll need to make 4 simple changes. The 4 changes are in the pics below. Please reference the picture for the filament settings. If you're still having issues with the pieces blowing out, then you can use the tape method I mentioned above. There might be a small chance the fan will be winding down after the purge when starting the print after the pause, and might blow a glass piece out of its place. I would pull up the “Cooling” screen on the printer to be ready to turn off the fan. NOTE: Whatever filament you're using for the frame, you'll need to adjust the settings in the filament to stop the part cooling fan from activating during the layer after the glass has been put down. You can follow the pics below to make those changes.
Filament slot 1 is the frame, and filament slot 4 is for the test piece.


Frame Filament Settings:

Test Piece Filament Settings:

I have ironing enabled for the test piece frame to see how the ironing looks. If you like the way it looks, then you'll need to apply it to the actual frame of the model. I don’t advise using ironing on the glass pieces. Depending on how calibrated your printer is and filament, you might get different results. So you might need to adjust accordingly or disable ironing all together.
There’s two plates with test pieces for you to print and make sure your tolerances all work as intended. Print the small stained glass piece(plate 3) first first and then the frame piece(plate 4), when the printer pauses, insert the glass pieces you just printed and make sure it fits. Then continue and look at the printed test piece to see if everything fits and looks good. Once you’ve done that, move onto printing the actual model.
I did use several different filaments to achieve the results I was after. Obviously you can use whatever filament and colors you’d like. Just know that you won’t get the same results, as I used all transparent filaments. Below I’ve listed all the filaments I used.
Boost Me (for free)
If you like my model and feel like boosting me, that would be greatly appreciated. Thanks for checking out my model.
License
You shall not share, sub-license, sell, rent, host, transfer, or distribute in any way the digital or 3D printed versions of this object, nor any other derivative work of this object in its digital or physical format (including - but not limited to - remixes of this object, and hosting on other digital platforms). The objects may not be used without permission in any way whatsoever in which you charge money, or collect fees.
Comment & Rating (0)