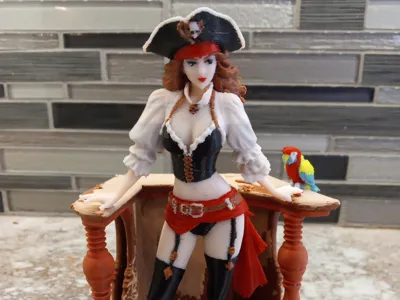
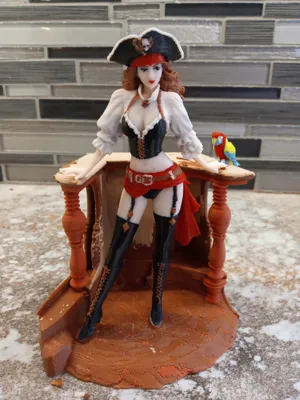
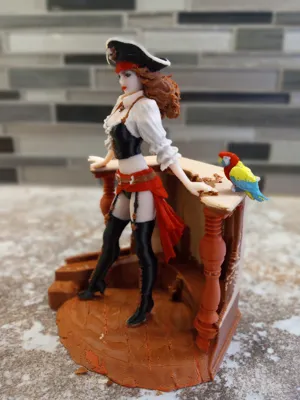
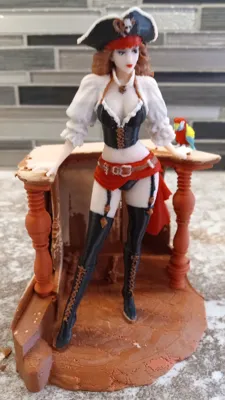
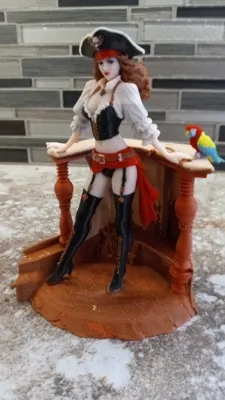
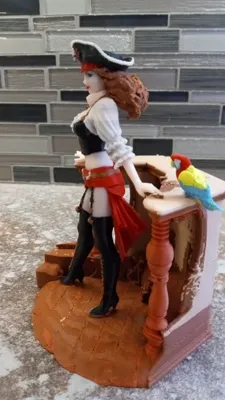
Lady Pirate


Print Profile(3)


Description
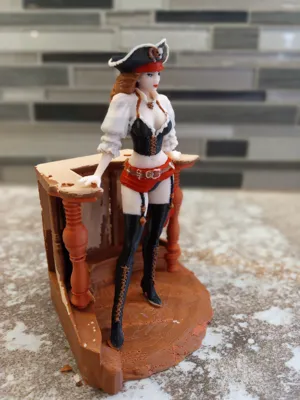
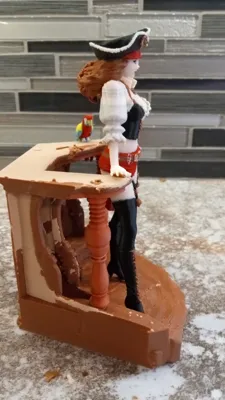
ARR-Matey! A Pin-up style Pirate.
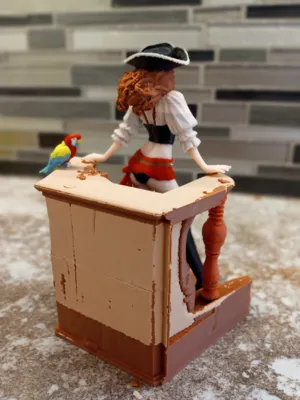
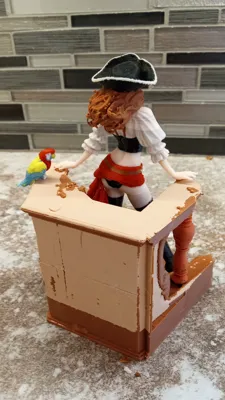
Print the pirate. Print the desk. Print the parrot. Print one, print all if you wish.
Powered by MakerWorld-Image-to-3D (https://makerworld.com/makerlab/imageTo3d) meshy6
Model printed on an A1 AMS(lite).
The 3mf model when created surprisingly included the background elements of the parrot, ship deck and railing. An impressive model! Even more so it also had the requisite number of fingers with the hands and feet facing the correct direction.
The coloring produced in Makerlab was very good and would need minimal touch up in BambuStudio. Problem was the print required 12 colors and the A1 is limited to 4. There was no good way to pause and color swap spools in this model as a whole.
Because there were no anatomical errors to correct as mentioned above the option of using meshmixer to section the model was not appealing ; as this would require a complete repainting of the sectioned parts.
A good time to start learning and playing with the features included in BambuStudio:
The description below details some techniques and workarounds I developed to get this model printed. If there are better methods or procedures please let me know.
The model was broken out into three printable pieces using BambuStudio based on the 4 color requirement limit.
- The Lady Pirate (Hacked from 5 colors using spool swap)
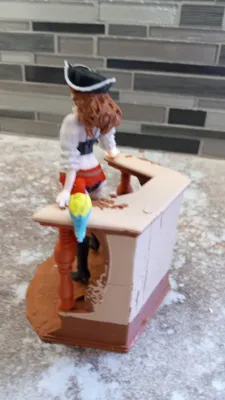
- The deck and railing
- The parrot
Each part was isolated using the “negative part” feature to cover the unwanted feature(s). A bit fiddly at times to guesstimate the proper positioning of what was to be removed. Each part was then saved out to a new 3mf part file.
With each part isolated to it's own 3mf file the color reduction was undertaken on each file by merging colors and only deleting colors not relevant to the edited part. Advice: Do not just save anything at any point during this process until completely done because if there is a mistake with the colors or an unexpected outcome you cannot go back, only start again.
- THE PIRATE LADY
The pirate was reduced to 5 colors (black, brown, red, white and beige), with a spool swap hack thrown in for good measure and then further reduced to 4.
The bambustudio paint tool was used to clean up some lines and coloring errors and solidify the colors throughout the model. The color scheme was reduced to 5 colors then the model was sliced. The sliced model was then edited with several pauses to allow for spool swapping and then saved again. The model was then reduced to the 4 colors with white being merged with red and the file then saved under another name. The order of the swap:
a. start with red
b. red was replace with white above the hip sash.
c. the white was replaced with red above the blouse .
d. The red was again replaced with white above the lips
e. the white was replaced with red above the eyes.
2. THE DECK AND RAILING
The deck and railing was straight forward until it wasn't.
Start by using the original 12 color 3mf.
The isolation of the deck was easy applying the negative parts to the pirate and parrot.
The color reduction was straight forward reducing everything into 4 colors in the browns and tans.
The model was then saved under a new name.
NOW for the Wasn't:
Being a picky SOB the left side of the railing facing was not prospectively rendered to be under the pirates resting right hand. This had to be fixed. Again using meshmixer for a fix would have meant a repaint. Back to investigating the tools in bambustudio.
The Fix:
a. Cloned the reduced color model.
b. moved and rotated the cloned part to get the railing under the right hand.
c. use the negative part to remove all but the required part of the railing for right hand support.
d. merged the resulting.
e. save the model under a new name.
In for a penny……………..
Decided to try some “what if” thoughts on saving time and filament with the deck and railing just because;
a. Cannot split model in bambulstudio as all colors will be lost after split.
b. Rule of thumb when printing in color, print multiple parts if possible to maximize build to waste ratio
c. height equals time.
The experimental results;
i. Straight foward slice of the deck and railing; time 32 hours with 310 g total filament
ii. Model and clone on one plate with clone inverted and models dragged down into the build plate in such a manner to have a complete model when sliced and rejoined. time 18 hours 180g of filament.
iii. model and clone on one build plate with only the original dragged into plate. A pause was placed into the sliced build so as to again have a complete model when joined. Once paused the build was stopped. time 17.5 hours filament guesstimate somewhat less than in ii. based on less support requirement.
3. THE PARROT
Unless a complete model as built is truly wanted or you require a plate full of miniature parrots for some nefarious reason the bird is a large waste of filament. Hazarding a guess there is 7 times more filament poop than bird here, very bad waste to model ratio
Comment & Rating (0)