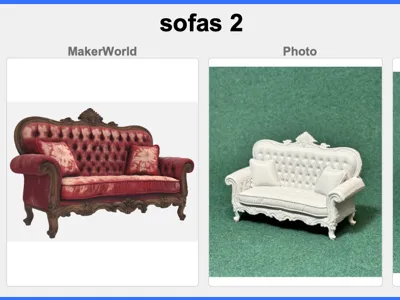
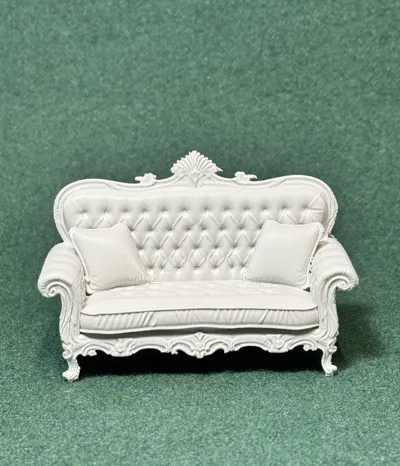
RPG • Dollhouse • Mini: Victorian Era sofas 2


Print Profile(1)
Description
This collection of Victorian-era items is designed to bring classic interior spaces to life in a practical and accessible way. Each piece is modeled with a focus on clean forms, recognizable silhouettes, and reliable printability, making them well-suited for tabletop scenes, dioramas, and display environments. The goal is to provide a flexible library of period-appropriate objects that can be mixed, matched, and reused to build complete rooms or detailed settings without unnecessary complexity.

In the "Victorian Home" these are found:
Drawing room - Parlor - -
—♚—♛—♝—♞—♜—♟—
Some of the Items in This Series. 200+ in all.
Victorian Era Abacus
Victorian Era Armchairs
Victorian Era Armoire
Victorian Era Bathtubs
Victorian Era Beds
Victorian Era Benches
Victorian Era Billiard tables
Victorian Era Books
Victorian Era Butter churns
Victorian Era Card tables
Victorian Era Carriages
Victorian Era Chairs
Victorian Era Cast-iron range
Victorian Era China cabinet
Victorian Era Clocks
Victorian Era Coffee grinders
Victorian Era Desks
Victorian Era Garden tools
Victorian Era Gramophone
Victorian Era Jewelry Boxes
Victorian Era Lamps
Victorian Era Lockers
Victorian Era Piano
Victorian Era Sofas
Victorian Era Tables
Victorian Era Telephone
Victorian Era Tool chest
Victorian Era Toy Chest
Victorian Era Wheelbarrow
—♚—♛—♝—♞—♜—♟—
⚠️ Print & Handling Notes
These models include fine, delicate details.
A strong filament is recommended — or anneal your set for additional strength (see below).
Bambu Studio Settings
Printer Settings
• Nozzle Diameter → 0.4 mm
• Compatible Material → PLA+
Filament Settings
• Nozzle Temperature (first layer) → 205 °C
• Nozzle Temperature (others) → 200 °C
• Bed Temperature (first layer) → 60 °C
• Bed Temperature (others) → 50–55 °C
• Cooling Fan:
◦ Layer 1–2 → OFF
◦ Layer 3+ → 100%
Quality
• Layer Height (Standard) → 0.20 mm
• Initial Layer Height → 0.20 mm
• Line Width → 0.45 mm
• Elephant Foot Compensation → 0.15 mm
Speed
• First Layer Speed → 20 mm/s
• Outer Wall Speed → 35 mm/s
• Inner Wall Speed → 50 mm/s
• Infill Speed → 50 mm/s
• Travel Speed → 120 mm/s
Acceleration / Jerk
• Default Acceleration → 1000 mm/s²
• Outer Wall Acceleration → 500 mm/s²
• First Layer Acceleration → 300 mm/s²
• Travel Acceleration → 2500 mm/s²
• Jerk (XY) → 8 mm/s
Strength / Infill
• Wall Loops → 3
• Top Layers → 4
• Bottom Layers → 4
• Infill Density → 20%
• Infill Pattern → Gyroid
• Sparse Infill Anchor Length → 5 mm (🔔 Note: increase to 10 mm if you see weak infill connections)
Skirt & Brim
• Skirt Loops → 3
• Skirt Distance → 2 mm
• Skirt Layers → 1
Retraction
• Retraction Distance → 4 mm
• Retraction Speed → 40 mm/s
• Z-Hop → 0.2 mm
• Wipe While Retracting → Enabled
• Retract on Layer Change → Disabled
• Minimum Travel Before Retraction → 1.0 mm
Supports
• Support Style → Tree
• Top Contact Z Distance → 0.25 mm (detachable, fixed)
• Support Density → 15%
• Support Interface Pattern → Grid
• XY Distance → 0.5 mm
• First Layer Support Gap → 0.3 mm
—♚—♛—♝—♞—♜—♟—
♨️ ANNEALING — Hardening Your Chess Pieces
Annealing your PLA models can improve strength by 10 – 20 %.
If you plan to play with these sets regularly, annealing is highly recommended.
If your goal is display or occasional play, annealing is optional.
The appearance and finish remain unchanged.
🔗 More info: Annealing PLA Prints for Strength — Easy Ways (All3DP)
https://all3dp.com/2/annealing-pla-prints-for-strength-easy-ways/
—♚—♛—♝—♞—♜—♟—
Please note:
Because I’m retired and on a fixed income, I print these models at a smaller scale to save on filament. All of these models are printed at 70% - 80% of the model uploaded size.
♟️
Thank you! Thank you! To all of you who Boost my uploads. Because of YOU I can get my filament now from “Maker's Supply”, saving me from using real money.
♟️
These creations are made purely for the joy of sculpting and sharing. Printing at a reduced scale can sometimes affect the quality of fine details; printing at full or larger sizes will yield smoother, more refined results.
♟️
Also, as a 77-year-old maker with hands that sometimes have a mind of their own, I occasionally have to use a little hot-glue surgery to reattach delicate parts. Please handle models with care—especially thin necks, joints, and fragile connectors. Take a moment to study your model before removing supports… or you might find yourself reaching for the glue gun too! 🥲


License
You shall not share, sub-license, sell, rent, host, transfer, or distribute in any way the digital or 3D printed versions of this object, nor any other derivative work of this object in its digital or physical format (including - but not limited to - remixes of this object, and hosting on other digital platforms). The objects may not be used without permission in any way whatsoever in which you charge money, or collect fees.
Comment & Rating (3)