


Print Profile(2)

Bill of Materials


.jpg)
Description
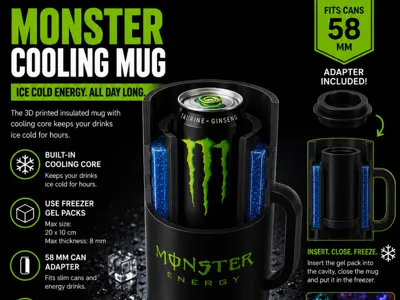
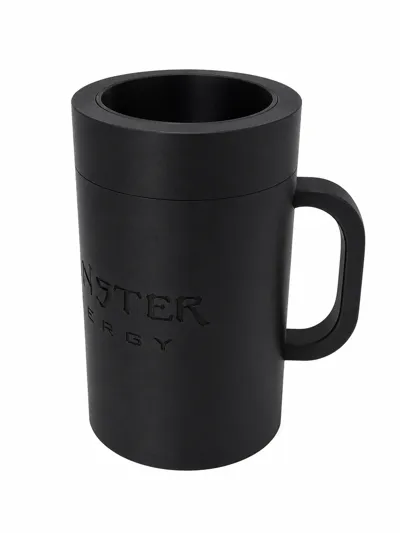
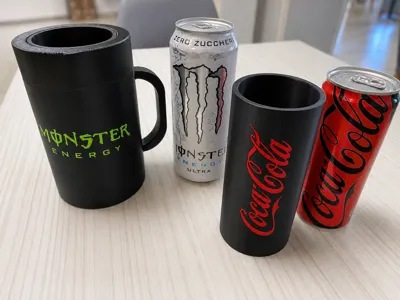
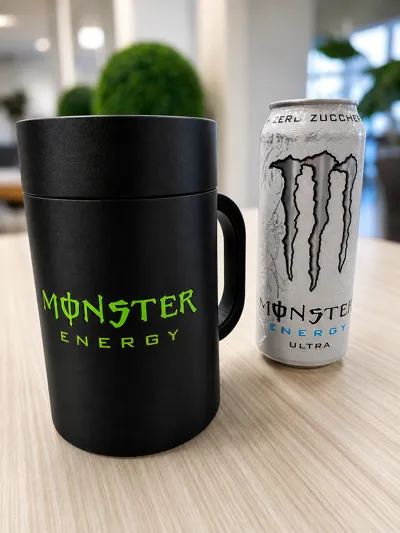
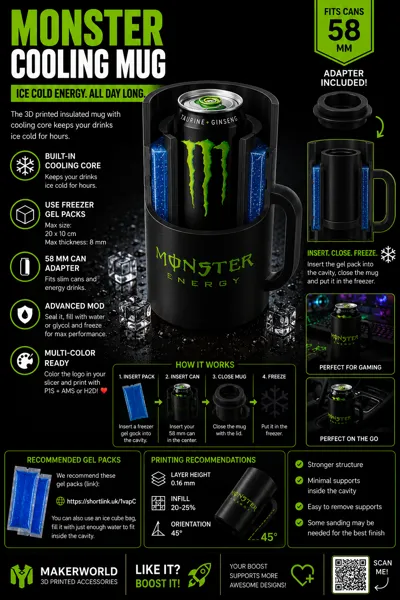
Keep your drinks ice cold for hours with this Monster-style cooling mug, designed especially for energy drink lovers!
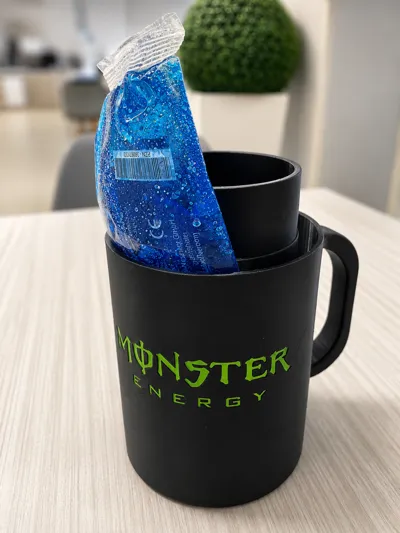
The mug features an internal cooling chamber where reusable freezer gel packs can be inserted to keep your drink cold much longer than a standard cup.
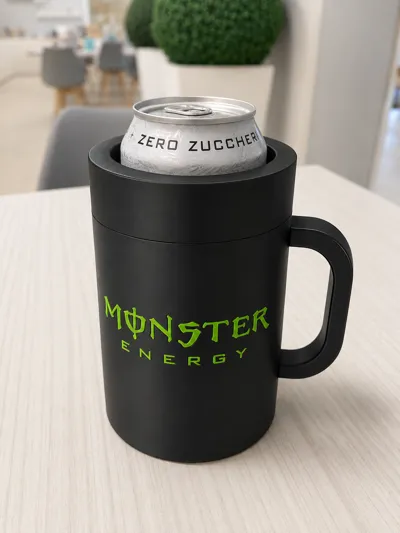
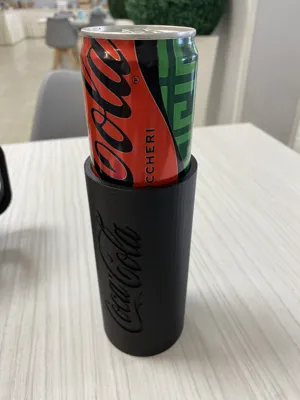
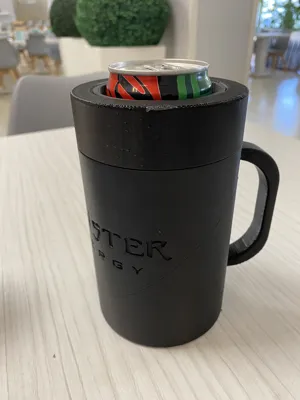
It also includes a 58 mm adapter for smaller cans, making it compatible with different energy drink and soda can sizes.
Perfect for:
- Energy drinks
- Soda cans
- Gaming setups
- Streaming desks
- Car meets
- Summer drinks
Cooling Chamber
Inside the mug there is a dedicated cavity designed to hold freezer gel packs like the ones shown in the photos.
Recommended maximum dimensions:
- 20 x 10 cm
- Maximum thickness: 8 mm
Insert the cooling pack into the mug, close it, and place it in the freezer.
Recommended cooling packs:
You can also use a simple ice cube bag, filling it with just enough water to fit inside the internal cavity.
Advanced Mod (for skilled makers)
For more experienced users, it is possible to make the cavity waterproof using a liquid sealant or epoxy coating.
This allows you to:
- Fill the cavity with water
- Use glycol coolant
- Freeze the mug itself for even longer cooling performance
IMPORTANT:
If you choose this modification:
- Carefully seal the closing cap
- Leave enough empty space for liquid expansion during freezing
Included Version
The file allows you to color the logo directly in your slicer and print it using a P1S with AMS, or even better, for the lucky ones… an H2C ❤️
Recommended Print Settings
- Layer height: 0.16 mm
- Infill: 20–25%
- Print orientation: 45°
Printing at 45°:
- Improves structural strength
- Reduces supports inside the cavity
- Makes supports easier to remove
Supported areas can be easily finished using:
- Sandpaper
- Hobby knife
- Small cleanup for imperfections
Friendly Note ❤️
The models I create are made for fun and to share with the community.
So please be respectful in the comments if the model is not your style. Thank you!
If you liked it…
⭐ Consider giving me a Boost! :D
It really helps support future projects and new designs.
If you enjoyed this project and want to support more crazy ideas like this one, consider giving me a Boost! 🚀❄️
I design these models for fun and to share them with the community, and every Boost really helps motivate future projects and improvements.
Thank you so much for the support ❤️
Update:
Added profile without logos
Boost Me (for free)
If you enjoyed this project and want to support more crazy ideas like this one, consider giving me a Boost! 🚀❄️
I design these models for fun and to share them with the community, and every Boost really helps motivate future projects and improvements.
Thank you so much for the support ❤️
License
You shall not share, sub-license, sell, rent, host, transfer, or distribute in any way the digital or 3D printed versions of this object, nor any other derivative work of this object in its digital or physical format (including - but not limited to - remixes of this object, and hosting on other digital platforms). The objects may not be used without permission in any way whatsoever in which you charge money, or collect fees.
Comment & Rating (5)