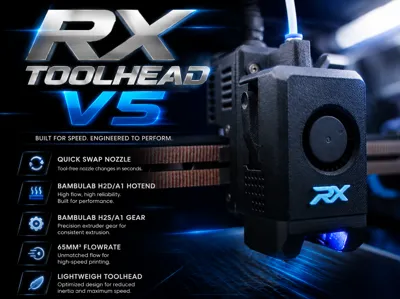
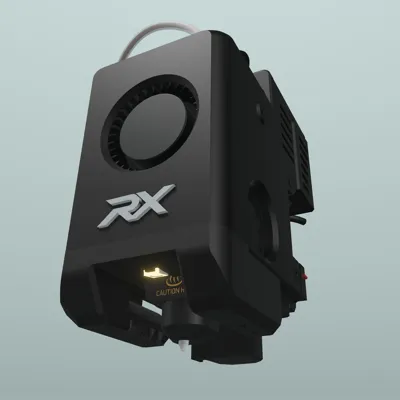
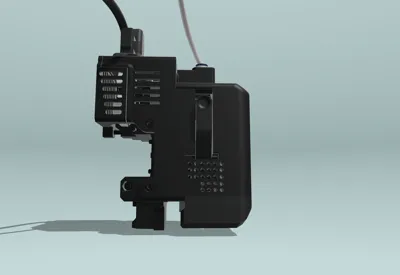
RX TOOLHEAD V5 using Bambu H2S/A1 gear & Hotend


Print Profile(1)
Bill of Materials


Description
after over 500 downloads I was forced to reupload this model to a new link because the original was taken down and removed all my hard earned points by MakerWorld under the reason “Por*ography Dissemination,” even though the post has nothing to do with that. I appealed the decision with supporting evidence and images for human review, but it was still rejected. Hopefully, this one won’t be unfairly flagged as well.

Boost Me (for free)
A boost would mean a lot—this project represents over a year, dozens of iterations, and hundreds of hours of work.
Click on Download STL/CAD files to find the .STEP files and Orca slicer profile
If this project has improved your printer or brought you value, please consider supporting its future on Patreon. Every contribution helps fund continued development, including the cost of new components, prototypes, and the filament used for testing and validation. Your support makes it possible to keep improving the project and bringing new features and updates to the community. Thank you! |
See the Model in 360 Exploded View here
If you need quick help or just hanging with us, talking about this toolhead
Join our Discord community
Full step-by-step Assembly Video for version 4. ⚠️ I'm working on a new video for version 5 since a lot has changed
⚠️If you are using the H2S extruder, don't skip this part! bellow
You’re chasing top-tier print quality without breaking the bank, this DIY Bambulab H2D/P2S style of toolhead is a game-changer. — It’s modular, efficient, and full of smart upgrades.
✅ Why Build One?
- Compatible with Bambu Lab H2D, P2S, A1, P1S, and X1C hotends.
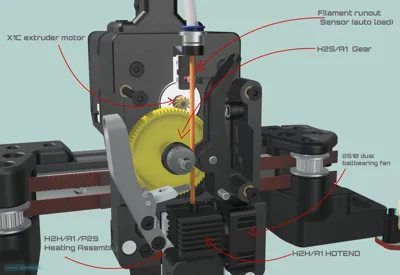
- Compatible with H2S and A1 extruder gears.
- Delivers exceptional print quality while remaining compatible with Bambu Studio print profiles.
Designed with continuous improvement in mind—the designer actively maintains and updates it based on real-world testing and community feedback.
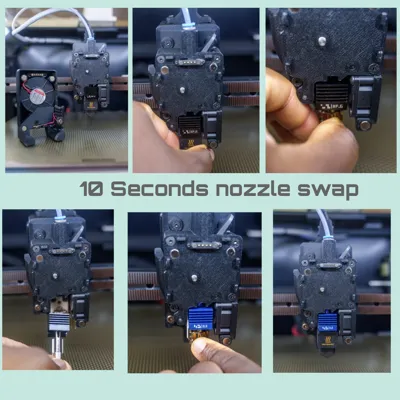
- Quick-swap nozzles — Get back to printing in seconds. Thanks to the Bambu Lab hotend heating assembly, nozzle changes require no contact with the thermistor or heater wiring, eliminating the common risk of damaging thermistor cables during swaps.
- Modular design — Easily upgrade, replace, or service individual components.
- Integrated filament sensor — Built-in for a clean installation and reliable filament detection.
- Automatic filament loading — Smooth, convenient, and user-friendly.
- Lightweight toolhead — Optimized for input shaping, high-speed printing, and precise motion.
- Affordable components — Compatible clone parts are widely available, making maintenance and upgrades cost-effective.
- Engineered for reliability — A robust mechanical design built for long-term performance.
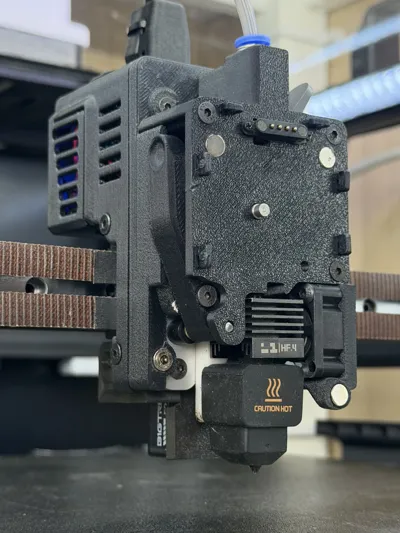
- Clean, professional design — Looks and performs like a refined production toolhead, not a typical DIY project.


Supports Different Probe types


Very easy to assemble and maintain


📦 Materials (BOM) – Organized by Category
All items include direct purchase hyperlinks
⚠️ Note About Links & Purchasing
Some of the Amazon links are affiliate links, provided only as a reference for part specifications and compatibility.
You are not required to buy from Amazon, and I don’t mind where you purchase the parts from.
My main goal with this project is to keep it as budget-friendly as possible so more people can build, experiment, and enjoy this toolhead.
Feel free to source parts locally, from eBay, Taobao, Bambu Lab, or any trusted supplier, as long as the specifications match.
⚠️Also, pay attention and don`t just buy everything on the list, some are duplicated. Just choose what you need ‼️
RX VORON V5– 5015 Toolhead BOM
🔩 Fasteners & Hardware
- M3 Screw Assortment Pack – M3×6/10/12/14/16/25/30 + M3 Nuts → Amazon
- M2×10 Self-Tapping Screws ( for standard limit switches) → Amazon
- M3 Brass Heat-Set Inserts (30× short M3×5×5) → Amazon
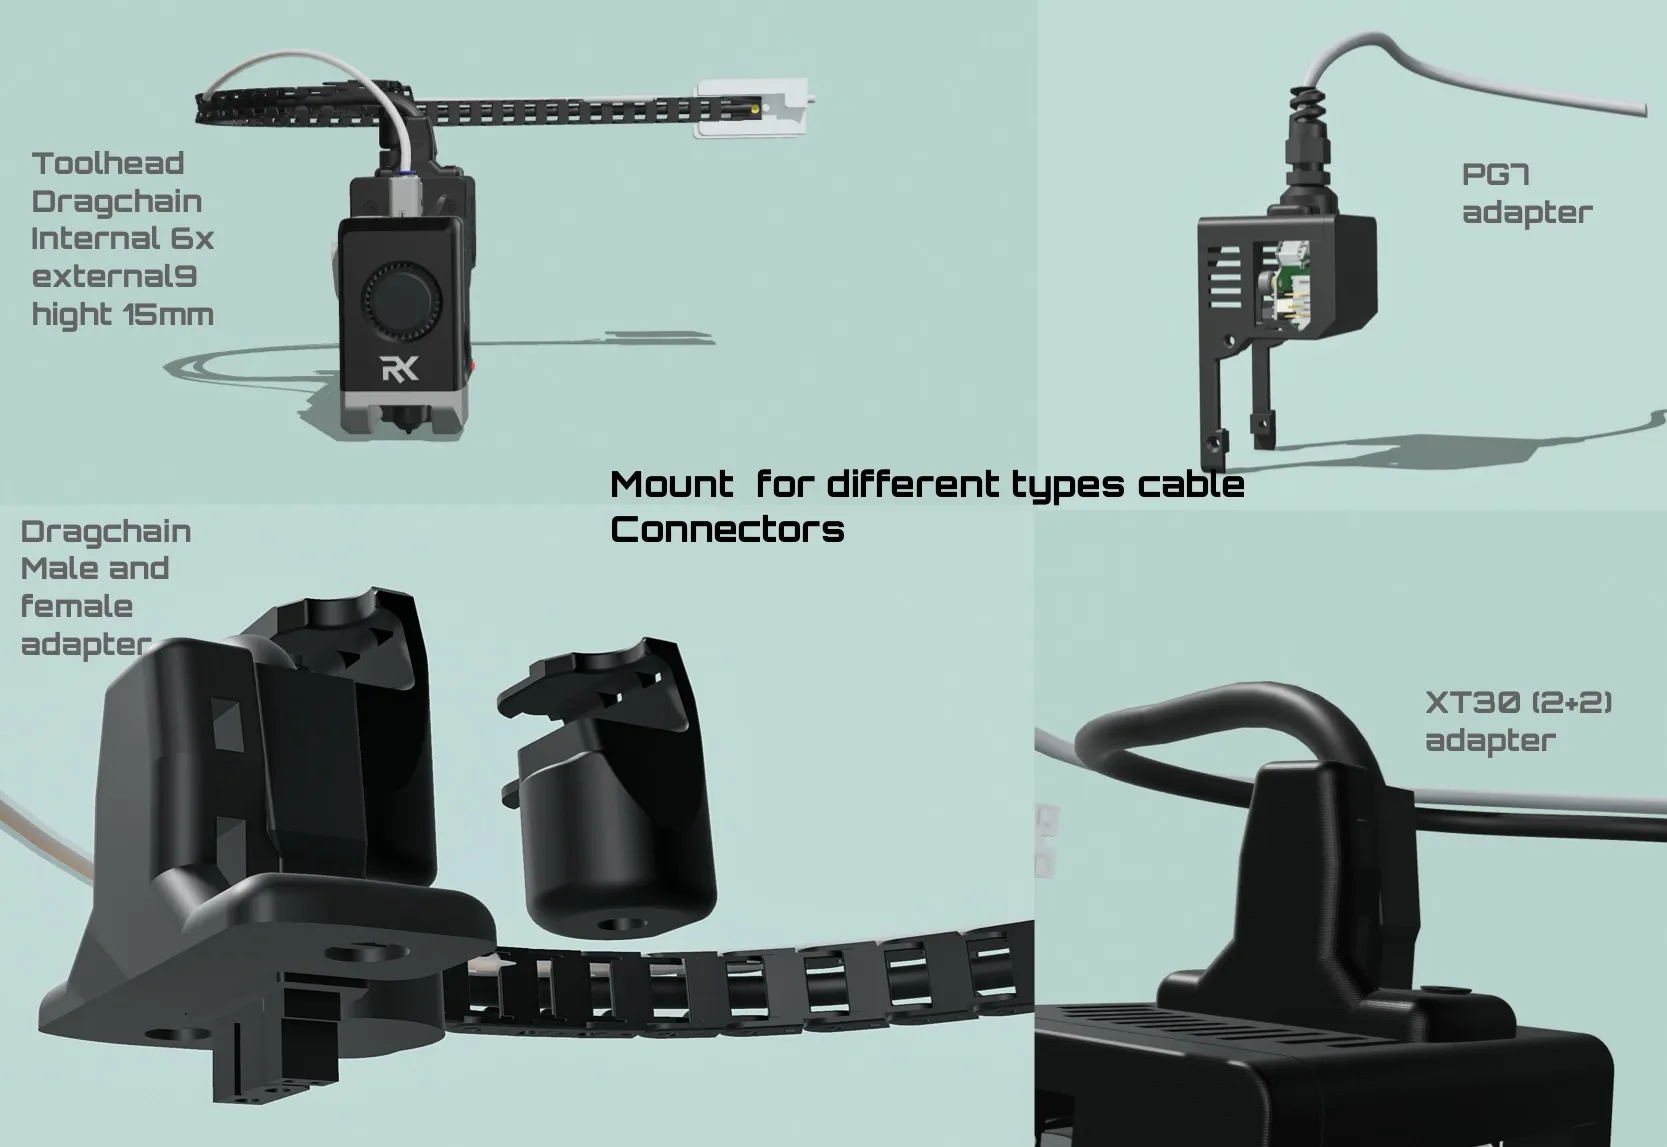
🔌 Tubing & Connectors
- PTFE Tube + ECAS04 Connector → Amazon
- PG7 Cable Connector (only if using EBB36 v1.2) → Amazon
- 2-Pin Pogo Pins (if using knomi display front cover and want the logo to glow with RGB colors → Aliexpress
🌀 Cooling Fans
(⚠️Pay attention to the voltage according to your toled headboard voltage requirement)
🎛️ Electronics & Boards
- EBB36 1.2 Toolhead Board → Amazon
- EBB36 GEN2 Toolhead Board → Amazon
Neopixel RGB LED Strip (optional) → Amazon
🔥 Heating Assemblies ⚠️
Original Bambu Lab assemblies strongly recommended. DO NOT buy H2D Left – Right is easier to work with.
- Bambu Lab A1 Heating Assembly → Amazon | Bambu Lab Store
- Bambu Lab H2D Right Heating Assembly → Amazon | Bambu Lab Store
- Bambu Lab P2S Heating Assembly → Bambu Lab Store
🔍 Probes (⚠️choose one)
- BTT Eddy Probe → Amazon
- MicroProbe → Amazon
- Cartographer Probe → Official Website
- Beacon Probe → Official Website
⚙️ Extruder Gears (⚠️choose one)
New recommendation to buy the
H2S extruder gear, it is a bit better than the A1 gear, especially if you plan to print TPU.
Also, it comes already with a compression tensioner spring, but it has no bearings in the package, so you will need to buy bearings separately, link below, Bambu Lab Store
if you buy another 3rd-party extruder gear or if you buy the H2S extruder gear, they don't include bearings in the package, so you need to buy the bearing separately thats. MR104 ZZ Amazon
- Original Bambu Lab A1 Extruder Gear (recommended – includes bearing) – Amazon | Bambu Lab Store
BIQU Alternative Extruder Gear (good for abrasive filaments, also includes bearing) – Amazon
🌀 Springs
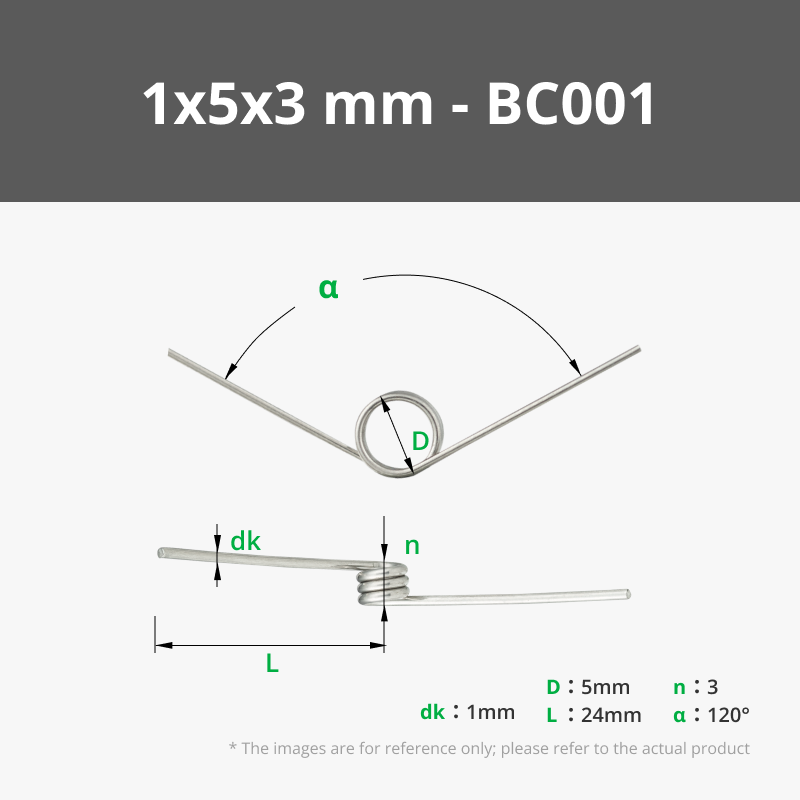
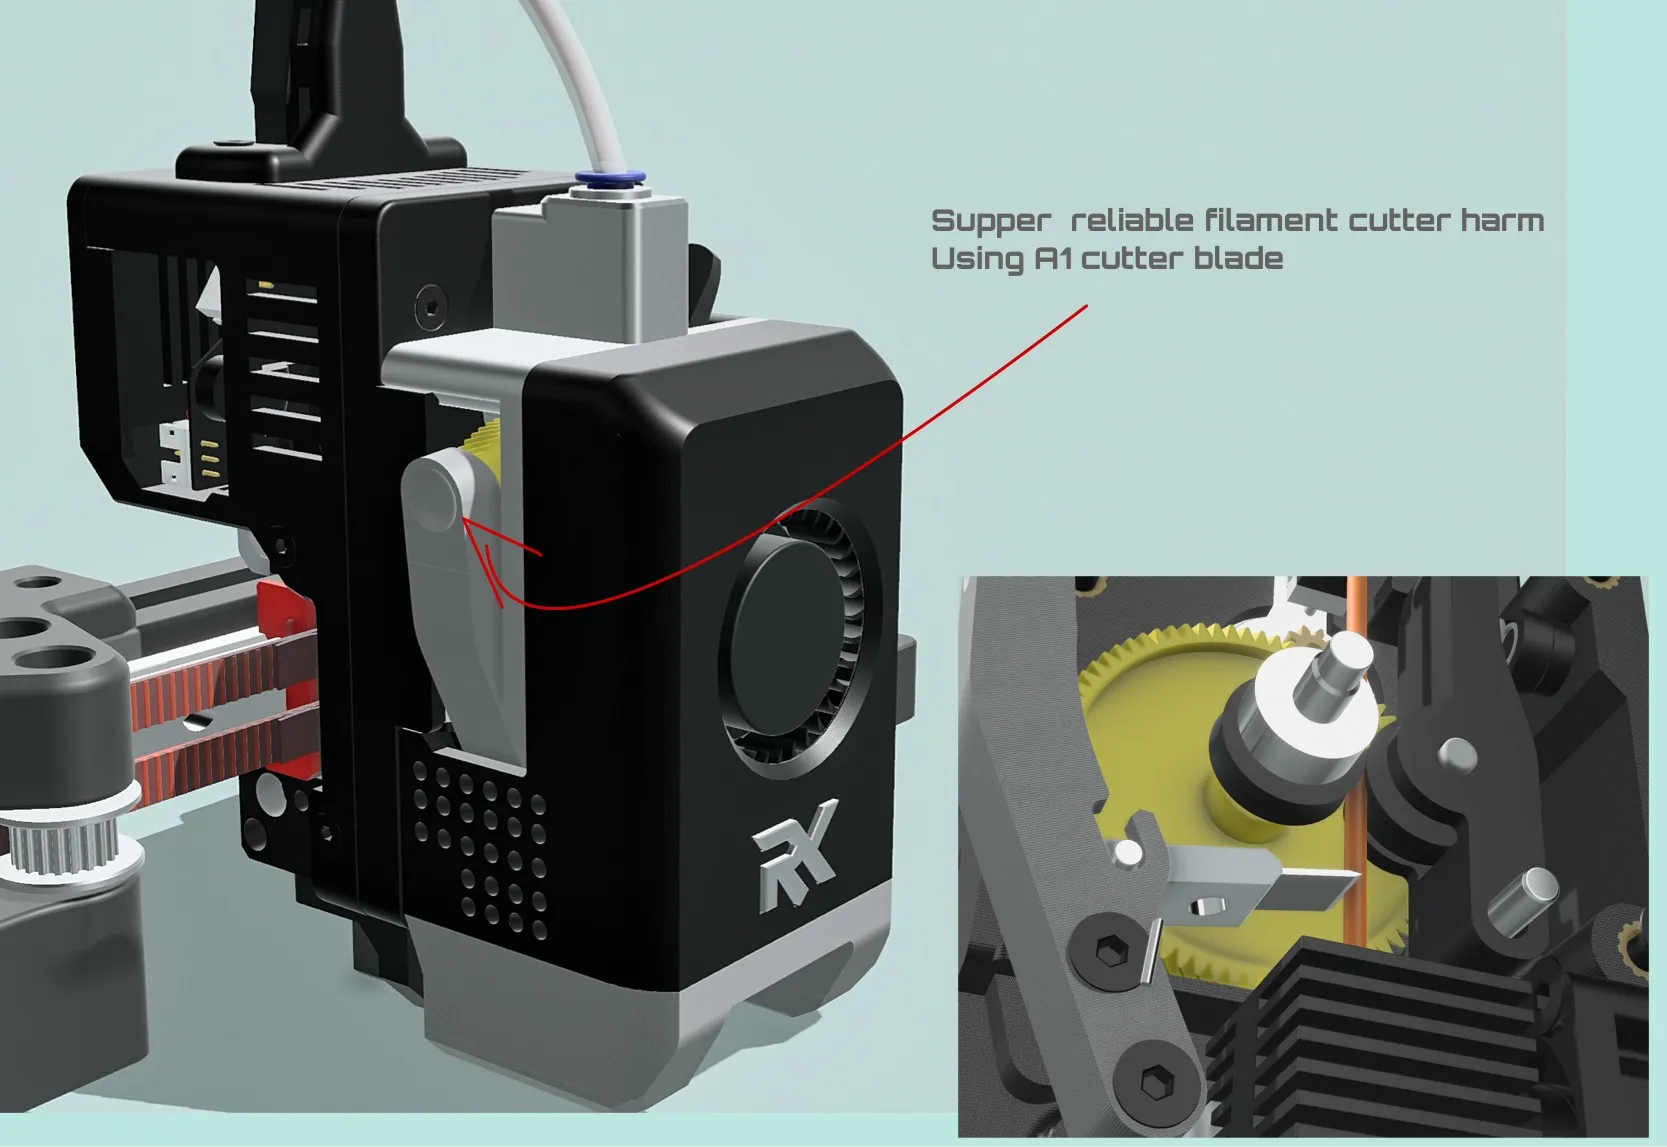
- Torsion Spring 1×5×3 – 120° (for filament cutter) → Amazon | Bambu Lab Store
- Compression Spring (0.8mm Wire Dia, 5mm OD, 10mm – for extruder tensioner) → Amazon
🧷 Pins, Blades & Switches
- 3×20 mm Dowel Pin (for filament tensioner; alternative: M3×20 screw) → Amazon
- A1 Filament Cut Blade → Amazon | Bambu Lab Store
- 13mm × 5.5mm Limit Switch → Amazon
- Small Switch KFC-V-105S-2-T (used for double filament sensors or front cover fall detection) → Ebay | Alibaba
🔥 Hotends (⚠️choose the one you need).
Match your hotend to your heating assembly. Mixing A1 heating assembly with H2D hotend gives almost no flow improvement.
- H2D Normal Hotend (~42 mm³/s PLA) → Amazon | Bambu Lab Store
- H2D High-Flow Hotend (~58 mm³/s PLA) → Amazon | Bambu Lab Store
- A1 Hotend (~25 mm³/s PLA) → Amazon | Bambu Lab Store
🔧 Motors & Wiring
- P1S / X1C Extruder Motor (gear is Helical) → Amazon | Bambu Lab Store
- 26 AWG Wire (for proximity switches) → Amazon
- Servo Motor (optional – for filament cutter) → Amazon
🟢 One-Stop: All-Original Bambu Lab Parts
Purchase directly from Bambu Lab for guaranteed compatibility:
- A1 Filament Cutter Blade → Bambu Lab Store
- H2S Extruder Gear Assembly (Recommended)→ Bambu Lab Store
- A1 Extruder Gear Assembly (alternative)→ Bambu Lab Store
- A1 Heating Assembly → Bambu Lab Store
- H2D Right Heating Assembly (recommended higher flow rate)→ Bambu Lab Store
- P2S Heating Assembly (almost the same as H2D) → Bambu Lab Store
- H2D Normal/High-Flow Hotends → Bambu Lab Store
- A1 Hotend → Bambu Lab Store
- Torsion Spring 1×5×3 (120°) → Bambu Lab Store
💡 Pro Tip: Bookmark this list! Double-check compatibility before ordering, especially for heating assemblies and hotends. When in doubt, buy original Bambu Lab parts for best results. 🛠️✨
When using a static filament cut depressor, configure an excluded zone in your slicer according to the depressor’s XY position.
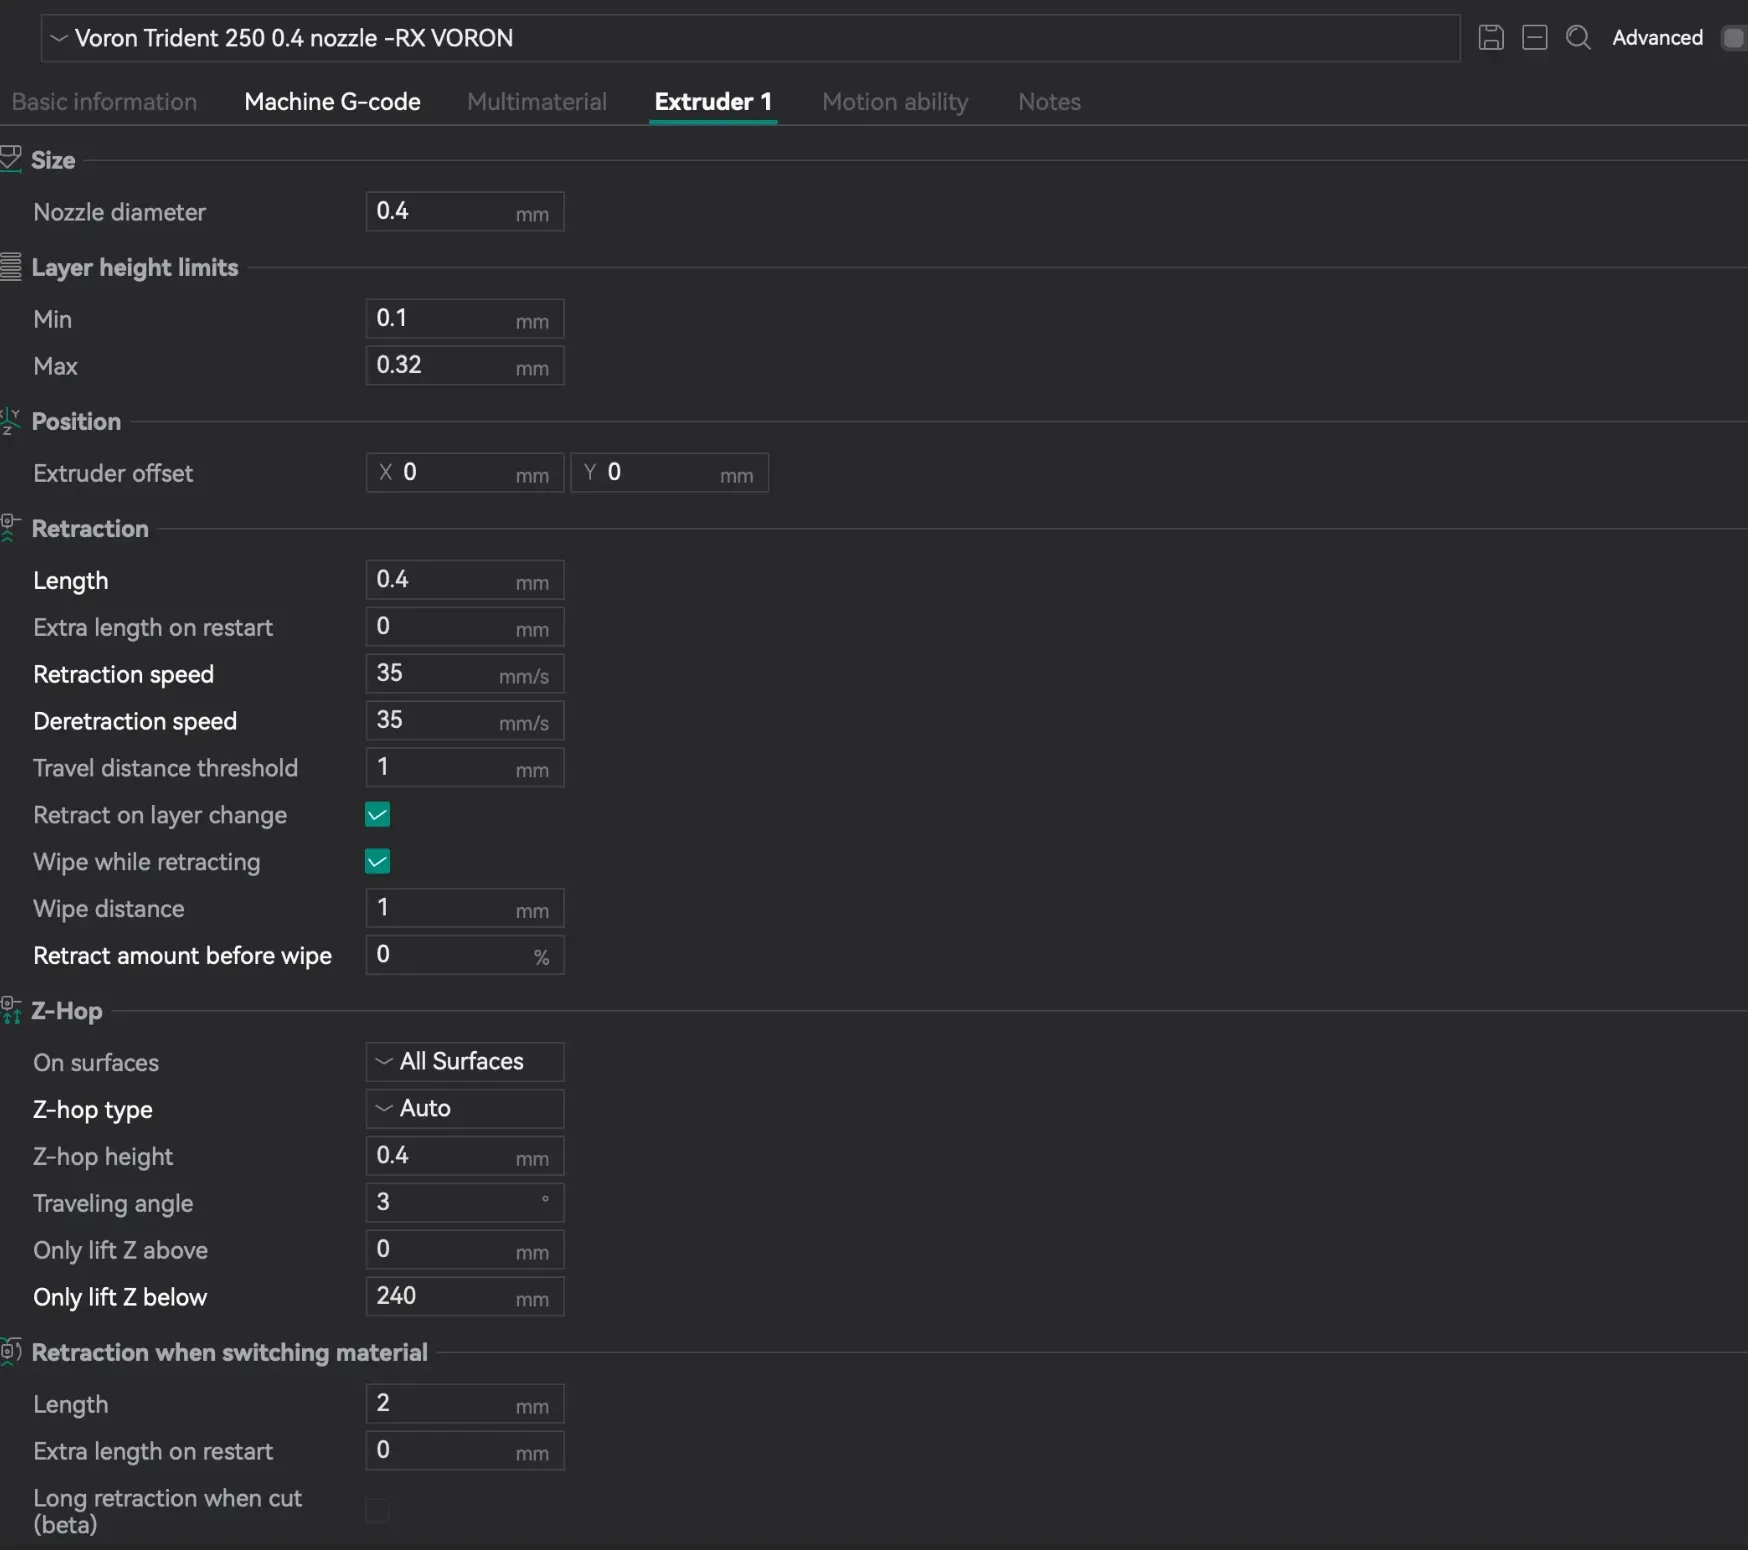
⚠️ After installing this toolhead, remember to update your slicer settings for retraction and deretraction speeds.
Also, don’t forget to update the extruder rotation distance and heating assembly sensor type in Klipper to the value below:
rotation_distance: 4.7830131121165
sensor_type: EPCOS 100K B57560G104F #Must use this for Bambulab sensor type
pullup_resistor: 4700 #for ebb36 gen2 use 2200
min_extrude_temp: 0 #important if you will use my load unload filament macro, keep it 0
max_extrude_only_distance: 300.0 # #important if you will use my load unload macro
max_extrude_cross_section: 10.0
I have attached a .txt file below with all important Klipper settings and macros for proper use of this toolhead
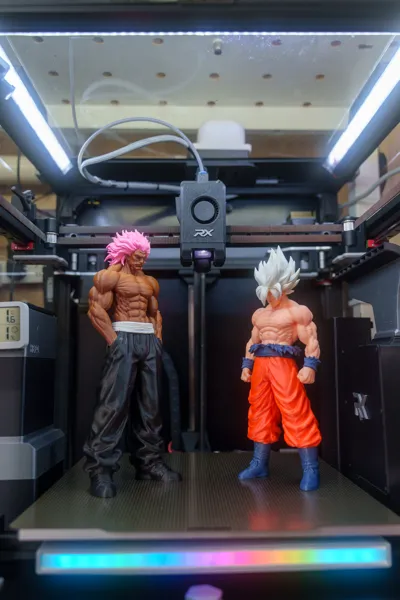
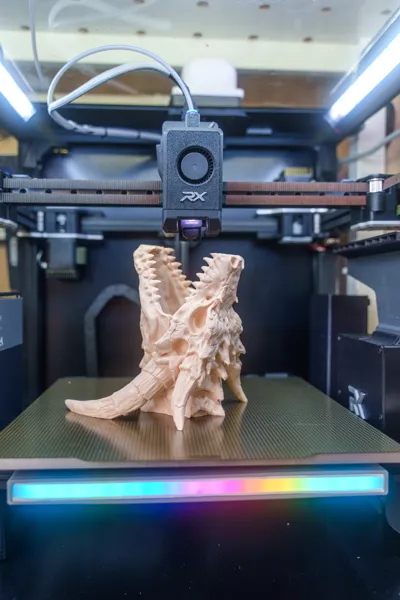
💡I’ve noticed that most people tend to comment or share photos only when they run into issues. But this toolhead represents over a year of work, iteration, and improvement to become what it is today.
So I truly appreciate everyone who takes the time to share photos of their builds — not just problems, but successes too. It really means a lot and helps show what this project can achieve in the real world.
Thank you for being part of it 🙌
Enjoy the future of DIY printing!
Happy printing!
____________#######____________
🔧 Common Issues & Fixes
1. Extrusion Inconsistency
Possible causes & checks:
• Rotation Distance
• Make sure your rotation_distance is set correctly as specified in the provided .txt file.
• Sensor Type
• Verify that the correct sensor type is set correctly as specified in the provided .txt file.
• Filament Tensioner Adjustment
• Proper tension is critical.
• Tighten the screw without filament inserted until you see slight movement, then stop.
• Too tight → filament deformation
• Too loose → slipping / under-extrusion
• Spring Selection
• You can use different springs, but:
• If the spring is too soft, it will cause inconsistency at high flow rates.
• Recommended: ≤ 0.8 mm wire thickness
• Weak springs = unstable extrusion under speed
• Filament Sensor (Switch Type)
• If installed:
• Enable pull-up resistor in Klipper (^ symbol)
Example : switch_pin: ^EBB:PD0
• Without it:
• You may get false triggers
• This can unintentionally activate load/unload macros → causing inconsistent extrusion
2. Heating Assembly Melting mainbody mount
• If your chamber temperature exceeds 55°C and you printing at nozzle temp over 260c.
• Use high-temperature materials to print mainbody, such as:
• PAHT-CF
• PPS
• PA12-CF
• Alternative:
• Use the hybrid design provided on step&stl:
• Printed body + CNC/machined high-temp components
3. Filament Cutter Getting Stuck
• Do not fully tighten the screw holding the cutter.
• Leave slight clearance:
• The spring will handle the pressure.
• Over-tightening = binding/jamming
4. Filament Not Fully Clearing After Cut
• A small piece may remain inside, making hotend swaps difficult.
Solution:
• Use the provided cutting macro
• Make sure to:
•Properly tune the XY position Align it with your cutter depressor location
5. Back Cover Hitting the Carriage
• Some printer carriages are taller than standard.
Fix:
• Use the shortened back cover version (if needed)
Recommendation:
• If you don’t have clearance issues:
• Use the standard back cover (more space for cables)
6. Heat Affecting Probe (Eddy / Microprobe)
• Excess heat from the hotend can damage or deform your probe.
Solution:
• Print and install the probe heat shield included in the model
7. The thermistor is reading the wrong temperature
Thermistor Pull-Up Resistor Guidance🌡️
Different toolhead boards may require different pull-up resistor values for accurate temperature readings. This affects how the thermistor signal is interpreted by Klipper or other firmware.
• Ebb36 1.2: Works correctly with a 4700 Ω pull-up resistor.
[pullup_resistor: 4700]
• Ebb36 Gen2 : Requires a 2200 Ω pull-up resistor for correct readings.
Tip: If the temperature readings seem offset (too high or too low), check the pull-up resistor value first before adjusting any other settings. Using the wrong pull-up resistor can cause misreading by ~30 °C or more, affecting print quality and material behavior.
pullup_resistor: 2200
💡 Final Tip
Most issues here come down to setup precision, not hardware defects.
Take your time during installation:
• Follow the documentation carefully
• Double-check mechanical adjustments
• Validate your Klipper config before printing
V4.5.2 Changelog
- Added support for the H2S dual extruder gear, which required redesigning the main extruder body and fan duct to accommodate it. This will slightly improve print quality and allow smoother TPU printing.
- Added a double-shear design for more stable support of the filament cutter arm.
- Improved the front cover 5015 fan holder with better side tolerances.
- Added a new, shorter rear electronics cover for users experiencing collisions between the toolhead and the AB motor mount.
- Added a new hybrid body design with a stronger and more stable mount, while also making it easier to print without supports.
- Refined the logo for a cleaner and more minimalist look.
- Corrected the hotend offset so the filament now feeds exactly through the center of the hotend.
- Fixed the gap between the extruder gearbox cover and the hotend.
- Improved the probe shield by adding a guide to route the hotend 2510 fan cable farther away from the heater assembly cable, reducing the risk of damaging the hotend fan cable.
- Raised the hotend fan slightly to improve airflow.
- Added an alternative fan duct with a slot to add a single normal Brighter white LED strip if you don’t want to use a Neopixel light
V4.5.2 Changelog
- Small improvements to the main body design
- Improved H2S and A1 front gear cover
- Improved hybrid body machined part
- Fixed alignment of the lower magnet to improve connection reliability when using rounded 6mm pogo pins
- Added belt holder in the 3MF files for 9mm belt carriages
- Improved rear electronics cover design to fully hide the board and cables (idea suggested by @ozncshn)
RX TOOLHEAD V5 — Final Stable Version
V5 is the most stable version of the RX Toolhead so far. I can confidently say this is the final version before moving on to the next project: a possible tool changer version.
Major Improvements & Features:
✅ Easier Assembly & Maintenance
You can now fully assemble the toolhead on your desk before installation. After placing it on the carriage, simply secure it with 4 screws and you are ready to start printing.
This design makes troubleshooting much easier without needing to completely disassemble and rebuild the entire toolhead.
✅ Improved Cable Management
The toolhead board is now integrated into the rear cover, providing a cleaner and more organized cable routing path.
✅ Unified Design Architecture
Merged most components from the A1 Gear version and H2S Gear version, improving:
- File organization
- Maintenance
- Future updates and modifications
✅ 6mm & 9mm Belt Compatibility
Added support for both 6mm and 9mm carriage systems, allowing users to choose their preferred belt size while keeping the same carriage design.
✅ Precision Improvements
- Aligned all screw holes for better assembly accuracy
- Optimized the main body and hybrid body designs
- Improved overall structural strength
✅ Stronger Carriage Design
Redesigned the carriage to be more robust, allowing you to tension the belt properly without worrying about deformation from excessive pressure.
✅ Voron Trident R2 Compatibility
Updated the design to support the new Voron Trident R2 platform.
RX Toolhead V5 represents the result of continuous testing, refinement, and real-world printing experience. A cleaner, stronger, and easier-to-maintain toolhead designed for high-performance builds. 🚀

Comment & Rating (20)