Infotainment Display Retrofit - Opel Astra J


Print Profile(1)
Bill of Materials
- Kupferkabel 1 qmm x 1:
- Kupferkabel 0,5 qmm x 1:
- Quetschverbinder x 1: https://www.amazon.de/dp/B0FSX3QCW9
- Externes Mikrofon x 1: https://www.amazon.de/dp/B01G16LSVQ
- Kabelbinder klein x 2:
- Gewebeschlauch breit x 1: https://www.amazon.de/dp/B07FW3GTXB
- Gewebeschlauch schmal x 1: https://www.amazon.de/dp/B07FW5H57B
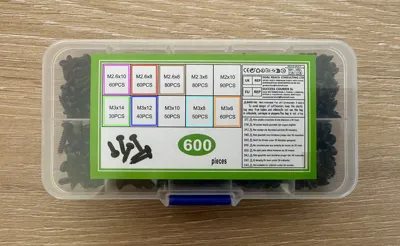
- Rundkopf-Schrauben Sortiment x 1: Benötigte Mengen und Längen siehe Beschreibung / https://www.amazon.de/dp/B0DHCPKNZT
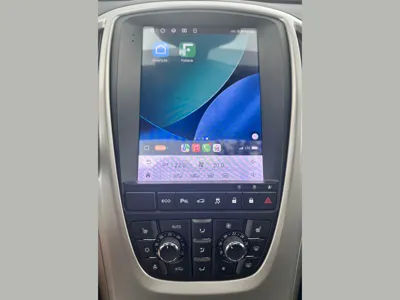
- Hizpo Android Autoradio für Opel Astra J x 1: Empfehlung: Variante QS8 mit 8 GB RAM, 128 GB Speicher & Qualcomm-Prozessor / https://www.aliexpress.com/item/1005008069890621.html
Description
Description
The project "Infotainment Display Retrofit – Opel Astra J" aims to significantly simplify the installation of the infotainment system. All brackets have been tested and optimized, ensuring a very precise fit
At this point, I would like to note that I have described my procedure as detailed as possible below to allow everyone to understand the individual work steps
If the detailed text description is not needed, there is also a step-by-step guide (see point 2) further below in bullet points and in the correct order
Each section includes corresponding images for illustration. Of course, due to different batches or other influences, it may happen that certain adjustments or parts are not needed. Therefore, it should be briefly checked beforehand whether the respective problem actually exists. If not, the corresponding step can simply be skipped
1 Detailed Text Description
1.1
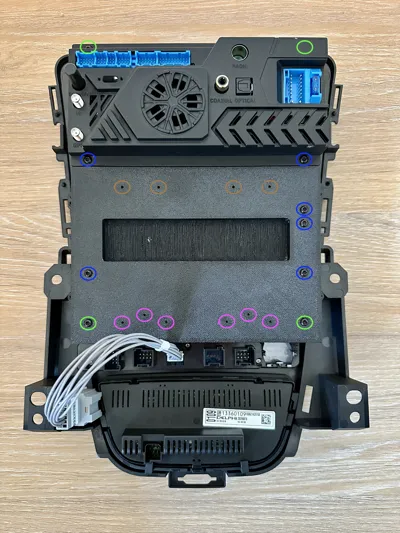
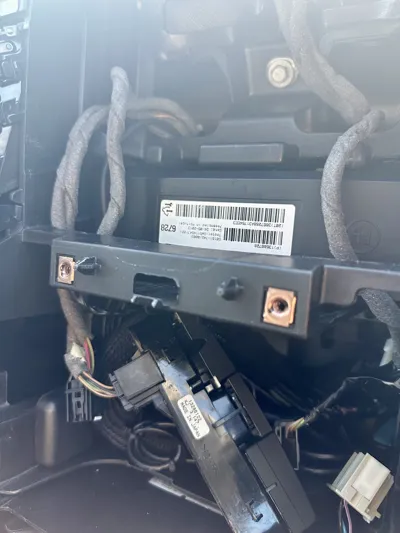
The bracket "Infotainment_Display_Adapterplatte" was particularly important to me, as the only solution so far involved removing the cross member of the original radio. However, this was not an option for me. Therefore, I moved the entire board, including the fan, further up. There is sufficient space in this area, so the larger assembly does not interfere. Additionally, all internal ribbon cables are long enough to easily accommodate the new position
1.2
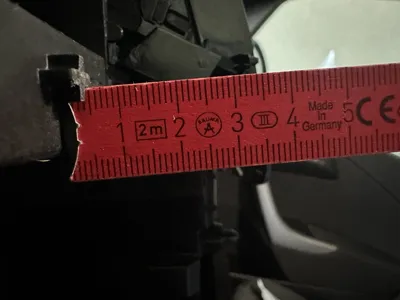
The only necessary adjustment is to shorten the retaining lugs of the original display to just under 5 mm (see images). The original display can then still be mounted as usual, while the new display is no longer obstructed by the cross member
Due to the limited installation depth, there was unfortunately no other sensible solution when designing the adapter plate. However, I consider this compromise to be completely acceptable, as both the use of the original display remains possible and the installation of the new display is not affected
1.3
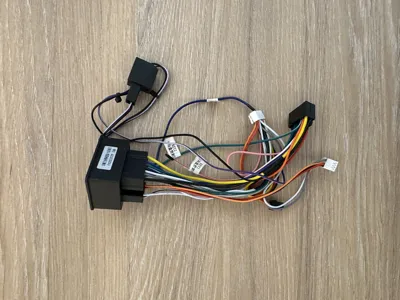
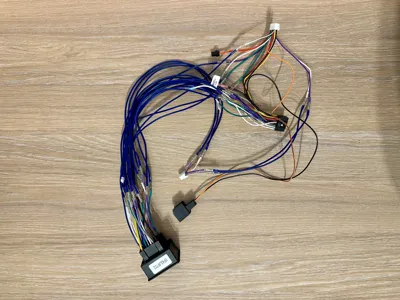
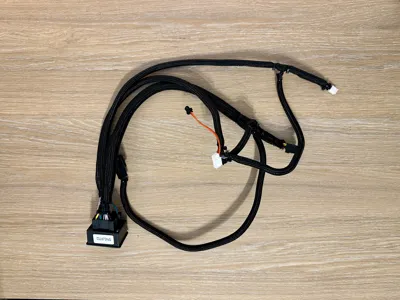
The supplied connecting cable for the main power supply is also very short and significantly complicates installation. If you also want to help yourself here, you can extend the cable with suitable crimp contacts. The contacts used are insulated and function similarly to heat shrink tubing. After crimping, they can be heated and will shrink tightly
To top it all off, I have encased all cables in braided sleeves for protection. This ensures the integrity of the cables as best as possible during installation
1.4
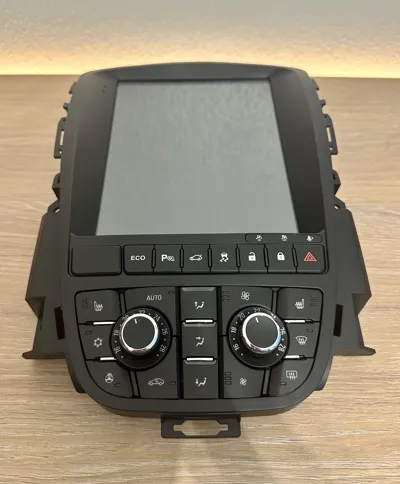
Furthermore, my frame, which holds the display and buttons, had problems with the lower climate control buttons. The lower three buttons constantly jammed when pressed. Unfortunately, the frame was manufactured with a very precise fit. Since my frame was also slightly warped or twisted, I helped myself with a small wedge and two zip ties
To attach the zip ties, I drilled two small holes. Then the wedge is pressed into the groove, and the zip ties are tightened. After that, the buttons worked perfectly again
1.5
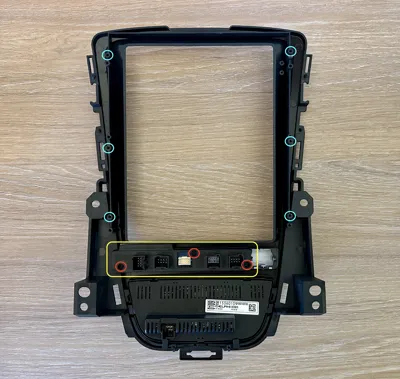
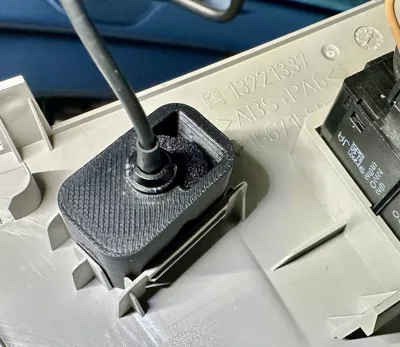
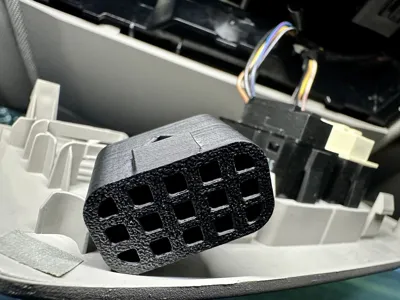
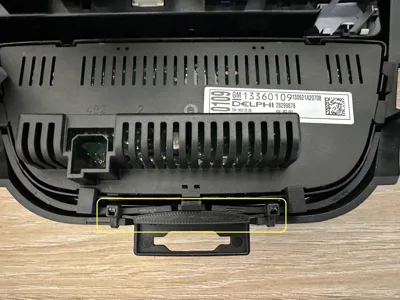
The last problem was that the connectors for the parking sensors, ECO, and ASR did not hold properly, as the supplied bracket did not allow the connectors to snap in correctly. For this reason, I designed a new bracket with which the connectors now fit precisely and securely without slipping out
2 Step-by-Step Guide
2.1 Install "Infotainment_Display_Abdeckung_Platine_Airbag" with the three M2.6 x 8 (red) screws
2.2 Place the display on the frame and mount it with six M3 x 8 (turquoise) screws
2.3.1 Drill out holes for the "wedge"
2.3.2 Insert the original climate controller into the frame - press the "Infotainment_Display_Rahmen_Keil" into the groove and tighten the zip ties
2.4.1 Loosen the board cover on the back of the display & thread it through the opening of the "Infotainment_Display_Adapterplatte"
2.4.2 Mount the "Infotainment_Display_Adapterplatte" on the back of the display with the four outer M3 x 14 (light green) & the inner
six M3 x 12 (dark blue) screws
Caution: During this step, ensure that no cables from the board are pinched
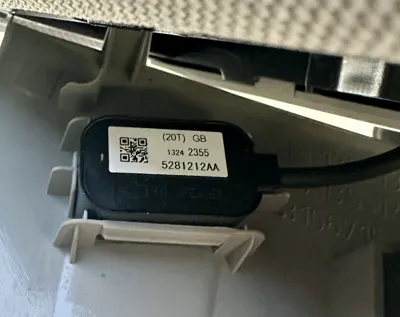
2.4.3 Mount the "Infotainment_Display_Halteplatte_GPS" with the three M2.6 x 10 (pink) screws & glue the GPS into the recess - for better reception, ensure that the GPS module points upwards (see images)
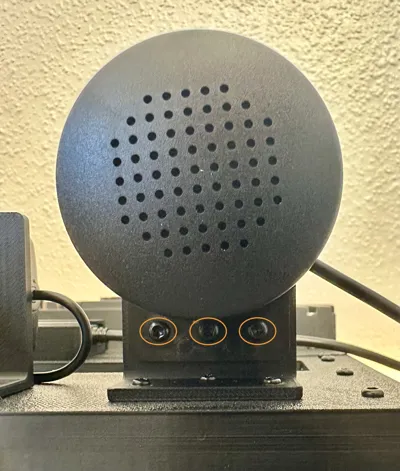
2.4.4 Mount the "Infotainment_Display_Halteplatte_Lautsprecher" with the three M2.6 x 10 (pink) screws - either glue the speaker into the recess or secure it with the three M3 x 6 (orange) screws
2.4.5 Mount the "Infotainment_Display_Halteplatte_SIM_Karte" with the two M2.6 x 6 (brown) screws
2.5 Extend the connecting cable and cover it with a braided sleeve (if necessary)
2.6 Insert the microphone into the bracket "Infotainment_Display_Halteplatte_Mikrofon_Dachhimmel" - route the microphone cable behind the cover of the left A-pillar trim using a cable puller
Technical specifications for the vehicle with retrofitted radio
- Vehicle: Opel Astra J 1.4 Turbo
- HSN / TSN number: 0035 / AXJ
- Year of manufacture: 2013
- Old radio model: CD600
- Model series: Active
Boost Me (for free)
If the "Infotainment Display Retrofit - Opel Astra J" project was able to serve its purpose, I am very pleased! I would appreciate positive feedback or support from you – whether through a review, recommendation, or feedback for further improvement. Thank you very much
License
You shall not share, sub-license, sell, rent, host, transfer, or distribute in any way the digital or 3D printed versions of this object, nor any other derivative work of this object in its digital or physical format (including - but not limited to - remixes of this object, and hosting on other digital platforms). The objects may not be used without permission in any way whatsoever in which you charge money, or collect fees.
Comment & Rating (0)