Child Safety Door Lock (Magnetic Self-Locking)


Print Profile(1)

Bill of Materials


Description
English
This 3D model adds an additional layer of safety for households with children or pets.
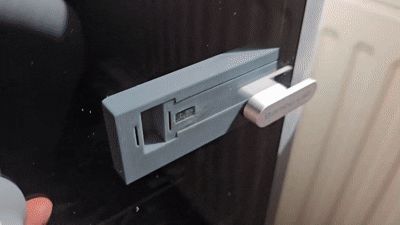
The mechanism automatically locks the printer door after closing and can only be unlocked again from the outside using the included magnetic key.
I personally have a young daughter and naturally make sure she never has unsupervised access to my 3D printer, especially while it is running. As an additional safeguard, I designed this magnetic self-locking door mechanism for the printer.
How it works
The print consists of five parts:
- The latch
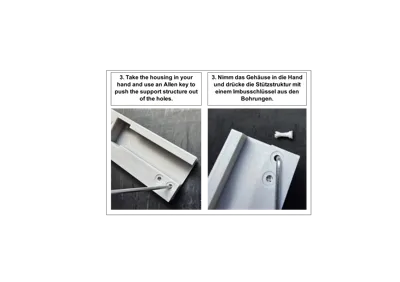
- The latch housing
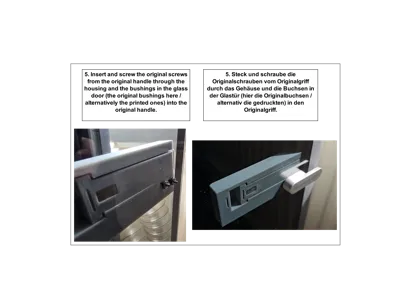
- Two bushings for mounting using the original handle screws
- An optional magnetic key / security magnet holder
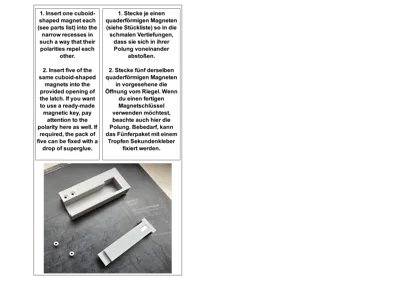
Inside the latch and the housing there is one pocket each for a rectangular magnet. These magnets must be inserted with opposing polarity so they repel each other.
This automatically pushes the latch outward and keeps the printer door securely locked after closing. It also prevents the latch from retracting unintentionally due to vibrations during printing.
The latch includes a chamfered edge so the door can simply be pushed closed.
For best results, apply a very small amount of lubricant to the chamfer on the latch.
Please do not apply lubricant between the latch and the housing.
Inside the latch there is an additional cavity for five rectangular magnets. These magnets are used together with the included magnetic key to unlock the mechanism from outside the printer.
The magnetic key itself can also be printed and uses two round magnets inserted during a print pause.
Required parts
The model is compatible with the following printers:
- Bambu Lab X1C
- Bambu Lab X1E
- Bambu Lab P1S
It will also most likely fit the Bambu Lab P1P when equipped with the front glass door / P1S upgrade kit.
Compatibility with additional Bambu Lab models may also be possible if their door, frame and front housing dimensions are derived from or identical to the X1C/P1 series design.
Please verify compatibility carefully before printing or installing the mechanism.
Required hardware
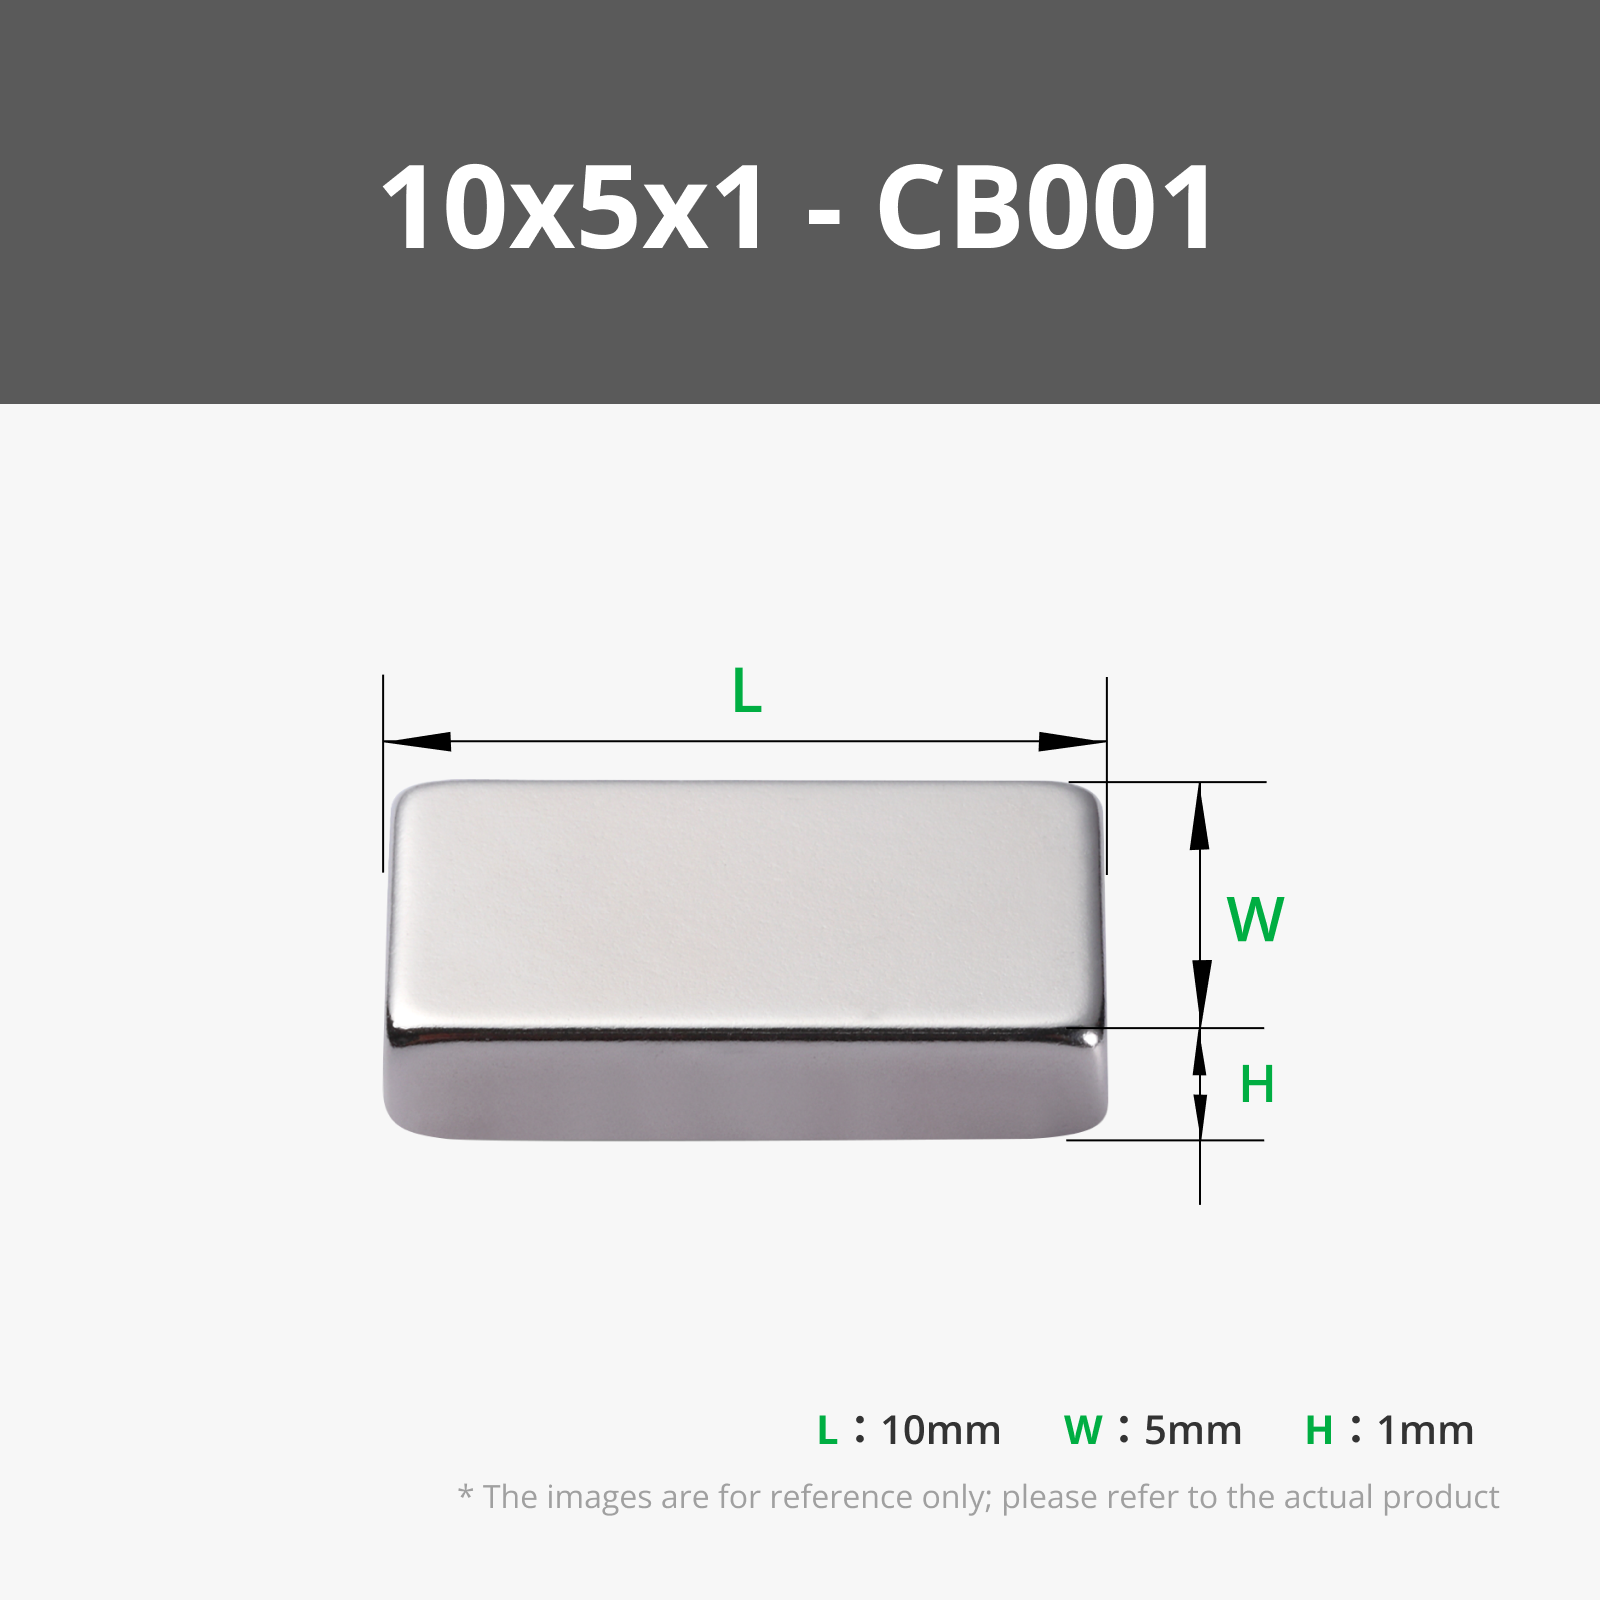
- 7 rectangular magnets
(10 × 5 × 1 mm — see bill of materials) - 2 round magnets for the magnetic key
(15 × 3 mm — see bill of materials) - PETG or a higher temperature resistant filament
- A very small amount of lubricant for the latch chamfer
The filament recommendations in the bill of materials are only suggestions and not mandatory.
Please pay attention to whether the recommended filament in the bill of materials is listed as a refill version or as a filament spool including the reusable spool.
Refill filament requires an existing compatible reusable spool. Without such a spool, the refill filament cannot be used properly.
If you do not already own a compatible reusable spool, please make sure to order the non-refill version instead.
The recommended filaments are simply suggestions that worked very well for this project and provide very good print quality and appearance. Feel free to choose whichever recommended color you personally like most.
Important Notes
The rectangular magnets are used inside the latch and housing mechanism.
The round magnets are only used for the optional magnetic key.
Please pay close attention to the polarity of all magnets before inserting them.
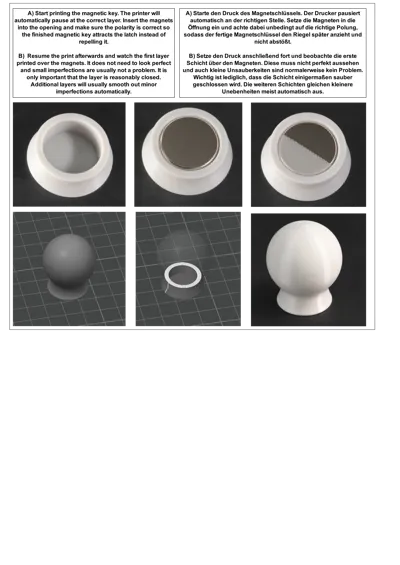
When printing the magnetic key, the printer will automatically pause at the correct layer height for magnet insertion. After inserting the magnets, resume the print and observe the first layer printed above the magnets. It does not need to look perfect and small imperfections are usually not a problem. It is only important that the layer is reasonably closed. Additional layers will usually smooth out minor imperfections automatically.
I personally use this mechanism myself and it has been working reliably for months. A friend using the same printer has also been using it successfully.
However, please keep in mind that this is an additional safety feature and not an absolute guarantee. Excessive force could still damage parts of the original printer handle or door assembly.
For me personally, this mechanism significantly improves safety and makes accidental opening by toddlers or small children extremely unlikely without the magnetic key.
German
This 3D model allows for additional safety to be created, for example, if children or pets live in the same household.
The lock ensures that the door automatically latches after closing and can only be opened from the outside with the included magnetic key.
I myself have a young daughter and naturally make sure she never has unsupervised access to my 3D printer — especially during printing operations. As an additional safeguard, I have therefore designed this magnetic self-locking mechanism.
How it works
The print consists of five parts:
- The latch
- The latch housing
- Two bushings for passing through the original screws
- An optional magnetic key or security magnet holder
In the latch and in the housing, there is a pocket each for a rectangular magnet. These magnets must be inserted in such a way that they repel each other.
This causes the latch to extend automatically and securely locks the printer door after closing. At the same time, it prevents the latch from unintentionally retracting due to vibrations during printing.
The latch also has a bevel or chamfer, so the door can simply be pushed shut.
For the smoothest possible function, a small amount of lubricant is recommended on the chamfer of the latch.
However, please do not apply lubricant between the latch and the housing.
Additionally, the latch has another cavity for five rectangular magnets. These, together with the included magnetic key, are used to unlock the mechanism from outside again.
The magnetic key itself can also be printed and uses two round magnets that are inserted during a print pause.
Required Parts
The model is compatible with the following printers:
- Bambu Lab X1C
- Bambu Lab X1E
- Bambu Lab P1S
With a retrofitted front glass door or P1S upgrade, it should also likely fit the Bambu Lab P1P.
Compatibility with other Bambu Lab models may also be possible if the door, frame, and front construction are derived from or identically built to the X1C or P1 series.
Please check compatibility independently before printing or assembly.
Required Hardware
- 7 rectangular magnets
(10 × 5 × 1 mm — see bill of materials) - 2 round magnets for the magnetic key
(15 × 3 mm — see bill of materials) - PETG or higher temperature resistant filament
- A small amount of lubricant for the chamfer of the latch
The filaments recommended in the bill of materials are merely suggestions and not mandatory.
Please pay attention to whether the filament recommended in the bill of materials is offered as a refill version or including a reusable spool.
Refill filament requires a suitable reusable spool. Without such a spool, the refill filament cannot be used properly.
If you do not yet own a suitable spool, you should therefore definitely order the version including the spool and not accidentally select the refill version.
The recommended filaments are merely suggestions with which very good print quality and appearance can be achieved for this project. You can simply choose the color you personally like best.
Important Notes
The rectangular magnets are used within the locking mechanism.
The round magnets are exclusively needed for the optional magnetic key.
Please pay close attention to the correct polarity of all magnets before insertion.
When printing the magnetic key, the printer automatically pauses at the designated spot for inserting the magnets. After insertion, the first layer over the magnets should be observed. This does not have to look perfect, and minor imperfections are usually not a problem. It is only important that the layer is reasonably cleanly closed. Further layers usually automatically compensate for minor unevenness.
I myself have been successfully using this mechanism for months. A friend with the same printer also uses it without problems.
Please note, however, that this is an additional safeguard and not an absolute guarantee. With sufficient force, for example, parts of the original handle or the door could still be damaged.
For me personally, this mechanism significantly increases safety and makes accidental opening by toddlers without the magnetic key extremely unlikely.
License
You shall not share, sub-license, sell, rent, host, transfer, or distribute in any way the digital or 3D printed versions of this object, nor any other derivative work of this object in its digital or physical format (including - but not limited to - remixes of this object, and hosting on other digital platforms). The objects may not be used without permission in any way whatsoever in which you charge money, or collect fees.
Comment & Rating (0)