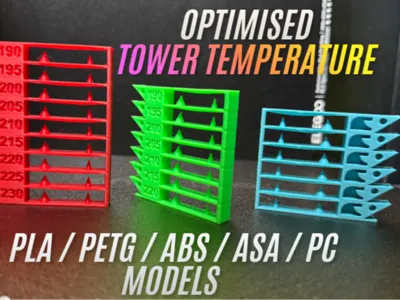
Optimised Temperature Tower Test PLA PETG ABS TPU


Print Profile(1)
Description
This model has been meticulously designed to help you easily find the optimal temperature for any filament. It provides clear points of contrast across different temperature levels, making it simple to identify where your settings excel and where they fail.
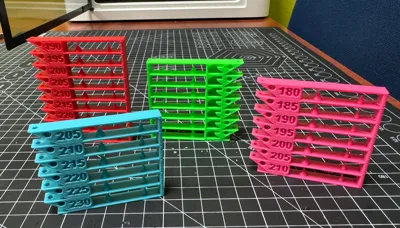
This 3MF project includes pre-configured build plates for PLA, PETG, ABS, ASA, TPU, and PC, each with its appropriate temperature range.
Key Calibration Features
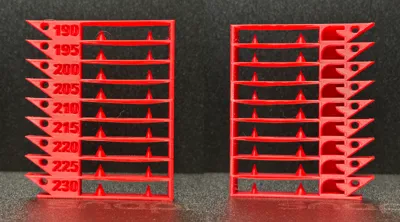
- Bridges: A 50mm central span to test filament sagging and cooling efficiency.
- Retraction & Stringing: Dual cones (wide base and needle-sharp tip) to fine-tune your retraction settings and eliminate "hairy" prints.
- Aggressive Overhangs: A 55° slope on the left side to find the thermal limit before the plastic starts curling.
- Dimensional Accuracy:
- Vertical Hole: To check for X/Y circularity and layer shifting.
- Horizontal Vertex Hole: A "torture test" for internal curved bridges.
- Complex Geometries (Rear Side):
- Internal Arch: Evaluates how the filament handles curved overhangs.
- Curved Tab: Tests interlayer adhesion on small, rounded surfaces.
Text Legibility: Embossed numbers to verify Z-axis resolution and flow consistency.
How to use this 3MF
1. Select your Plate: Choose the build plate that matches your filament type (PLA, PETG, ABS, ASA or TPU).
2. Pre-print Setup: Before starting, manually set your filament's nozzle temperature to the maximum value of the tower's range (e.g., 230°C for the PLA tower, check your filament's tag). This ensures the base and the first level print correctly.
3. Temperature variations: MakerWorld removes custom G-code from 3MF files for security. To make this tower work, you must manually set the temperature changes:
- Option 1 (Layer Slider): After slicing, move the layer slider to the beginning of each level, right-click, select "Add Custom G-code", and type M104 S210 (adjusting the temperature value for each level).
- Option 2 (Printer settings): If you prefer to automate the process without manual layer markers, copy and paste the following logic into your Printer Settings > Custom G-code > Layer change G-code, Example for PLA (190ºC - 230ºC):
{if layer_num==45} M104 S225{endif};
{if layer_num==85} M104 S220{endif};
{if layer_num==125} M104 S215{endif};
{if layer_num==165} M104 S210{endif};
{if layer_num==205} M104 S205{endif};
{if layer_num==245} M104 S200{endif};
{if layer_num==285} M104 S195{endif};
{if layer_num==325} M104 S190{endif};
Layer Specifications:
- Base: 5 layers (1.0 mm at 0.2mm layer height).
- Each Temperature Level: 40 layers (8.0 mm per block).
Use these values to accurately set your Layer G-code or Height Range Modifiers.
4. No Supports Needed: This model is 100% support-free.
5. Analyze: Once printed, look for the level with the straightest bridges, cleanest cones (no stringing), and sharpest text. That is your optimal printing temperature.
Technical Specifications
- Layer Height: 0.2mm (Recommended).
- Walls: 2.
- Infill: 15%
- Materials included: PLA (230-190°C), PETG (260-220°C), ABS/ASA (270-230°C), TPU (240-200°C), PC (310-270°C).
License
You shall not share, sub-license, sell, rent, host, transfer, or distribute in any way the digital or 3D printed versions of this object, nor any other derivative work of this object in its digital or physical format (including - but not limited to - remixes of this object, and hosting on other digital platforms). The objects may not be used without permission in any way whatsoever in which you charge money, or collect fees.
Comment & Rating (2)