Empire / Vader / Dark Side Kyber Saber Stand


Print Profile(1)
Bill of Materials


Description
Thanks for checking out my model! Interested in supporting my work or selling prints?
Support Crew – Show some love and help keep the projects flowing
Galactic Maker Foundry – Sell physical prints of my original designs
Foundry License+ – Sell prints and use my photos for listings
🎉 Supporter-only Discord coming soon – get early access, tips, and sneak peeks!
Membership
Join here to support or get a license
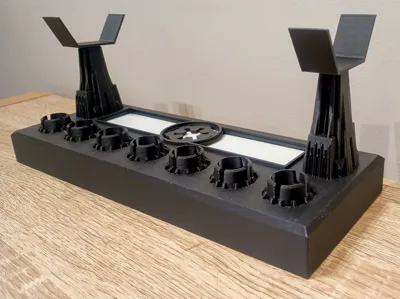
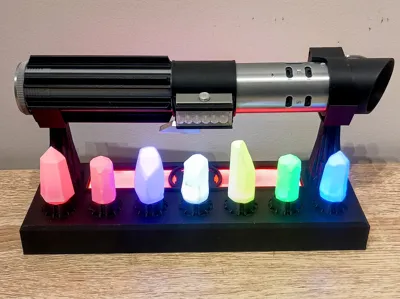
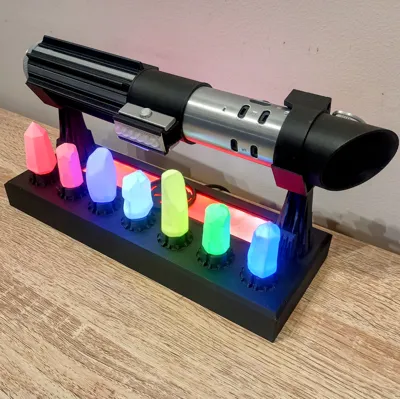
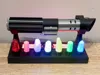
For when your lightsaber deserves something a little more intimidating than a plain old shelf.
This is the Dark Side / Empire version of my Kyber Saber Stand, designed as a matching counterpart to my Jedi Kyber Stand. It keeps the same general display concept, but with a much more Imperial feel — because apparently glowing space crystals look even better when displayed with a bit of ominous red lighting.
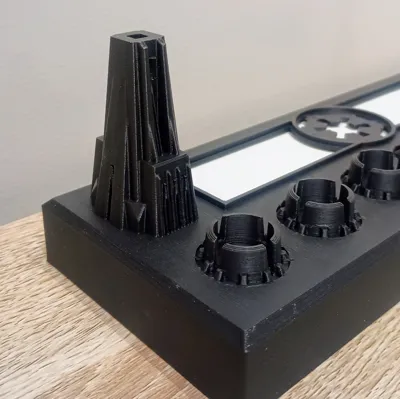
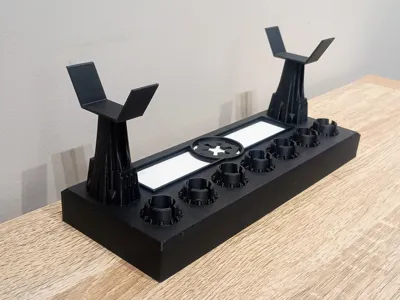
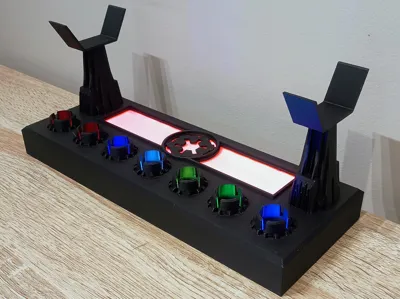
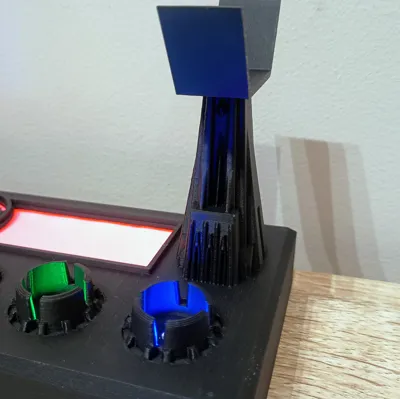
The design features an Empire crest in the centre, a slightly larger rear diffuser section, and new saber support struts inspired by Vader’s Castle on Mustafar. The tall angular supports give the stand a darker, fortress-like silhouette while still securely holding the saber above the illuminated kyber crystal display.
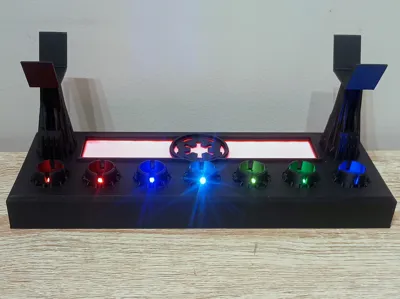
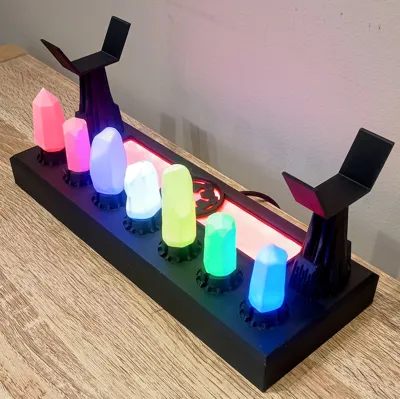
The front section is designed to hold 7 kyber crystals, with each crystal sitting in its own printed holder. Add LEDs underneath and the crystals glow beautifully, giving the whole display that proper Sith artefact / Imperial trophy shelf vibe.
This version is designed to use WS2812B addressable LEDs controlled by an ESP32 SuperMini C3 running WLED, so the lighting can be controlled from your phone, tablet, browser, or desktop.
Features
- Holds 7 kyber crystals, either printed/custom crystals or Savi’s Workshop-style compatible crystals
- Dark Side / Empire themed version of my Kyber Saber Stand
- Vader’s Castle-inspired saber support struts
- Empire crest centre detail
- Larger rear diffuser section compared to the Jedi version
- Rear diffuser with ambient glow
- Fully controllable with WLED from a smartphone, browser, or desktop
- Powered by an ESP32 SuperMini C3 via USB
- Uses WS2812B addressable LEDs
- Designed for clean internal wiring with point-to-point soldering
- Includes standard and 6mm offset saber holder options
- Great for Vader, Sith, Empire, Inquisitor, or Dark Side themed displays
- Two base versions included: one-piece version and split version for easier printing
Saber Holder Options
To help the stand fit a wider range of lightsabers, I’ve included an additional saber holder with a 6mm height offset.
When testing with my other saber designs, I found that a 6mm difference gave a much better fit and helped accommodate different saber diameters, grip shapes, and balance points.
So if your saber sits a little too high, low, or unevenly on the standard holders, try swapping one of the supports for the 6mm offset version.
This gives the stand a bit more flexibility without needing to redesign the whole thing for every single saber — because apparently every lightsaber in the galaxy was made by someone with a different ruler.
Electronics Needed
1x ESP32 SuperMini C3
1x WS2812B 60 LEDs/m strip
7x single WS2812B LEDs cut from the strip for the kyber crystal slots
29x WS2812B LEDs for the rear diffuser section
Short jumper wires, around 25–30mm, for LED daisy-chaining
A few longer wires for connecting to the ESP32 SuperMini C3 and the rear diffuser LEDs
1x USB cable for power
4x M3 x 8mm bolts for the base cover
Hex button head bolts are recommended
Wiring / Power Note
Power is wired directly to the LEDs by twisting the USB power wires together with the LED power wires, then soldering them to the 5V and GND pads on the ESP32 SuperMini C3.
This avoids relying on the onboard voltage regulator to power the LEDs and helps keep the lighting stable.
The LED data wire connects from the ESP32 SuperMini C3 to the first WS2812B LED. Use whichever GPIO pin you set in WLED for your data output. If using my setup, follow the pin shown in the wiring/preset notes.
Assembly Overview
1. Flash WLED to the ESP32 SuperMini C3
Flash WLED onto the ESP32 SuperMini C3.
Go to:
install.wled.me
Choose the latest version and flash the board with the Plain Version.
Once flashed, WLED gives you full control over the lights from your phone, tablet, computer, or any browser on the same network.
2. Prepare the LEDs
- Cut 7 individual LEDs from the WS2812B strip, one for each kyber crystal slot.
- Cut a second strip of 27 LEDs for the rear diffuser section.
- Tin all LED pads before wiring.
- Cut short jumper wires, roughly 25–30mm long, for linking the 7 individual kyber LEDs together.
- You’ll need wires for:
5V
GND
DATA
Tip: I usually overestimate the wire lengths slightly, then trim them to fit before soldering. It makes layout and cleanup much easier than trying to cut every wire perfectly the first time.

3. Wire the Kyber Crystal LEDs
- Chain the 7 kyber LEDs together using your jumper wires.
- Make sure the data direction is correct:
- DO / Data Out from one LED goes to DI / Data In on the next LED.
- If the direction is wrong, the LEDs after that point will not light up.
- Add an extra set of wires to the first LED for connecting to the ESP32 SuperMini C3.
- Add another set of wires from the last kyber LED so the signal can continue on to the rear diffuser strip.
- Even after making a heap of these, I still occasionally mess up the LED direction, so definitely double-check the arrows or data markings on your strip before soldering everything in place.
4. Assemble the Stand Base and Diffuser
- If using the split version, glue the base parts together first.
- Glue the rear diffuser LED holder / strip groove around the diffuser opening.
- Then glue the diffuser plate in from the inside.
- Add a few small drops of CA glue underneath the Empire crest, around the edges, and around the symbol area.
- If using the one-piece version, simply glue the diffuser in place using the same method.
- Don’t overdo the glue. Too much can seep onto the diffuser and leave visible marks once the LEDs are on.
5. Install the LEDs into the Kyber Slots
- Insert each single WS2812B LED into its kyber crystal slot.
- I usually tack each LED in place with a few small dabs of hot glue first.
- After testing the full setup, I go back and add a bit more glue to secure everything properly.
- CA glue can also be used, but avoid getting any glue on the LED lens or top surface.

6. Install the Rear Diffuser Strip
- Use the wires coming from the last kyber LED to connect to the 25 LED rear diffuser strip.
- Wrap or position the strip around the rear diffuser groove.
- Secure the strip with hot glue, tape, or whichever method you prefer.
- Make sure the LEDs are facing toward the diffuser so the light spreads evenly across the rear glow section.

7. Connect the ESP32 SuperMini C3
- Thread the USB cable through the hole in the back of the base.
- Twist the USB red wire together with the LED +5V wire, then solder them to the 5V pad on the ESP32 SuperMini C3.
- Twist the USB black wire together with the LED GND wire, then solder them to the GND pad on the ESP32 SuperMini C3.
- Solder the LED data wire to your chosen data GPIO pin (I use GPIO4) on the ESP32 SuperMini C3.
- Mount the ESP32 SuperMini C3 inside the base using VHB tape or double-sided tape.
- If the onboard status LED causes light bleed through the base or diffuser, you can cover it with tape.


Note. Images show an D1 Mini from the Jedi Stand but they wont fit in the Dark Side stand so I used a Supermini C3 instead.
8. Power Up & Configure WLED
The ESP32 SuperMini C3 may default to GPIO2 for the LED output, but on these SuperMini boards I’ve found GPIO2 does not work correctly for this setup.
You will need to change the LED output pin to:
GPIO4
To do this in WLED:
- Open WLED in your browser or app.
- Go to Config.
- Open LED Preferences.
- Find the LED output / GPIO setting.
- Change the data pin from GPIO2 to GPIO4.
- Save and reboot WLED.
- Plug in the USB cable and open WLED in your browser or phone.
- You can configure your own effects—or use my custom WLED preset (Its labelled Jedi buy works for this stand too)
🔗 github.com/ASTDrones/KyberStand - Set the LED count to 36 total (7 for the Kybers, 29 for the diffuser).
- My preset sets up 8 WLED segments:
- Segments 1–7: Each Kyber LED has its own effect/color:
- Red/white crackle (for black Kyber)
- Solid red
- Purple
- White
- Yellow
- Green
- Blue
- Segment 8: Controls the 29-LED rear diffuser strip, which you can set to any ambient animation or static glow you like.
- This gives each crystal its own identity and matches perfectly with printed or Savi’s Workshop Kybers.
9. Final Assembly
- Once everything is wired, powered up, and tested, go back and fully secure the kyber LEDs with hot glue.
- Tidy up the wiring with hot glue or tape.
- Install the bottom cover.
- Secure the cover using 4x M3 x 8mm bolts.
- Choose either the standard saber holders or the 6mm offset holder depending on how your saber sits.
- Slot the saber supports into the top of the Vader’s Castle-style struts.
- They should be snug, but you can add a small drop of glue if you want them permanently fixed.
- Place your saber on the supports, add your kyber crystals, and enjoy your new Imperial display.
- Preferably while standing in front of a lava planet and making questionable life choices.
Optional Kyber Crystal Finish Tip
If you’re printing your own kyber crystals, I like to coat mine with a thin layer of clear UV resin.
It helps smooth out the layer lines and gives the crystals a more glassy finish.
For my setup, I use 6 white/translucent crystals and 1 black crystal. With the red flicker effect in WLED, the black kyber ends up looking cracked, unstable, and very Dark Side.
Printing Notes
Print the base and saber supports in black for the classic Imperial look.
Print the diffuser panels in white or translucent filament.
Print the kyber crystals in translucent colours or clear/white filament if using RGB LEDs.
The crystal holders look best in black so the glowing crystals remain the focus.
The split base version is easier to print.
The one-piece base version may require supports, depending on your printer and orientation.
Notes
This was designed as the Empire / Vader / Dark Side companion piece to my Jedi Kyber Saber Stand.
It should work with a range of sabers, but fit may vary depending on the specific model, diameter, and balance point of your saber.
The included 6mm offset holder gives extra flexibility for fitting different sabers without needing a completely custom stand.
If you have any ideas for other themed versions, different logos, or alternate crystal layouts, feel free to drop a comment. I’m always open to making more variants.
Item | Quantity | Links |
|---|---|---|
| ESP32 SuperminiC3 | 1 | https://www.aliexpress.com/item/1005006599545782.html? |
| WS2812B LED strip | 60 per Meter | https://www.aliexpress.com/item/1005006766819624.html |
| USB cable | 1 | https://www.aliexpress.com/item/1005008045179029.html |
| Wire 26 AWG Red, Black, Yellow | as needed | https://www.aliexpress.com/item/4001283806251.html |
| M3x8mm Bolt | 4 | https://www.aliexpress.com/item/32810852732.html |
| VHB Tape | as needed | https://www.aliexpress.com/item/1005008305877251.html |
| Soldering Iron | 1 | https://www.aliexpress.com/item/1005007099216072.html |
| Solder | as needed | https://www.aliexpress.com/item/1005008695639704.html |
| Hot glue | as needed | https://www.aliexpress.com/item/1005008055271799.html? |
| CA glue | as needed | https://www.aliexpress.com/item/1005003643576389.html? |
| UV Resin Kit | as needed | https://www.aliexpress.com/item/1005009210446554.html |
License
You shall not share, sub-license, sell, rent, host, transfer, or distribute in any way the digital or 3D printed versions of this object, nor any other derivative work of this object in its digital or physical format (including - but not limited to - remixes of this object, and hosting on other digital platforms). The objects may not be used without permission in any way whatsoever in which you charge money, or collect fees.
Comment & Rating (0)