1/64 miniature scene: Yihelu 02_1/64 Cafe


Print Profile(6)
Description
[Nanjing Yihe Road] 02
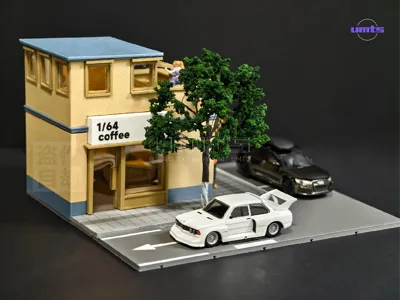
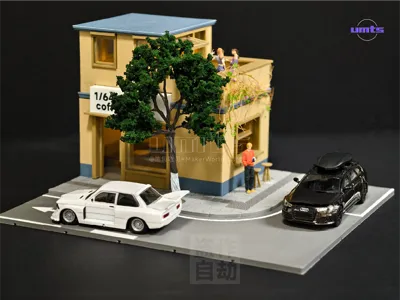
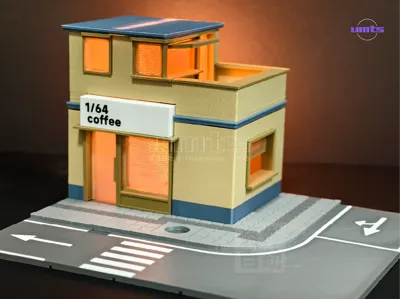
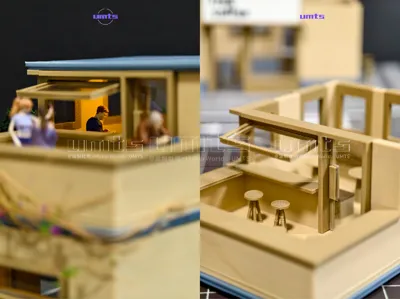
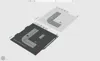
Yihe Road No 2 scene, 1/64 coffee shop, with a terrace on the second floor at the street corner
[May 17] Revision Notes
[AMS] Part1 For the main building body, the middle floor slab (crossed out in the diagram) was added. In the AMS version, the middle floor slab and the second-floor wall are connected. This part is for the [Non-AMS version] parts, so it has been deleted here
If you have already downloaded the 3mf file, just delete this part

————————————————————
[AMS Version] and [Non-AMS Version]
1, Just print with AMS
2, The walls of the Non-AMS version are single color
2, The base of the Non-AMS version has no road markings, you need to paint them yourself or simply leave them unpainted. The facade can be paused at layer 38 to change color
[About nozzle]
1, Most parts use a 0.4mm nozzle
2, Internal components like the coffee machine require a 0.2mm nozzle for better detail
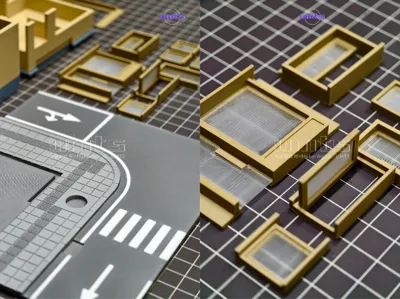
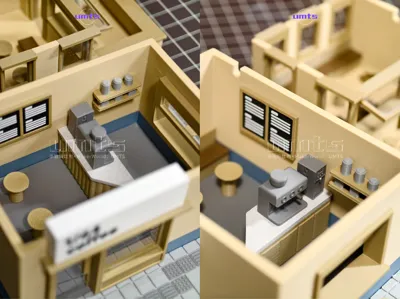
[Main Building Body]
The walls are Print in Place and can be directly slotted into the floor groove, eliminating the hassle of gluing wall seams. However, connections between walls and the ground, and fixing doors and windows, still require gluing
A PDF instruction manual is provided for step-by-step installation
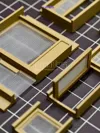
[About Glass]
Effect 1: Frosted glass, as shown in Figure 3, no interior version, simple and quick. You can print glass with separately configured parameters
Effect 2: Transparent glass, as shown in the cover image, with an interior version, rich in detail. Purchase PVC sheets yourself, cut them, and glue them to the door and window frames to reveal the interior furnishings of the building
[Light Selection]
Wire grooves are left at the top of each floor slab, allowing you to route wires as you wish
Here is my experience for your reference only
1, Initially, I used ultra-fine flexible filament, the effect is shown in Figure 3. It was too bright, and with a single light strip, wiring was a bit troublesome, plus a USB cable trailed from the back
2, Ultimately, I chose LED magnetic control lights for the model. They can be controlled individually with magnets, one set for three lights on the first floor and one set for two lights on the second floor. The batteries are glued to the back wall, which is quite convenient
[Purchasing Trees]
I chose sparser and slightly shorter trees, otherwise, the front would be largely obscured
[Preventing Warping]
Warping Terminator Trio
1, Stress relief grooves
2, Draw brim
3, Adhesive spray
This time, stress relief grooves were added to the bottom surface, changed to drawing brim to make the edges smoother, and then applied adhesive spray to completely eliminate warping
[If you are printing with different printing plate and filament types, remember to change the settings before slicing and printing! Otherwise, it will lead to print failure]
Hope everyone has fun
Yihe Road No 3 scene is under construction
TO BE CONTINUE…
Documentation (1)
License
You shall not share, sub-license, sell, rent, host, transfer, or distribute in any way the digital or 3D printed versions of this object, nor any other derivative work of this object in its digital or physical format (including - but not limited to - remixes of this object, and hosting on other digital platforms). The objects may not be used without permission in any way whatsoever in which you charge money, or collect fees.
Comment & Rating (6)