


Print Profile(2)


Description
Overview
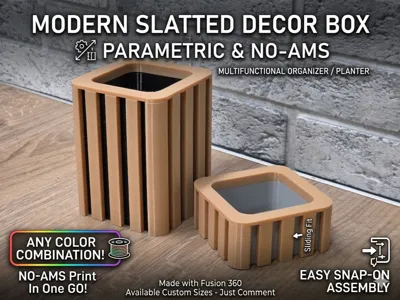
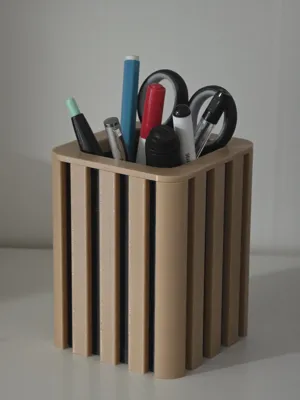
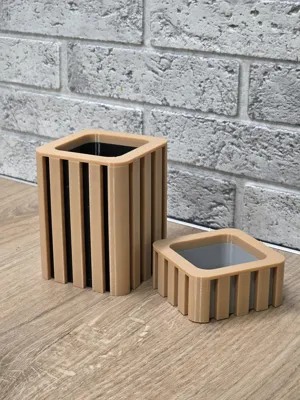
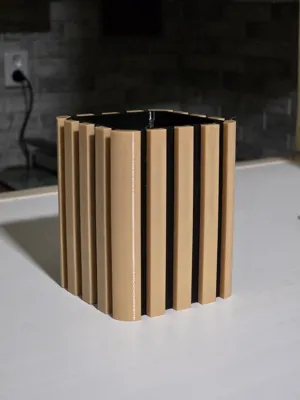
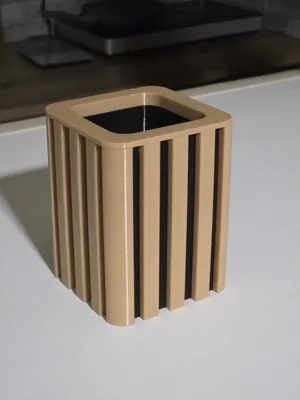
Bring a touch of modern interior design to your desk or home with this Modern Slatted Decor Box. Inspired by the popular wooden wall paneling trend, this multi-purpose container combines aesthetic appeal with a clever functional design. Whether you need a sleek pencil holder, a stylish planter, or a minimalist organizer, this parametric model fits every need.
As seen in 1000030014.jpg, the design features a clean contrast between the inner box and the outer decorative slats.
Key Features
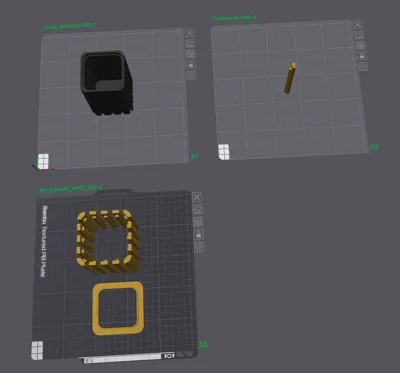
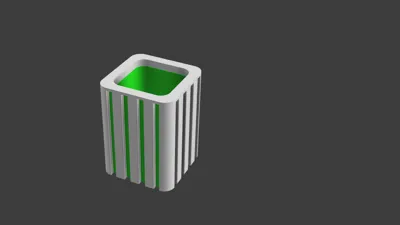
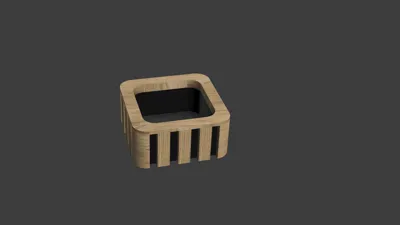
- No AMS Required: Designed for easy printing on any machine. The box and slats are printed on separate plates, allowing for easy color customization without waste.
- Unlimited Color Creativity: You don't need "wood" filament to make this look great! Use your imagination—contrast dark boxes with bright slats, create rainbow patterns, or go for a luxury look with silk filaments.
- Easy Assembly: Features a precise parallelogram sliding joint. Simply slide the panels on and click them into place.
- Parametric Design: The models in the photos (inner dimensions 60x60x100 mm and 60x60x20 mm) are just the start. Since the design is fully parametric, I can provide custom sizes upon request.
- Optional Snap-on Rim: A decorative top rim is included that easily snaps onto the lugs for a finished, premium look.
Print & Material Tips
- Vertical Panel Printing: I recommend printing the panels vertically (standing up). This ensures the front surface is perfectly smooth and free from any textured build plate imprints.
- Pro Tip: Use a brim when printing vertically to ensure stability and prevent the panels from tipping over.
- Surface Texture: For a unique look, try applying Fuzzy Skin to the front face of the panels!
- Waterproofing: If you plan to use the box as a planter or for liquids, I highly recommend using PETG for the base (inner box).
- Print Tuning for Sealing: For a watertight finish, ensure your printer is well-calibrated. It is better to have a slight over-extrusion rather than under-extrusion to ensure perfect layer bonding.
Assembly Recommendations
- Print the Main Box first.
- Test Fit: I highly recommend printing just one panel first to check the tolerances.
- The panel should slide on easily at first and get tighter toward the end to ensure it stays securely in place.
- Troubleshooting Fit:
- Too Loose? Use a drop of glue, or slightly increase your Flow Rate / adjust XY Hole Compensation.
- Too Tight? Slightly decrease Flow Rate or adjust XY Contour Compensation (negative value) to create more clearance.
- Final Step: Slide all panels on and snap the top rim into place.
Show off your creations! I would love to see your color combinations and textures. Please share your makes and photos in the comments!
Need a specific size? Leave a comment with your desired dimensions, and I will upload a custom version for you!
Boost Me (for free)
If you like this model, feel free to leave me a boost.
Thak you very much
Comment & Rating (0)