MeshCore / Meshtastic YAGI Antenna 868MHz (LoRa)


Print Profile(1)
Description
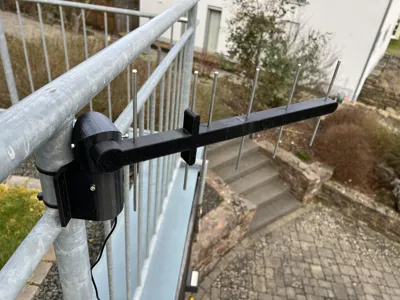
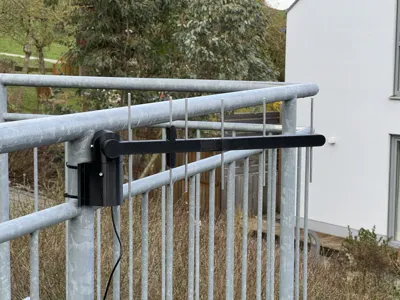
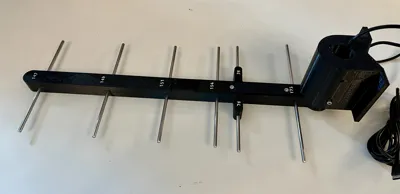
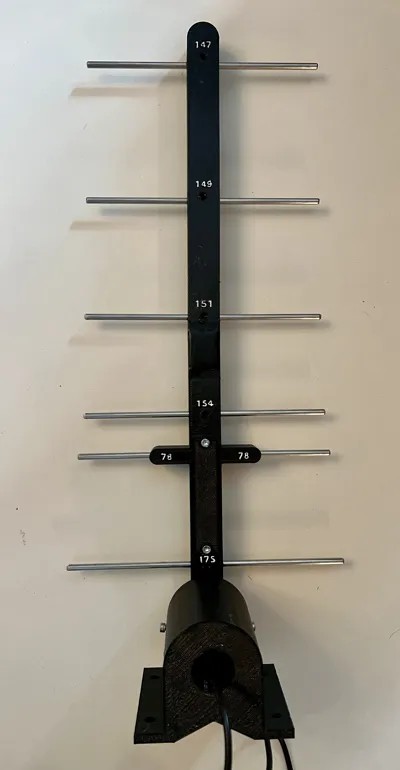
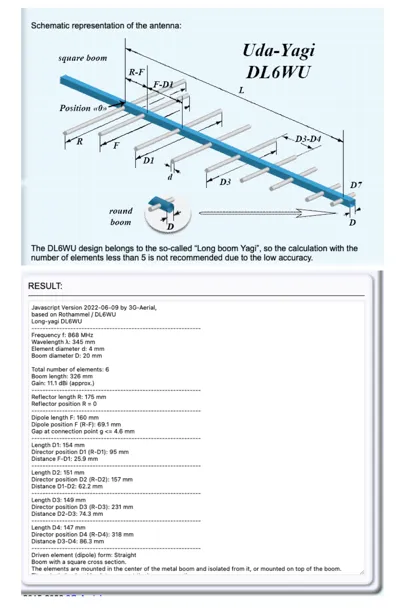
Powerful 6-element Yagi 868MHz for Meshtastic & MeshCore in the proven DL6WU design
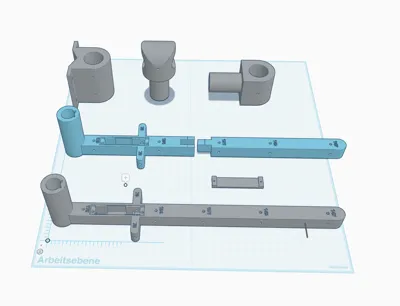
The antenna was developed for maximum range while maintaining a compact design and is based on a 20 mm boom with 4 mm aluminum elements. The theoretically calculated antenna gain is approximately 11.1 dBi
The Highlight
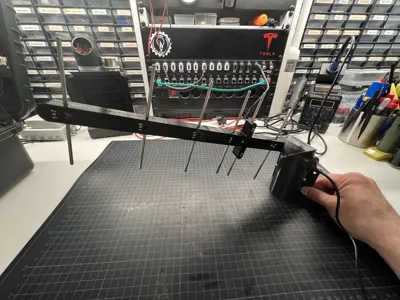
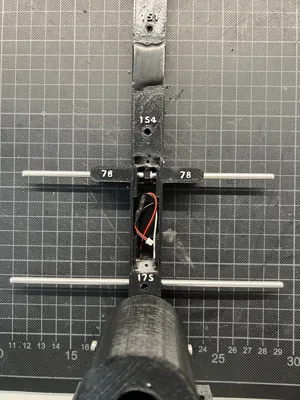
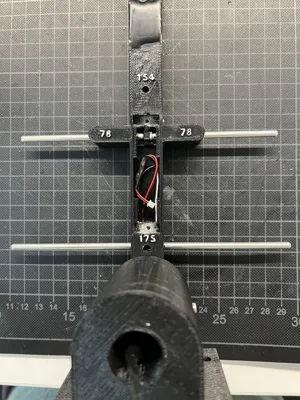
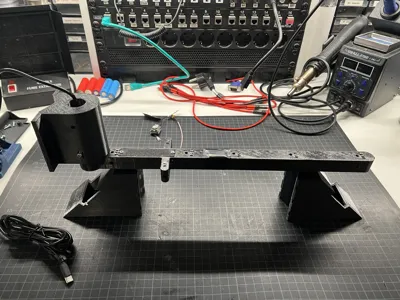
The complete XIAO nRF52840 & Wio-SX1262 Kit or XIAO ESP32S3 & Wio-SX1262 disappears invisibly directly inside the antenna – including an integrated 18650 battery holder (Attention: Modification needed!). In the "all-inclusive" variant, only a USB-C cable is routed outwards for charging. This ensures a particularly clean, portable setup without external enclosures or visible cabling. Alternatively, the electronics can also be installed separately in their own enclosure, allowing the Yagi to be used exclusively as a pure directional antenna
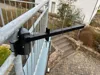
The fully rotatable and swivelable holder allows for precise alignment and makes the antenna ideal for long-range LoRa, portable use, and experimental mesh connections
Note
- DL6WU Yagi-Uda antenna online calculator
- Underlying calculation

Hardware Bill of Materials
- XIAO ESP32S3 & Wio-SX1262 Kit (Seeedstudio) or
- XIAO nRF52840 & Wio-SX1262 Kit (Seeedstudio)
- 18650 LiPo Battery
- 4mm Aluminum Rod
Small parts (cables, screws, ...)
Important Note
If you want to install the Seeed XIAO module directly in the antenna (boom), the modules (or pin headers) must be "shortened" and then rotated by 45 degrees and inserted into the corresponding recess. Apologies to everyone who has already printed the antenna without this important note
- If you use the Seeed XIAO ESP32S3 & Wio-SX1262 Kit, you must remove both pin headers (cut off or desolder)
- If you use the Seeed XIAO nRF52840 & Wio-SX1262 Kit, you must desolder the lower female header (on the Wio-SX1262) and then resolder the XIAO nRF52840


License
You shall not share, sub-license, sell, rent, host, transfer, or distribute in any way the digital or 3D printed versions of this object, nor any other derivative work of this object in its digital or physical format (including, but not limited to, publishing derivative works outside the Makerworld platform or hosting on other digital platforms). The objects may not be used without permission in any way whatsoever in which you charge money or collect fees. Subject to the above restrictions, derivative works may be published only within the Makerworld platform, and all such derivative works must be licensed under the same SDFL‑C license, without modification or additional terms. You may download the digital versions of this object, 3D print it, and display images, videos, or usage demonstrations of 3D printed versions of the object on personal social media platforms or Makerworld official channels, provided that no digital versions of the object are shared or distributed.
Comment & Rating (7)