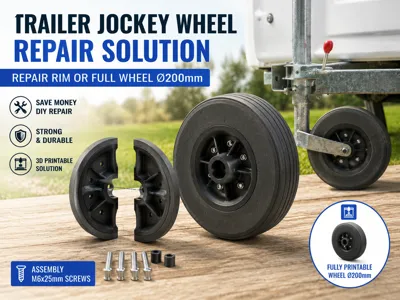
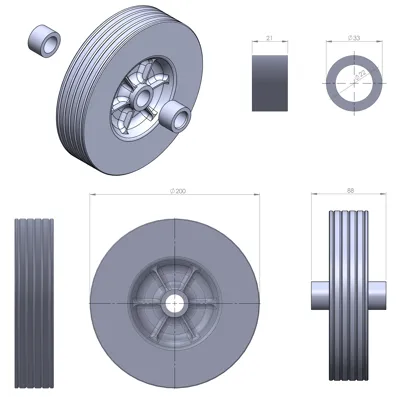
Trailer Jockey Wheel Repair Rim / Full Wheel Ø200


Print Profile(3)

Description
Trailer Jockey Wheel Repair Rim / Full Wheel Ø200
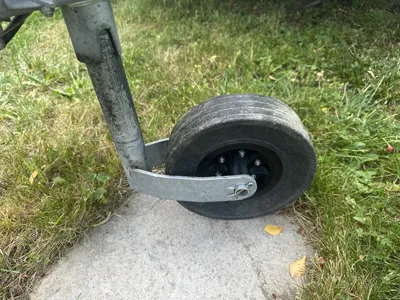
During a road trip through Italy, the jockey wheel on our caravan suddenly broke after hitting the ground while turning with our Adria Aviva trailer.
After checking replacement parts, I found that a new wheel would cost around €38, which felt unnecessarily expensive for such a simple part.
So I designed and printed my own repair solution — and after multiple real-world tests, it works surprisingly well.
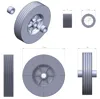
This model includes:
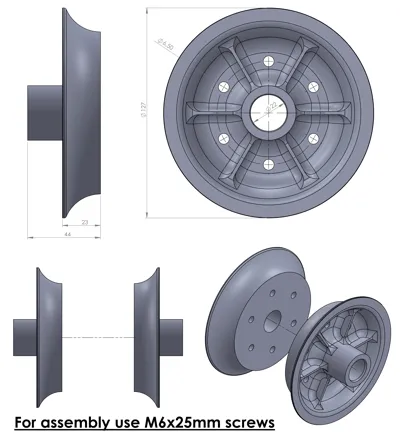
- a repair rim solution using the original rubber tire
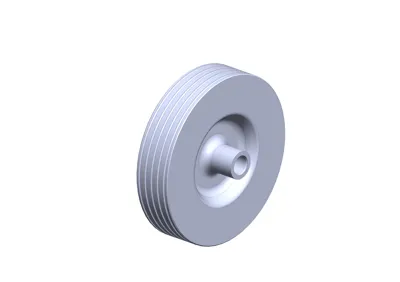
- and a complete Ø200 mm printable wheel for anyone with a fully damaged wheel or missing tire
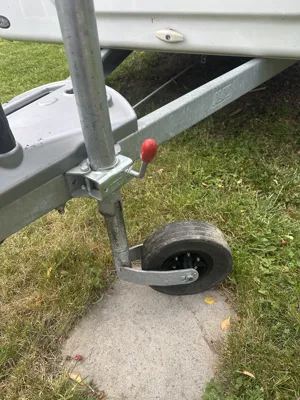
Both versions have already been tested on our trailer and are working great.
🔧 What’s Included
✅ Repair Version
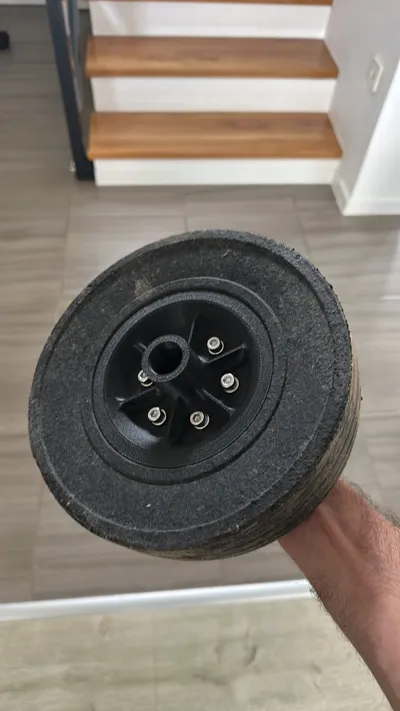
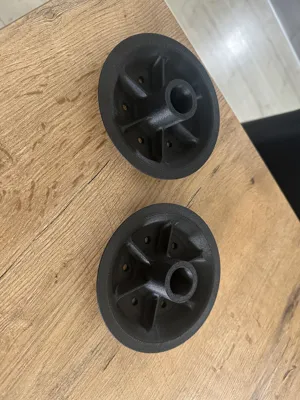
- Reuse the original rubber tire
- Print the rim in two halves
- Assemble both sides together with the tire installed
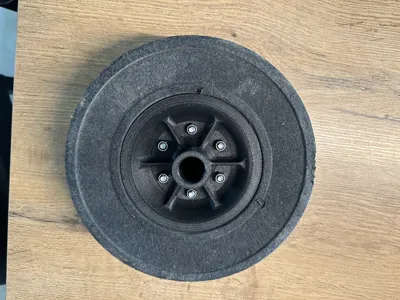
✅ Full Wheel Version
- Complete printable wheel Ø200 mm
- Great if your original wheel is completely broken
- No original rubber needed
🧱 Printing Recommendations
Rim Halves
- Print as provided
- Strong material recommended: PETG / PAHT-CF / ASA
Use sufficient infill for durability

Full Wheel
- Recommended: 8 walls/perimeters
- Increase wall count further if additional strength is needed
- PETG or ASA strongly recommended for outdoor use

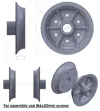
🔩 Assembly
- The rim is designed in two separate halves
- Assemble using:
- M6x25 mm screws
- Insert the original tire between both halves before tightening
⚠️ Important
This is a DIY repair solution designed and tested for practical personal use.
Always inspect printed parts before use and adjust print settings according to your trailer weight and terrain.
💡 Why I Made This
Instead of throwing away the entire wheel and buying a costly replacement, this project makes it possible to repair or recreate the wheel for just a few euros using a 3D printer.
Hopefully this solution helps others facing the same problem!
Boost Me (for free)
🚀 Enjoyed This Model?
If this model helped save your trip, your trailer, or your money, consider giving it a Boost 👍
Boosting helps this project reach more people and supports the creation of more practical real-world repair solutions.
Thank you for your support! 🙌
Documentation (2)

License
You shall not share, sub-license, sell, rent, host, transfer, or distribute in any way the digital or 3D printed versions of this object, nor any other derivative work of this object in its digital or physical format (including - but not limited to - remixes of this object, and hosting on other digital platforms). The objects may not be used without permission in any way whatsoever in which you charge money, or collect fees.
Comment & Rating (0)